Categories
Armoire Woodworking

Finally Some Progress

The story stick ended up being a worthwhile diversion. It’s definitely a technique I’ll use again. I didn’t realize it at the time, but a big advantage of the story stick is that you can make mistakes on IT and still be in a situation to correct them. With it, I was able to layout all 4 posts, 2 sides per post, in about 10 minutes. When I did the original layouts, it took about 30 minutes for matching sides because of all the redundant measurements.

After getting everything marked, I once again laid everything out together for a sanity check. Everything looked good. Finally, time to cut some mortises.

Categories
Armoire Woodworking

The Armoire Continues

I can honestly say that I’m glad I didn’t really get much done in the shop today.

Not that I didn’t try to. I was actually hoping to fit some of the stretchers into their mortises; with an outside shot of doing a little glue up. In the end, all I really got done was trimming the tenons on the stretchers for the front and back, and getting the rails for the sides cut along with their tenons.

I thought I had marked the layout lines on the posts for the mortises. After I had finished the third attempt and realized I had gotten it wrong again, I decided it was time to call it quits. How did I get it wrong 3 times? Because I’d forgotten the details involved that I had so meticulously thought through a week or two ago and I didn’t thoroughly inspect the notes I’d taken at the time.

After the first markup, I realized I’d forgotten to account for the shoulder cuts. Having remarked everything for the second time, I then forgot to allow 1/4 inch for spacing around the drawer. So I marked it up a third time. When I finished, the last tenon was too close to the end of the post; I knew I had left a margin for error. Finally, I went back to my notes. I figured out that instead of starting the layout at 4″ from the bottom of the post, I should have started 3″ from the bottom of the post.

Man, was I glad I hadn’t cut any mortises like I’d considered doing. Next time, I’ll make a story stick when I’ve worked out those details for a non-trivial layout.

Categories
Woodworking

Props to Rikon

I just wanted to give credit where its due. I have a 14″ bandsaw from Rikon, the 10-325 model. I think highly of the saw, for what that’s worth. My problem is the lower guide bearings had frozen up and are heating up the blade. I was thinking of replacing them with guide blocks instead so I contacted Rikon’s tech support to see what they recommended.

The gentleman’s name I spoke with is Rod. He convinced me that the guide blocks probably aren’t the way to go because of heat build-up, though he did say the the Coolblocks might be a possibility if that’s what I wanted to do. In addition, he’s sending me a complete set of replacement bearings, for free. It sounds like they were aware of the potential for problems and that these newer bearings should be an improvement. We’ll see.

Rod was friendly, knowledgable and left me a happy customer. If he is representative of their support, then I’d say this is one more reason to go with Rikon products, certainly the 10-325.

Well done, sir.

Categories
Woodworking

Tool Review- Tite-Mark Marking Gauge

The Wife recently gifted me with a Tite-Mark marking gauge from Glen-Drake Tools. Mainly, I was looking for such a tool to help me with laying out dovetails on drawers. After getting a chance to look over the Tite-Mark documentation, I realized that the uses for a marking gauge were much greater than I had previously thought. With that in mind, I knew that the armoire project would proved a good testing ground for it’s all-round usefulness. Is it a uni-tasker, or is it truly as universally useful as claimed?

Categories
Armoire Woodworking

The Armoire Begins

wood

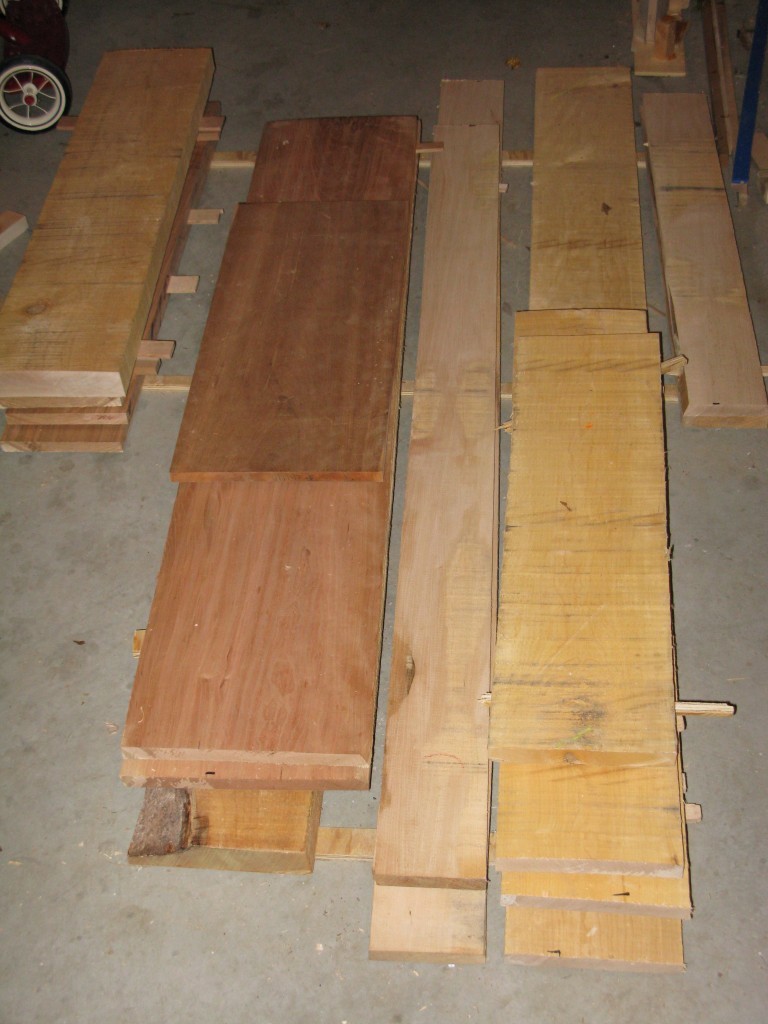
Believe it or not, that pile of wood is going to be an armoire. Well, that’s not completely correct- I actually need to get more before all is said and done. Mainly the cherry. Hopefully I won’t need anymore maple. I’ll need some plywood as well so I can close up the back.

But still, can you see it? Those pieces of cherry on the left are the 3 drawer fronts. The wider maple boards on the right are the drawer boxes. The 8/4 maple will be the posts. The 12″ wide pieces of cherry will be the panels for the sides of the armoire. The narrower pieces of maple are the stretchers between the drawers and rails on the sides.

The details are what always get me in these projects. The bigger the project, the more important the details. Typically I draw complete plans prior to buying the wood. That way I have an idea of what width boards I need as well as what lengths I can cut them to so that I can get them into a vehicle. (Most boards that are roughcut are 10’+ in length. They’ll let you cut them, but you have to buy the whole board.) I’ve already been bitten by details in this project. Since I didn’t know the details regarding lengths, some of the boards that are cut are an inch or two short.

Of course, I had my reasons for doing it this way. Having plans is no guarantee against mistakes either. At least, not for me. Many of my plans that I’ve done have had flaws in them for one reason or another. Those flaws don’t become apparent until I get to a point in the project where they do become apparent.

In this particular case, I saw the cherry board and new it was the drawer fronts for the armoire. I wanted to maximize the usage of the boards but I couldn’t tell for sure what the dimensions would end up being. Thus, I had to guess at lengths for the maple, but I was a little off. In particular, I didn’t allow extra length for the tenons on the ends of the wood that is to become the stretcher. Bummer. Still, I should be able to make it work.

At this point, I’ve got the drawer fronts sized and I’ve cut the four posts for the lower portion of the armoire. I’m making it as an upper cabinet portion and a lower dresser. The top of the dresser will serve as the bottom for the cabinet. I’ll pin the front posts of the cabinet into the top of the dresser for alignment, but this will allow the dresser top to move without stressing the cabinet. I don’t have all the details figured out For instance, I’m still trying to decide if the door frames will be maple or cherry. I’m leaning towards cherry, thus making them all cherry doors, but I’m not completely decided. Also, the top of the cabinet is a bit murky. Will I mill some cornice? or put some kind of crown up there? The biggest question mark is the interior of the cabinet. I want to put more than just some shelves in there. But I’m not sure of anything beyond that.

There’s plenty more to come on this project. I’m looking forward to it.

Categories
Woodworking

Desktop Letter Drawer

Credit where it’s due- I got the idea for this from here.

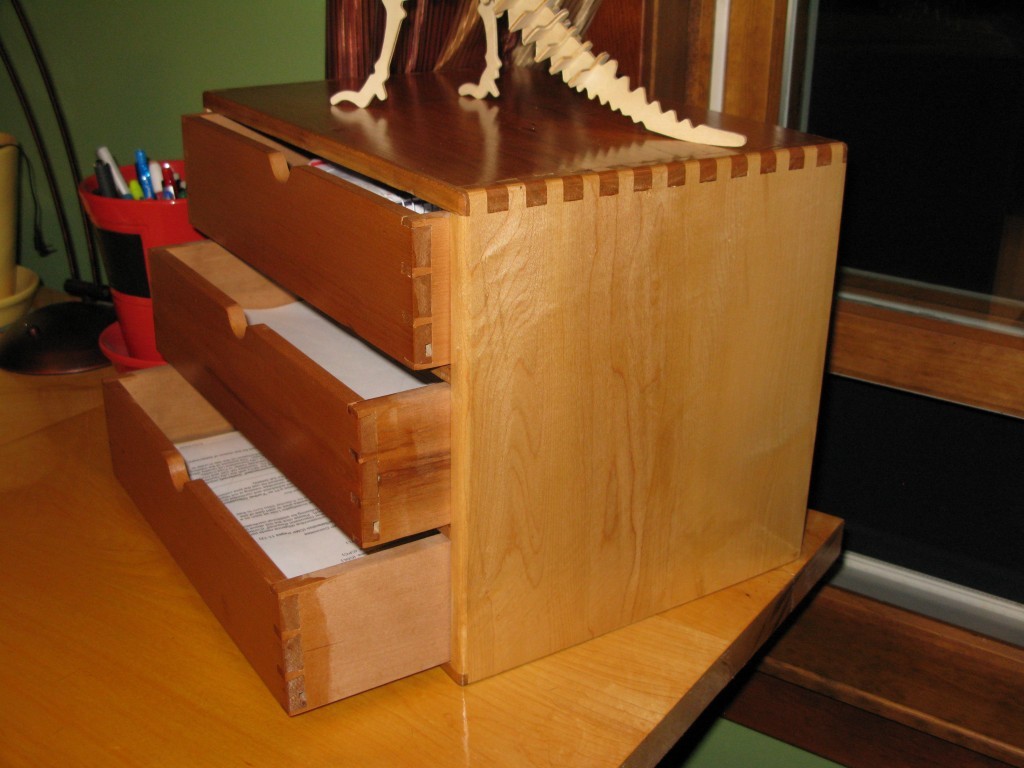
img_1623

It’s overall size is (roughly) 14″W x 11″H x 10″D.  It’s almost entirely cherry, the two sides are maple, and the drawer bottoms are maple as well.  I used left over material from a variety of other projects I’ve done.  There are no glue-ups, all boards were chosen based on their being large enough to work without glueups.  Truth be told, I originally wanted to do the whole thing out of cherry, but I didn’t have enough stock that was wide enough to do the 2 sides and the top, so I opted to make the 2 sides out of maple.  The bottom is not solid- it consists of a front and rear stretcher piece and then 2 drawer runners, basically identical to the construction used to make the other drawer slots.

Categories
Woodworking

Letter Drawer Finished

The last coat of tung oil has been applied to the little letter drawer I was working on, which means the project is completed.  I’ll try to get a picture and accompanying post about it up soon.

Categories
Woodworking

AAAAAAAAAHHHHHHHHHHH! !@#$%^&

I will not chisel toward my fingers.  I will not chisel toward my fingers.

Categories
Woodworking

Dovetails

Every burgeoning woodworker learns about the dovetail at some point.  It is a joinery technique that is held in high regard- foremost because it is so effective.  Dovetailed drawers and boxes that are hundreds of years old, having long since passed the point where any glue would still be effective, hold because of this unique piece of joinery.  Dovetails are also held in high regard as a sign of skilled craftsmanship.

Categories
Woodworking

A Bookshelf

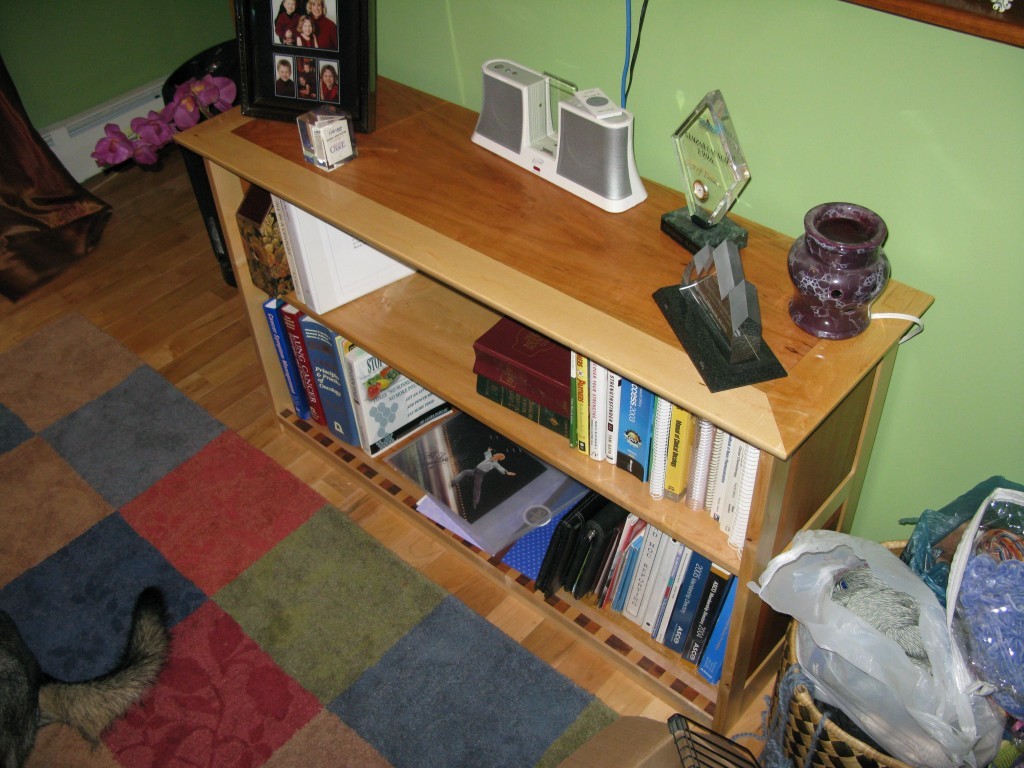
img_1362

Now a post on something a little more interesting….

This is the bookshelf I just made for my wife’s home office.  It’s not particularly large and was definitely made for the space in which it resides.  The dimensions are 48″ long (the top) x 30″ high x 15″ deep(the top).  The dimensions of the case portion of the shelf are 14″ deep by about 44″ long.  It is made entirely of maple and cherry and finished with tung oil.   Actually, that’s not technically true- there is also some black walnut.  The top is aligned on the back with the case, but overhangs the case on both sides and the front.  Also, you can’t tell from the picture, but I rounded over the bottom half of the top to create an undercut.  This helps to obscure the fact that the top is pretty beefy- 7/8″ finished.