Credit where it’s due- I got the idea for this from here.

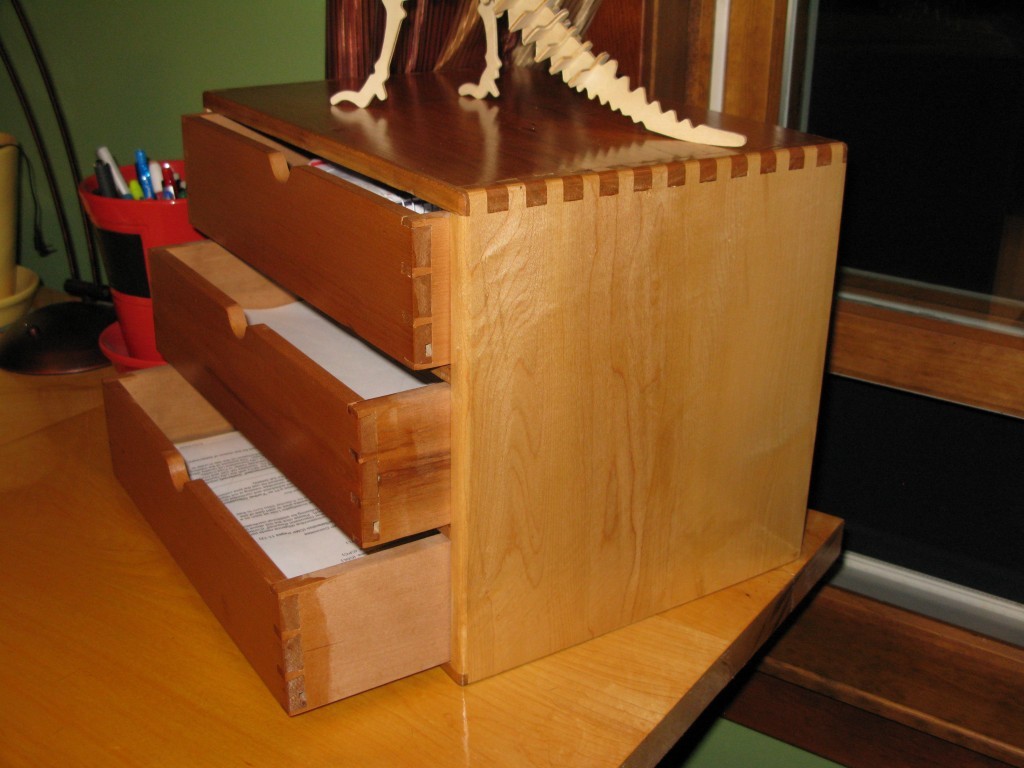
It’s overall size is (roughly) 14″W x 11″H x 10″D. It’s almost entirely cherry, the two sides are maple, and the drawer bottoms are maple as well. I used left over material from a variety of other projects I’ve done. There are no glue-ups, all boards were chosen based on their being large enough to work without glueups. Truth be told, I originally wanted to do the whole thing out of cherry, but I didn’t have enough stock that was wide enough to do the 2 sides and the top, so I opted to make the 2 sides out of maple. The bottom is not solid- it consists of a front and rear stretcher piece and then 2 drawer runners, basically identical to the construction used to make the other drawer slots.
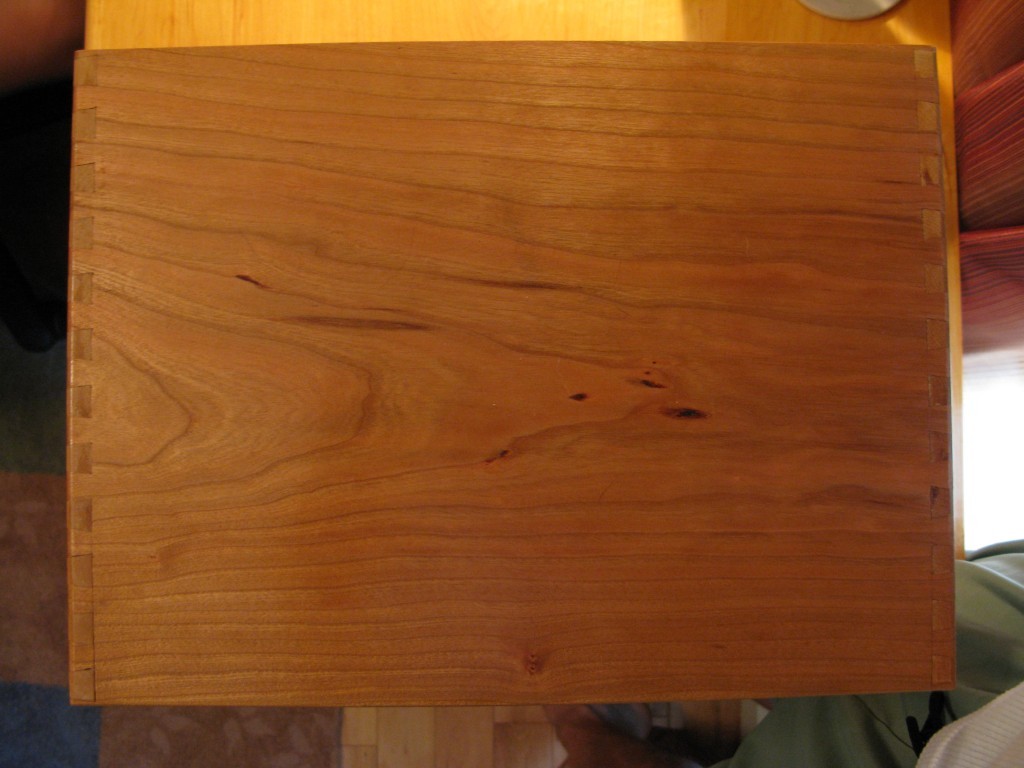
The big highlight of this piece is the dovetailing used to join the top to the sides. Those are all handcut and by far my best effort at hand-cut dovetails. There are just a couple of very minor slip-ups where the tails are a little small for the pins they mate to. However, they are not visible in the picture and just based on a glance not very noticable at all. I detailed how I managed to attain these results in this post.

The drawer dovetailing is not of the same quality, save for the middle drawer which, not coincidentally, was also the last drawer I built. That was the drawer where I finally figured out a solid dovetailing technique. After cleaning up the other drawers, they were not as bad as my initial evaluation led me to believe, yet they are still clearly inferior to the results obtained on the third drawer.
Each drawer is made from a single piece of stock that I resawed in an attempt to get the grain to look like it goes all the way around the drawer. Unfortunately, this didn’t really work like I’d hoped. The dovetail joinery makes it difficult to pick up on the grain as the eye follows from one side to the next. Considering the amount of effort involved in this technique, I’ll definitely give some thought before doing it again. Of course, the resawing portion did save me on overall stock used, so the approach is not entirely without practical merit.
Probably the most disappointing aspect of the design is the construction results of the drawer dividers/ supports. I merely dadoed the case sides at the appropriate points(a through-dado on the bottom, 2 stop dadoes for the other drawer dividers), then glued front and rear stretchers along with two runners that fit between the stretchers. The runners are a little thicker than the stretchers so that the drawers are vertically centered in their respective opening when fully inserted. The mistake here was not using some sort of tongue/groove construction to attach the stretchers to the runners. I just butted them together and relied on the glue. Unfortunately, the pieces moved as the glue set and consequently are not well registered with one another. I was trying not to get bogged down in details for such a simple piece, so I intentionally avoided the extra millwork involved with tongue and groove. Now that I see the results of the “simple” approach, I realize I should have taken the extra time for tongue and groove. Luckily, this isn’t something that would be obvious to anyone other than a fellow woodworker.
The finger inserts in the drawers fronts were sanded in place using a spindle sander in my drill press. I simply marked the middle of the drawer front, and then carefully set the drawer against the sanding drum. It took several minutes per drawer, but the results were consistent and clean.
I used Formby’s Tung Oil finish- which I’m not entirely sure is actual Tung Oil. Nevertheless, it provided a nice finish. The only gotcha is that I had to put on about 6 or 7 coats to build up a nice finish. So it had to be done over the course of several days. The maple, in particular, finished up very nicely. Hopefully the cherry top patinates to provide a nice contrast with the maple sides so that the tails really pop visually. The maple endgrain is definitely darker than the face grain- so the contrast with the cherry is muted for the time being.
Other details- I used my low-angle block plane to pseudo-round over all the sharp corners. Even the dovetailed top corner. The back is dadoed into place with a pair of 1/8″ pieces of cherry. I nailed them into place in addition to gluing. The drawers are made of 3/8″ cherry, with a 1/4″ maple bottom. The case (top, sides) is made from 1/2″ cherry and maple while the stretchers and runners are roughly 5/16″ or thinner. The pieces are all relatively this because anything thicker and it would have looked funny based on the overall size of the drawer set, IMHO. This project is the smallest one I’ve worked on and it was a lot of fun. I’ll have to see if there are other little projects in this vain that I can work on for the future.
Also, I never did draw up a set of plans. The drawers were built first and were sized to accomodate 8 1/2″ x 11″ paper. I just guessed at a reasonable depth, which ended up being 3″. The case was built to accomodate the drawers. This wasn’t a bad approach- but was a little tricky since I couldn’t very well adjust the drawers if I made a mistake with the case dimensions. All in all, a very satisfying project.
One reply on “Desktop Letter Drawer”
Too bad you also didn’t take a picture of the T-Rex.