Every burgeoning woodworker learns about the dovetail at some point. It is a joinery technique that is held in high regard- foremost because it is so effective. Dovetailed drawers and boxes that are hundreds of years old, having long since passed the point where any glue would still be effective, hold because of this unique piece of joinery. Dovetails are also held in high regard as a sign of skilled craftsmanship.
So with that introduction, I’d like to present my latest attempt at handcut dovetailing:
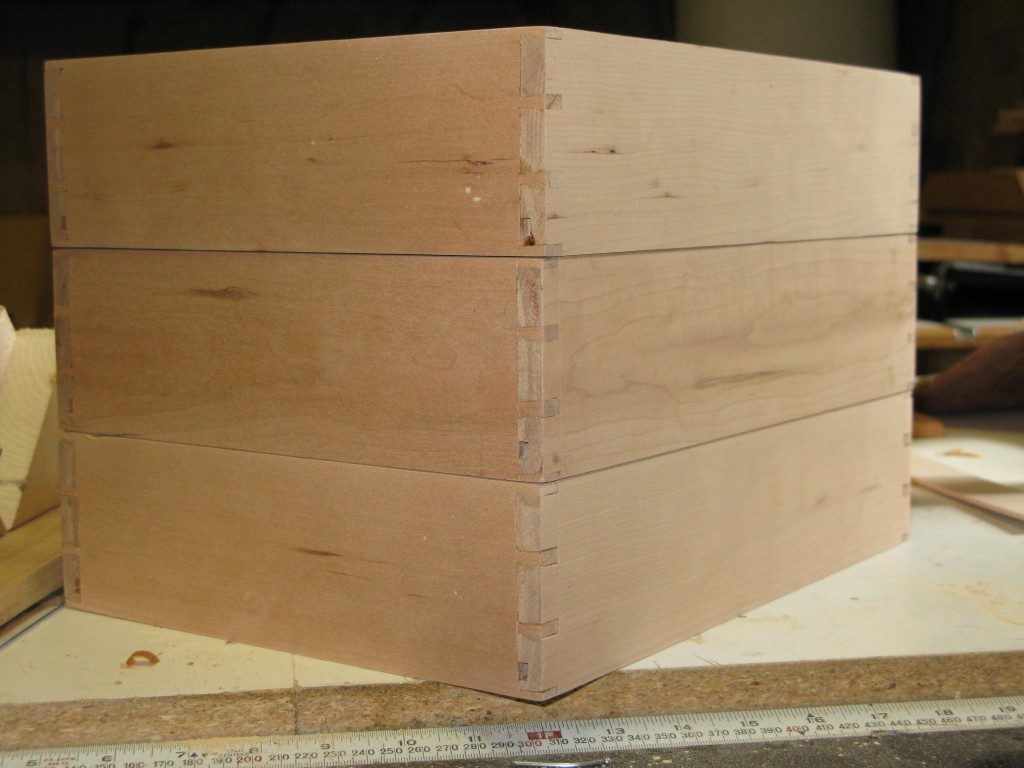
These drawers are being made for desktop paper clutter. The height of each drawer is 3″, with inner dimensions of 9″x12″. The stock was supposed to be 1/2″, but it’s closer to 3/8″. Either way, since they’ll be holding paper, the inner dimension of the drawer is what’s important.
Not all the drawers look as good, but the last one in particular came out VERY well. Since I started doing the hand cut thing for dovetails, I’ve been trying to find the right combination of tools, process and technique. Not to mention develop the requisite skill with the tools required. With this last attempt, I think I might finally have figured it out.
So here’s the deal, after doing the layout for the tails, I did the sawing portion, keeping close to the layout lines, but not cutting on the lines themselves. While sawing, I’ve determined 2 things: first, when starting the cut don’t let the full weight of the saw rest on the wood; second, after getting into the cut- relax my hand and wrist and let the saw track the layout line. The first point prevents the saw from catching on the wood and allows for a smoother entry cut into the wood. Once the cut is started, the full weight of the saw is all that is needed to complete the cut. Once the cut has been started, it is important to allow the saw to track to prevent it from binding while performing the cut. Relaxing the hand and wrist makes a big difference in allowing the saw to follow its cut. When I start trying to adjust the track of the saw in the middle of the cut the saw typically binds on the sides, as opposed to catching on the teeth.
After that, I use a coping saw to remove the material between the tails, once again, cut close to the layout line. Oh, BTW, did I mention that I used my PorterCable dovetail jig to hold the wood in place for all of this? Worked fantastic, which shouldn’t be surprising- that’s what it was made for after all.
Anyway, here was the breakthrough. Using a mallet, I chiseled out the sides of the tail while the piece was still in the jig. This allowed me to keep the tails nice and square and at the same time, finish cut the dovetail angle. I just set the chisel into the layout line on the endgrain then, using the mallet, slowly worked the chisel down along the layout line on the side.
I repeated the above process of cut, cope, chisel with the tails on the other side. Then I took the piece out of the jig and cleaned out the waste along the bottom layout line. To help with this, I used my 1/8″ bevel edge chisel to get into the corner of the dovetail, an then chiseled out the middle to make using a wider chisel easier. Once again, the mallet was essential for this part.
Once the tails were done, I used them to layout the pins. Then, I cut the inside of the pins- but I didn’t try to cut super close to the layout lines in this case. After matching up the corresponding tail board to double check the layout lines, I chiseled out the rest accordingly. One extra step I took that made the chiseling easier was to make a third cut down the middle of the pin waste. The extra cut made it easier to remove the waste from the initial cuts by allowing the wood to collapse as the chisel goes through the wood.
A few miscellaneous notes about the whole thing. For the layout, I marked both sides of the wood for the line that marks the depth. I also marked the wood for both sides of the pins, but only one side for the tails. I don’t have a marking guage, but I think one will make a difference for marking the depth line. A wider bevel edge chisel would be nice for cleaning out the waste at the bottom of the tails.
The last thing, which I mention separately because I think it is uniquely important, is I’ve developed patience for the process. I noted several times during the process where I noted to myself to slow down and not rush things. This is important because at points it feels like- maybe I could chisel a little larger chunk to speed the process, or cut a little more aggressively with the saw to speed things up. The finished product definitely benefits from a healthy dose of patience.