The story stick ended up being a worthwhile diversion. It’s definitely a technique I’ll use again. I didn’t realize it at the time, but a big advantage of the story stick is that you can make mistakes on IT and still be in a situation to correct them. With it, I was able to layout all 4 posts, 2 sides per post, in about 10 minutes. When I did the original layouts, it took about 30 minutes for matching sides because of all the redundant measurements.
After getting everything marked, I once again laid everything out together for a sanity check. Everything looked good. Finally, time to cut some mortises.
How to do it was the question. The posts are maple, so they’re heavy and they’re hard to drill in, especially for a Forstner bit. Additionally, the posts are about 3 feet long with mortises near the end. That’s difficult to hold on a small drill press table. Lastly, the mortises are going to end up a little shy of 5/8″. Meaning the oddball size would necessitate a lot of hand chiseling to get the size close. Yes, I could trim the tenons to a more common dimension but with the size of the piece I want as much beef there as I can get. No trimming the tenons and no drill press.
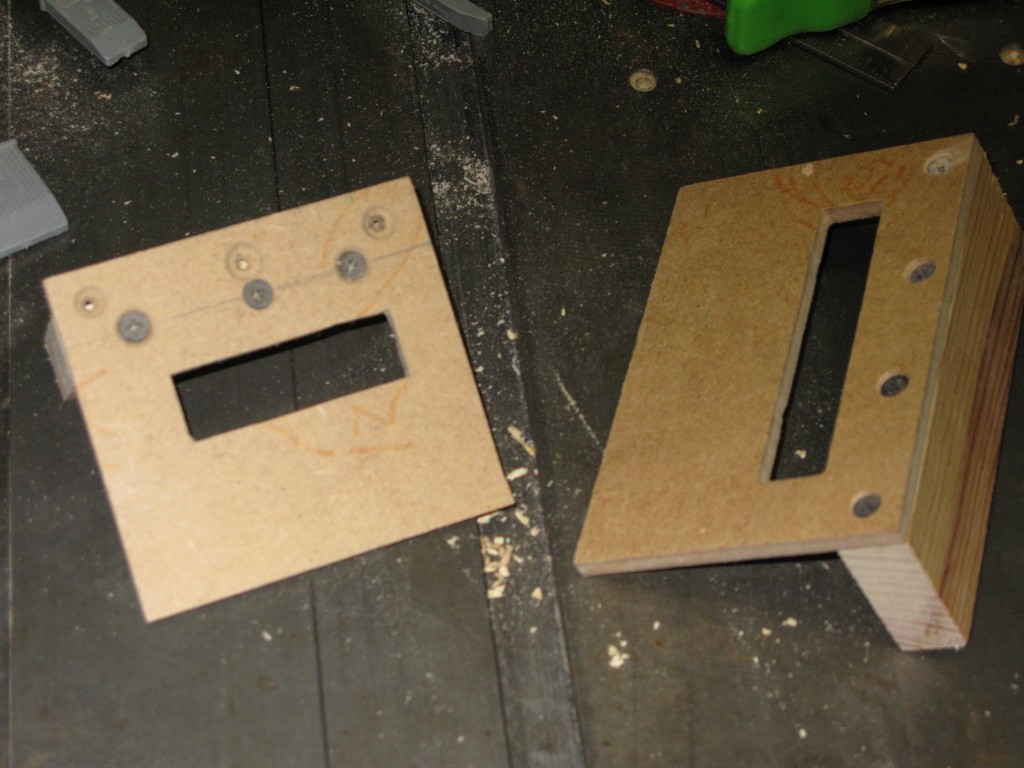
The obvious choice is a benchtop mortiser- if I had one that is. So the next obvious choice is a router. Ahh, but on the router table, or hand-rout it? After a little deliberation, I opted for hand routing using a template/jig that I clamped to the post. Using a router table you can’t see the cut being made and it’s easy to over shoot the mark. Mistakes can happen with with jigs as well but I figured the right jig could minimize the opportunities. Below is a picture of the jig I came up with. I had 3 different sized mortises to cut so I made 3 jigs.

I attached a 5/8″ collet to the router base and used a 1/2″ straight cutting bit. The mortise needs to be 1 1/4″ deep so the bit is 1 1/2″ long. I sized the cutout in the template to account for the size of the collet- basically the cutout is 1/16″ bigger on each side of the cut(1/8″ total for length and width). In the future, I’ll go a little less than a 1/16″ on each side so I have a little more margin for error. The fence serves 2 purposes: one, it registers the location of the mortise from a side of the post; two, it provides a good clamping surface.
Setup and using the jig was simple. I just aligned the cutout over the mortise, clamped it into position, then clamped the post to the workbench. Ideally, I’d use a plunge router. I didn’t have a plunge base so in this case, I drilled a 1/2″ starter hole with a Forstner bit and then started the router from there.
The downside to the approach is I had to make multiple passes; each one a little deeper than the previous. In between passes I had to clean out the mortise. All in all, this wasn’t the best approach but I’m sure it was superior to using the drill press. The jig and template worked out well at any rate.
So now I’ve got 2 of the 4 posts routed. In doing so, I realized that I couldn’t assemble the piece the way I had intended. I’ll have to glue up and assemble the sides first, and then join the sides using the front a rear stretchers. Because of the width of the armoire, my initial thinking was it would be better to build the front and back first and then join them by building up the sides. The problem is the panels. It would be too clumsy trying to get the panels in place with the wide front and back assemblies.
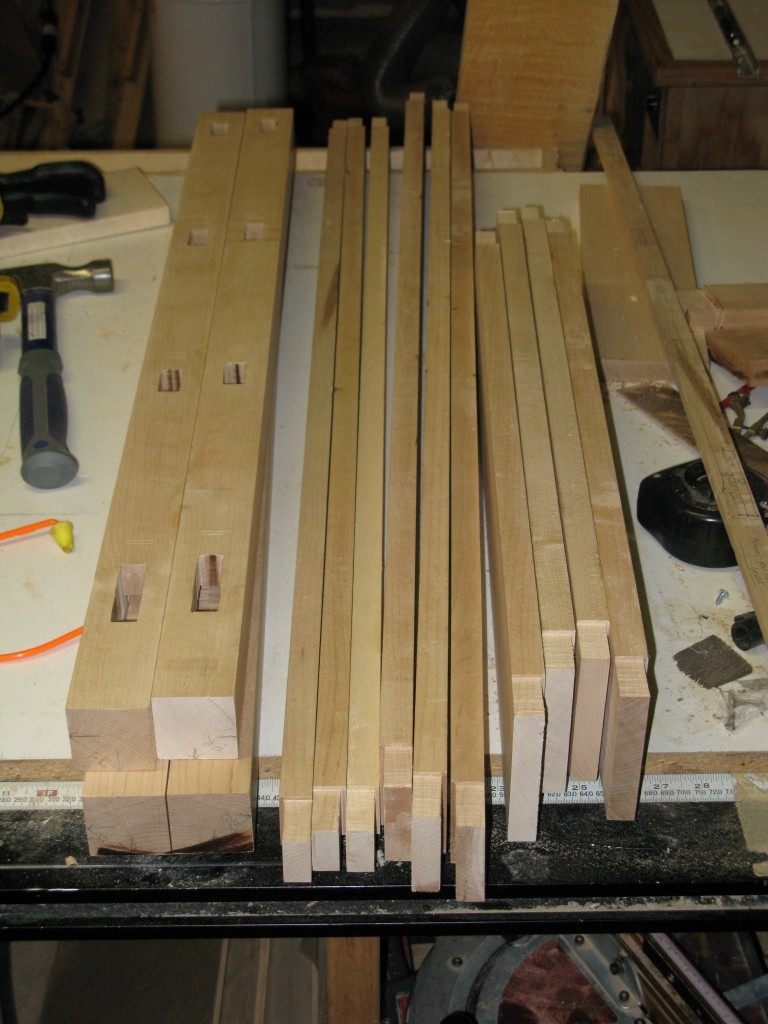
Here’s a shot of the work done so far. The four posts as well as the stretchers for the front, back and sides are all pictured. It took me a couple of hours to do the 8 mortises on the posts as pictured. That includes a little chisel cleanup around all the mortises as well.
