Now a post on something a little more interesting….
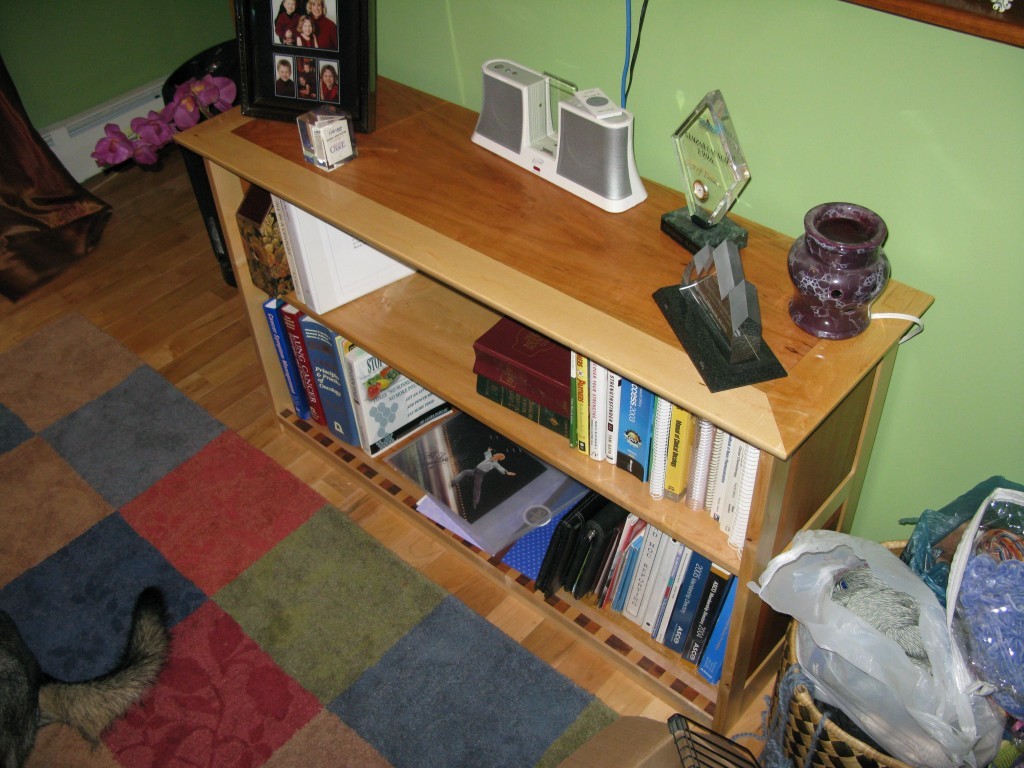
This is the bookshelf I just made for my wife’s home office. It’s not particularly large and was definitely made for the space in which it resides. The dimensions are 48″ long (the top) x 30″ high x 15″ deep(the top). The dimensions of the case portion of the shelf are 14″ deep by about 44″ long. It is made entirely of maple and cherry and finished with tung oil. Actually, that’s not technically true- there is also some black walnut. The top is aligned on the back with the case, but overhangs the case on both sides and the front. Also, you can’t tell from the picture, but I rounded over the bottom half of the top to create an undercut. This helps to obscure the fact that the top is pretty beefy- 7/8″ finished.
The shelf is only 10″ wides, so it’s centered in the middle of the 14″ sides. After conferring with the wife about the shelf, I decided that it did not need to be adjustable, which meant using dadoes in the sides of the case to support the shelf. However, I wasn’t keen on being able to see the dado, so after a little consideration I decided to use mortise and tenon construction to hold the shelf in place. In essence the ends of the shelf became tenons with a cheek cut along the top and bottom so that the mortise would be concealed. Another detail here is the tenon of the shelf is narrower than the mortise in the side to allow for shelf expansion and contraction.
Securing the top to the case was straight forward. The width of the case was such that the sides aligned with the maple border that I put on the top. Since the border is mitred into place around the piece of cherry, I didn’t have to worry about movement of the top with regards to the sides, so I used stop dadoes on the bottom of the top that aligned perfectly with the sides of the case. I did add two “pegs” to the top of each of the sides and cut corresponding mortises into the dadoes in the top to further help hold everything together.
A further note about the top- the maple border is mitred at the two front corners. I then attached the border to the piece of cherry using biscuits across the front edge. Since the grain of the cherry at it’s short edges is perpendicular to the grain of the maple border, I opted to slot the sides of the cherry and then place biscuits at the front and back of the border that ride in the slot. This technique allows for the cherry piece to move without stressing the joinery along the front edge, but still offers support between the cherry and maple so that the long front edge doesn’t become a “hinge.”
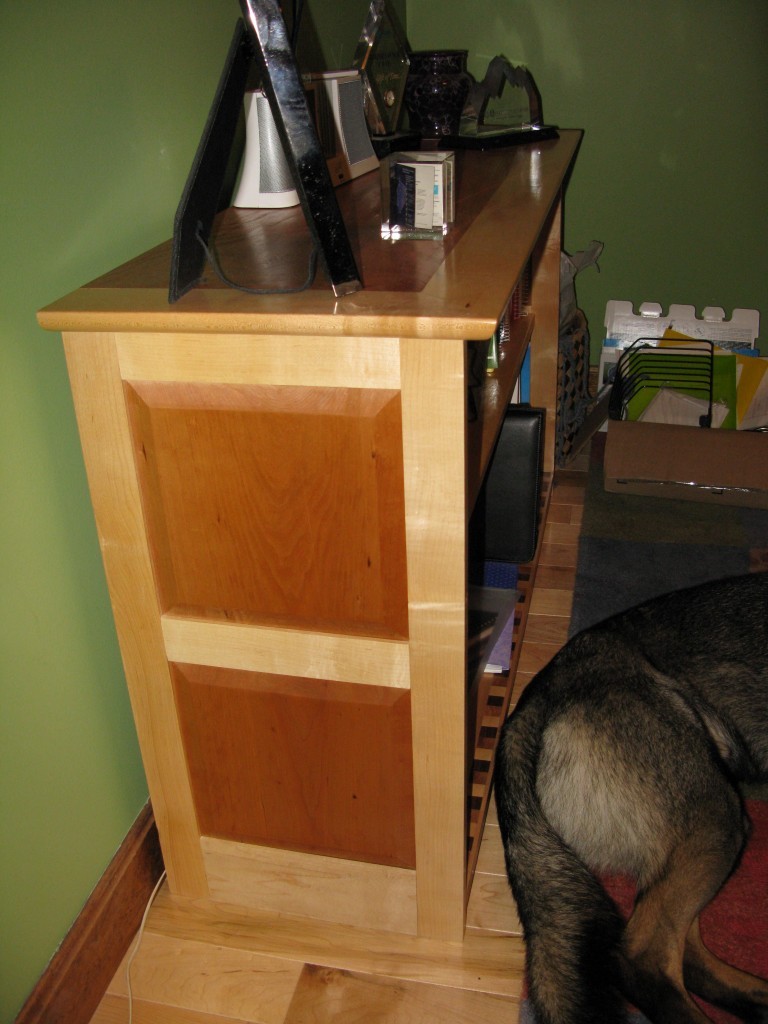
Since the sides are wide, I used the old floating-panel construction to make them. The rails and stiles are all 2″, except for the bottom rail which is about 4″. When I originally designed the piece, I was going to put a base molding on it, so I made the bottom rails wider to accomodate a 2″ molding on them but still maintain the appearance of 2″ rails.
After I got it assembled and looked at it, I liked the simplicity of the piece without the molding, so I scrapped that idea. The extra width for the bottom rails still worked to my advantage anyway because the bottom shelf fits into a dado on the inside of the case sides that runs through the rail. If the bottom rail had only been 2″, there would not have been enough space at the bottom to put the shelf in place and have it look right on the inside portion of the finished case. The shelf would have been sitting on the floor, or the shelf would have been crossing the floating panel, where as the middle and top shelves would not be doing anything like this. If this sounds confusing, then lets leave it at “It would have looked funny.”
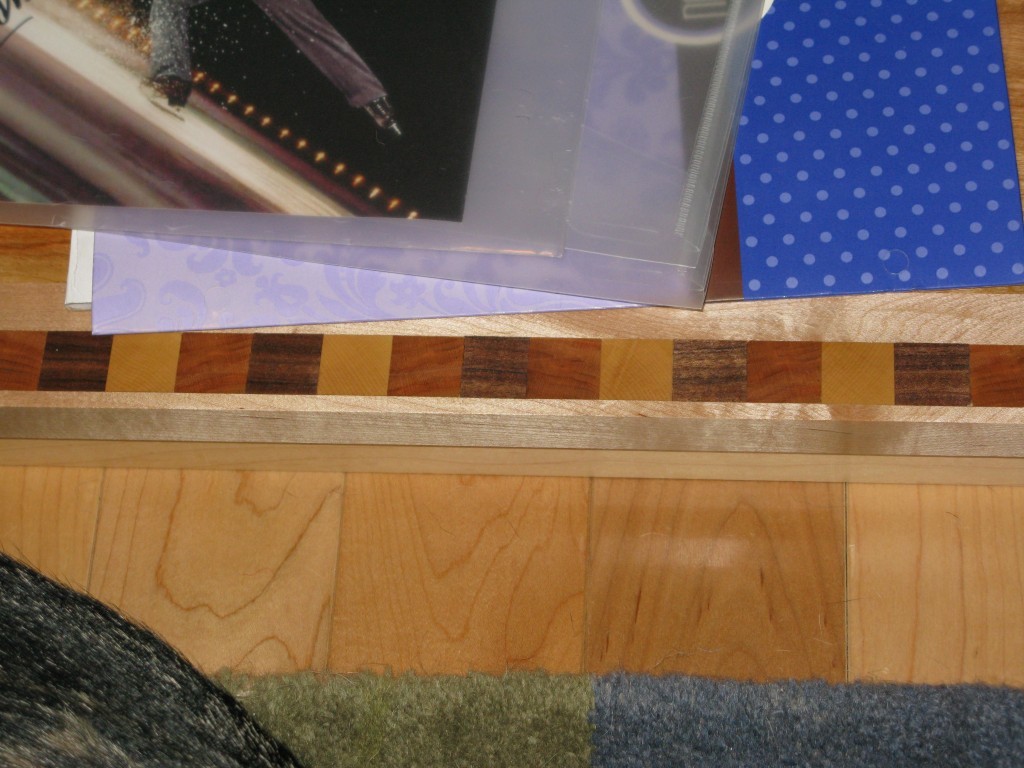
The last element of the piece I wanted to comment on is the inlay, pictured above. I wish I could claim that this was part of the original design, but I can’t. It’s actually there to cover a pretty grievous ‘oops.’ There’s a dado on the bottom of the bottom shelf that aligns the base piece and helps hold everything together. Unfortunately, when I initially went to cut the dado, I got distracted by some cleanup and put the dado on the wrong side!
When I dadoed the wrong side, I didn’t want to just use the other side because it didn’t look as nice. The grain and color was not as visually appealing and the bottom also had some imperfections that I wanted to hide. I didn’t have any more maple to attach to the bottom, so cutting it off and redoing it was not appealing. So after stepping away from the whole thing for awhile, my wife took a look at suggested inlay as a possible solution. I came up with the simple pattern of alternating the maple, cherry and walnut squares above as a result.
Everything considered, I’m very pleased with the results. The mistake that resulted in the inlay worked out in the end- although I don’t think I should count on that as a way out in all cases. I should have taken the care to make sure I was cutting the correct side. This sort of thing continues to be an issue for me, but I am getting better at avoiding this sort of mistake, so at least progress continues to be made.
UPDATE 8/24/09: I’ve modified the pictures to use a higher resolution, and therefore larger, version.