I’m not much of a photographer, but I think these will do.
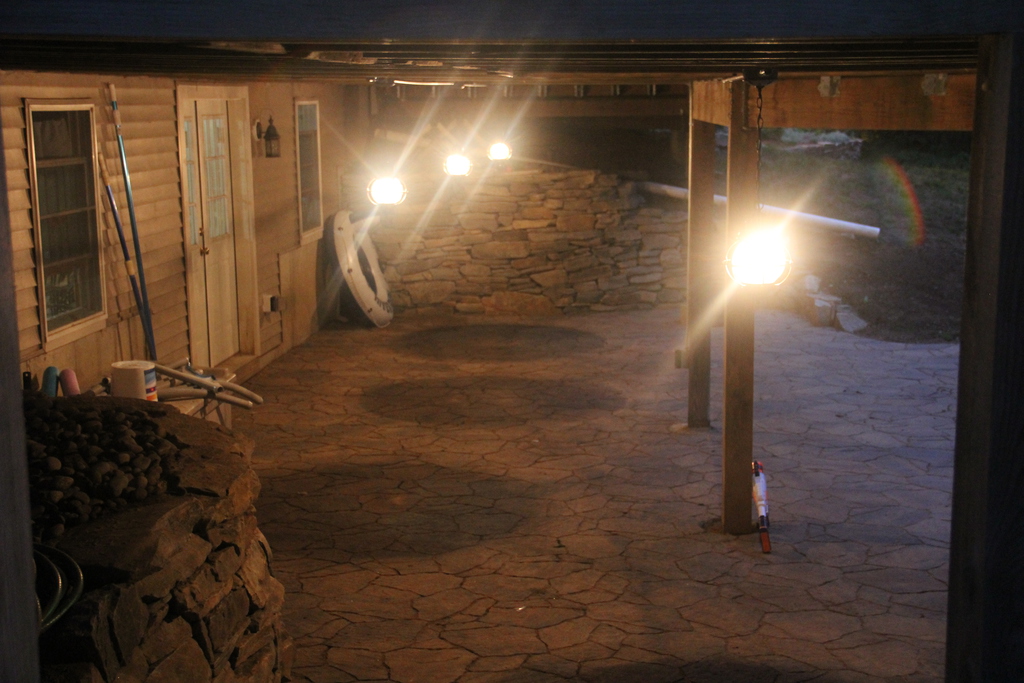
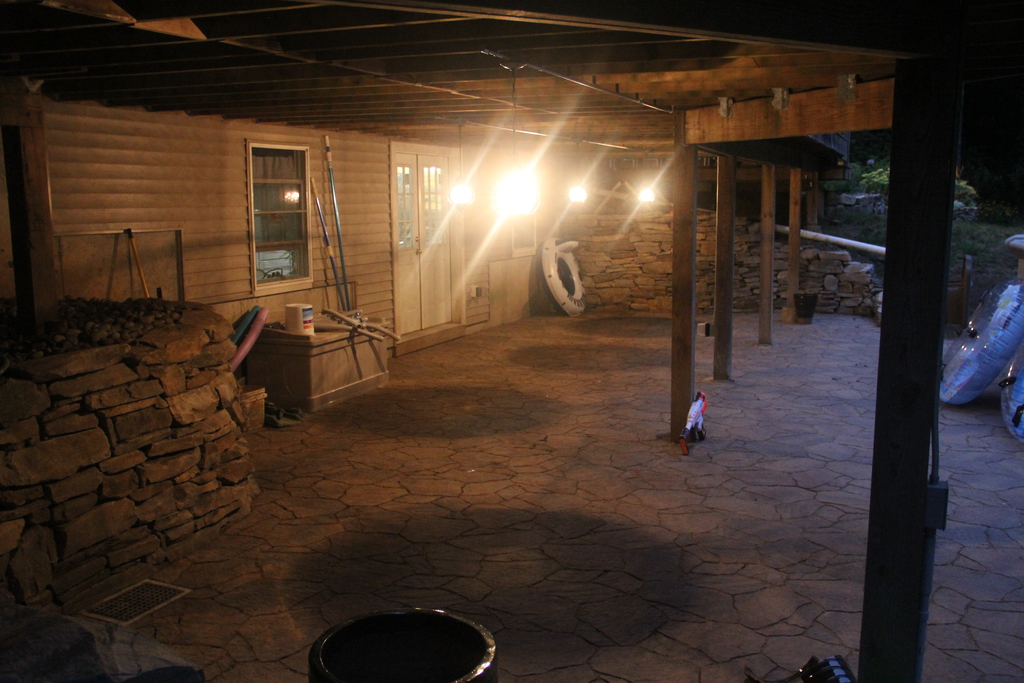
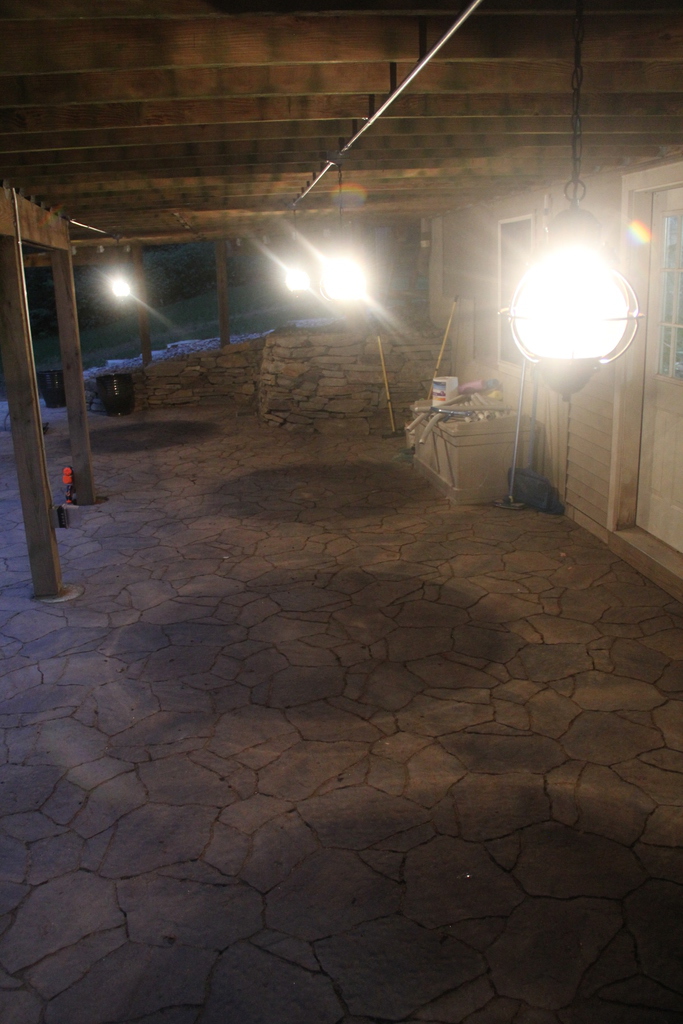
I’m not much of a photographer, but I think these will do.


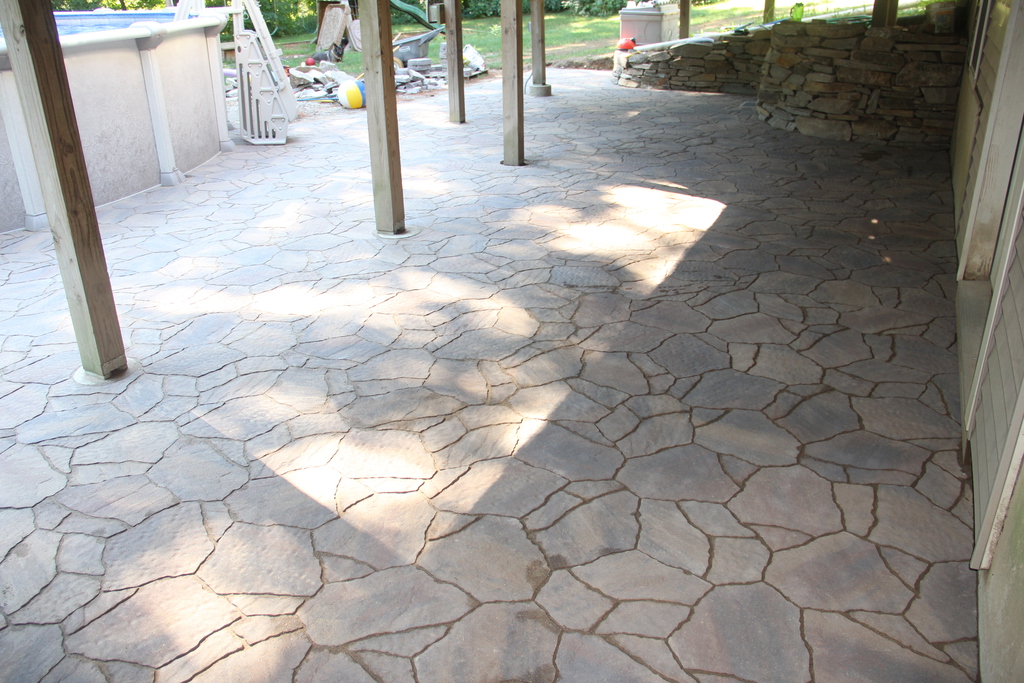
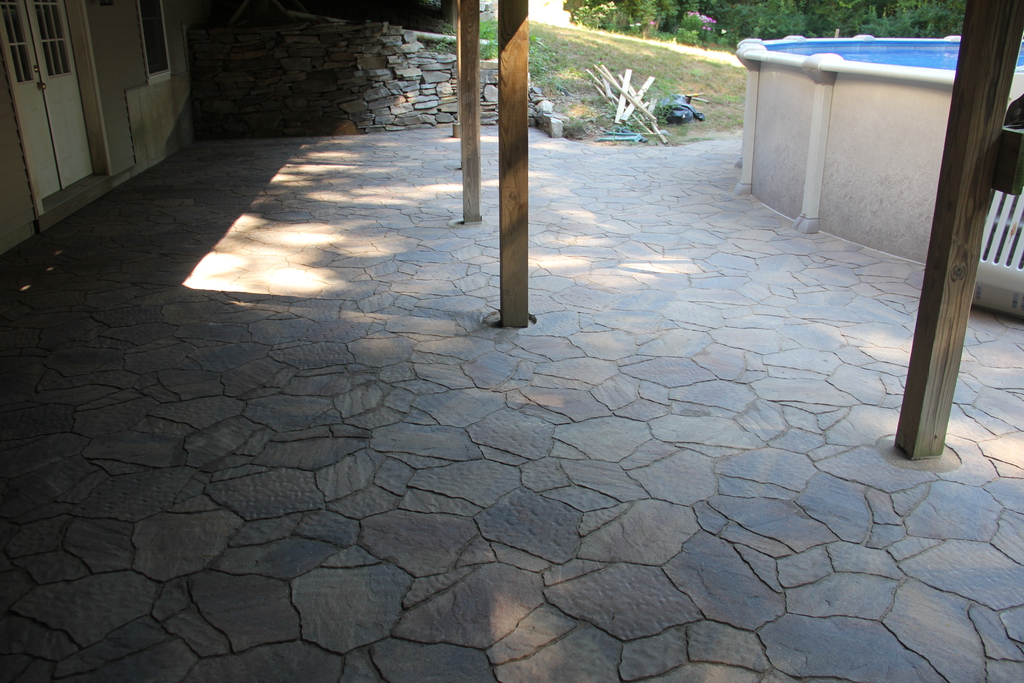
Now that it’s basically completed, I thought some before and after pictures for the patio area were in order. My first pictures were taken on May 1st, while today is, well, today. I wasn’t able to work every day on it during that time between weather, vacations, trips and other duties or logistical delays. I’d guess I have about 250 hours into it as of today.
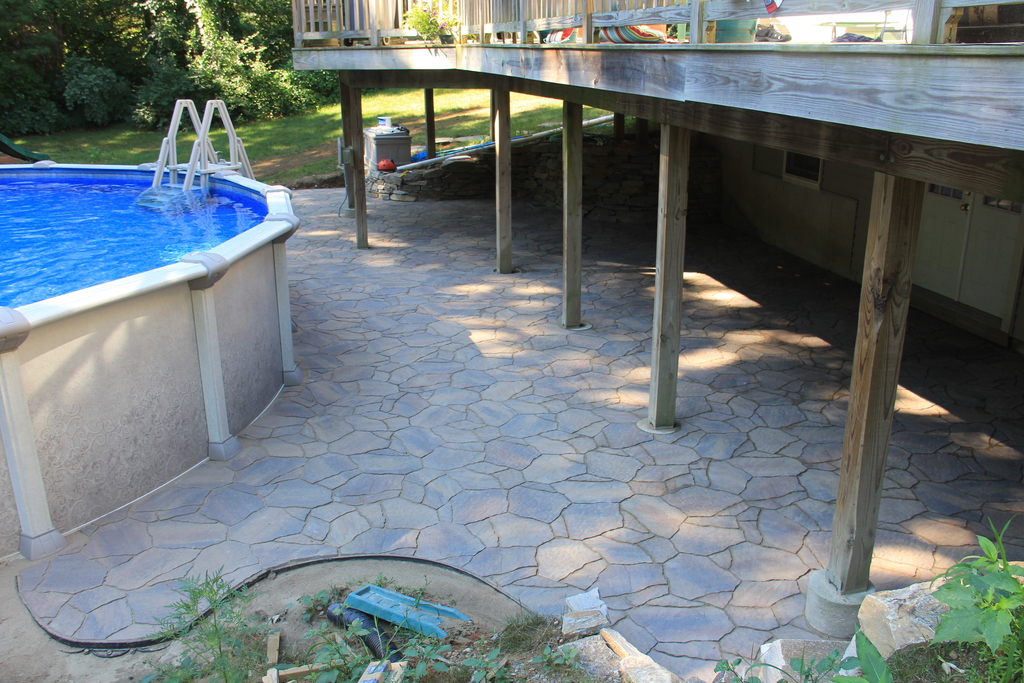
First, a wide view:
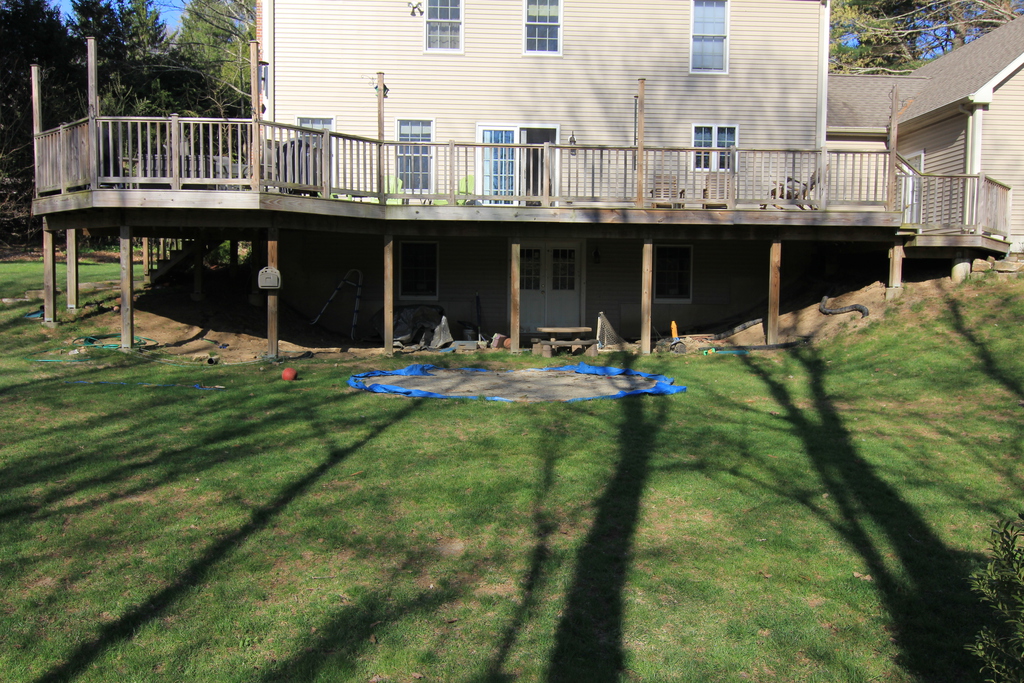
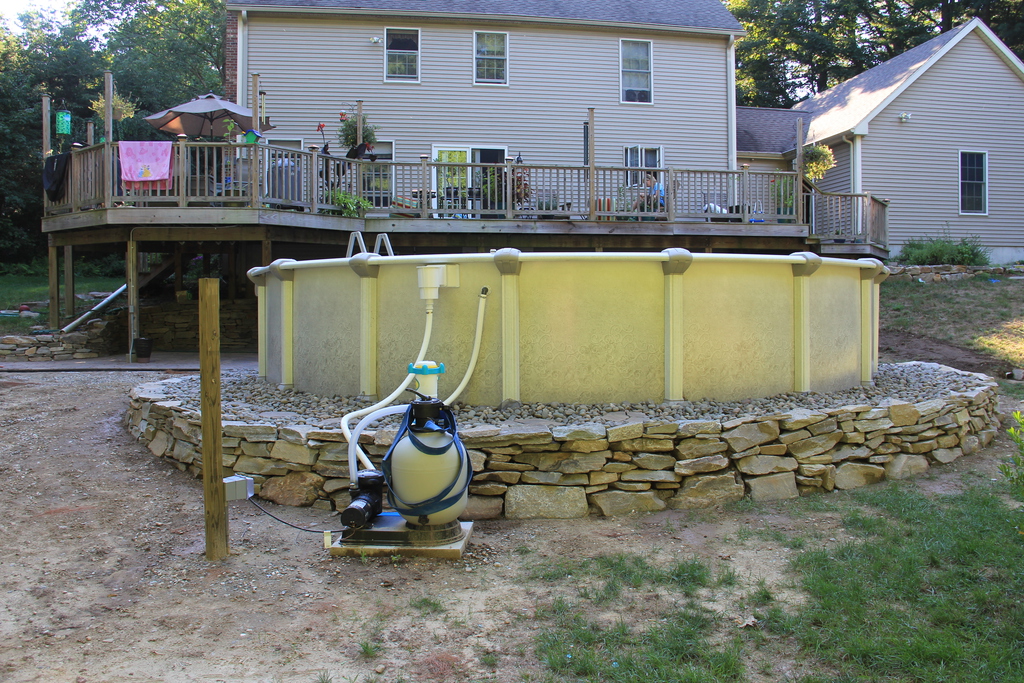
Tough to see much there with the pool dominating the foreground. And yes, I’ve got to get some grass growing again. I did say “basically” done.
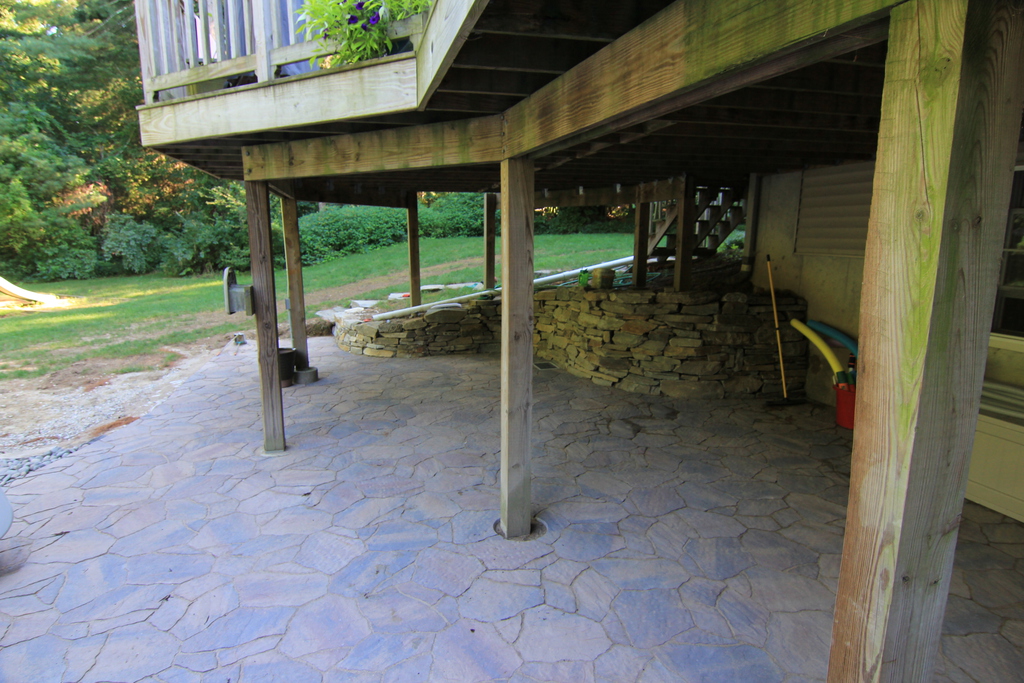
Now, here’s the left side as viewed from under the deck:
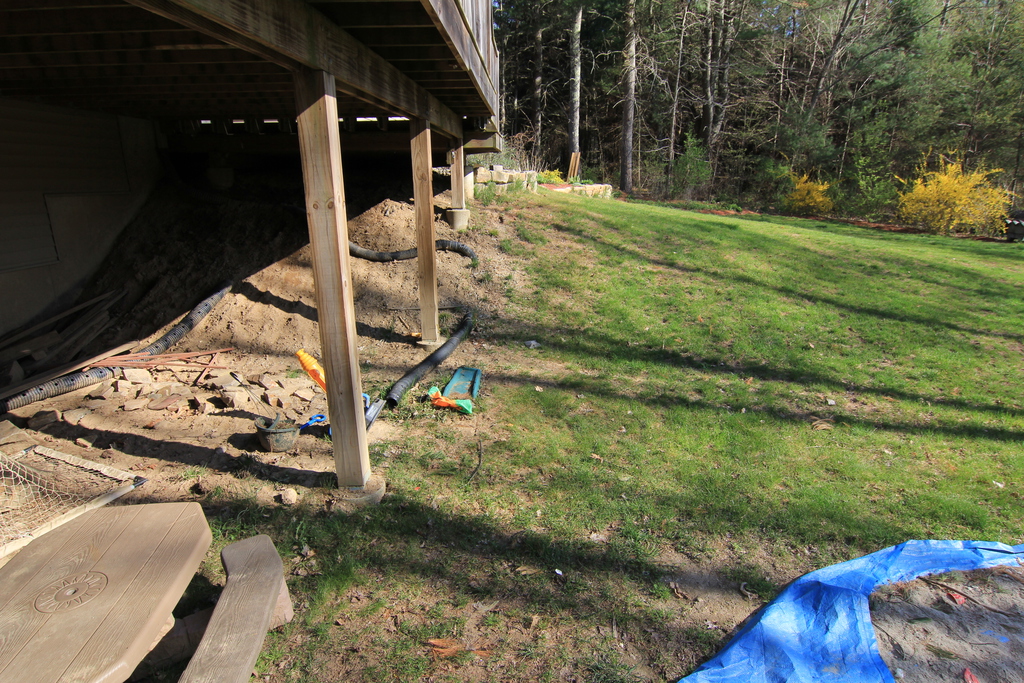
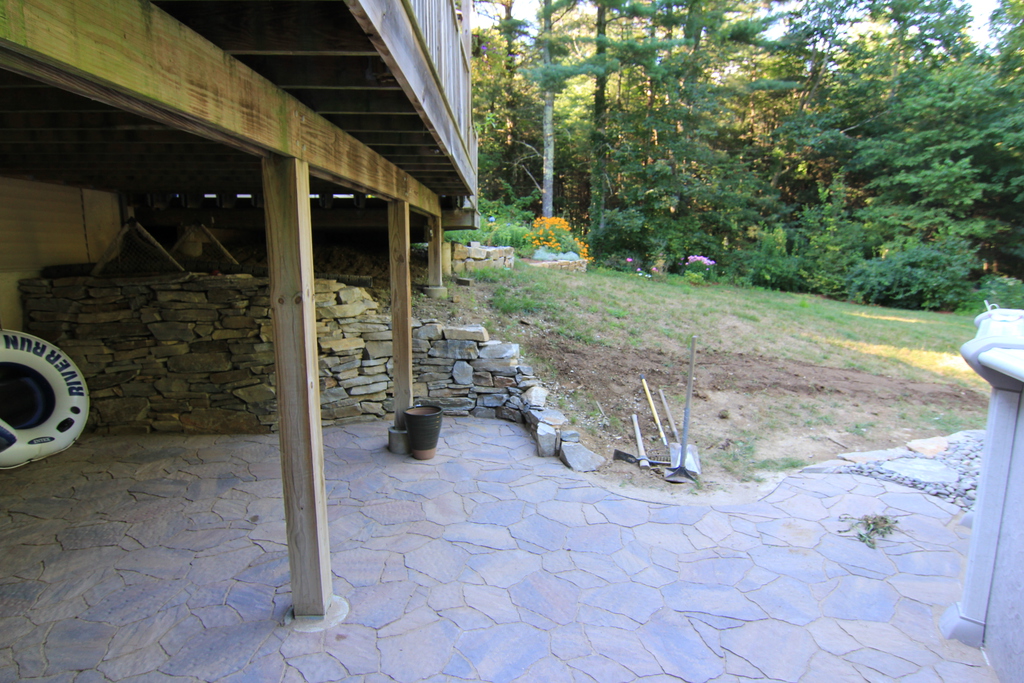
Just a little different. Now the right side:
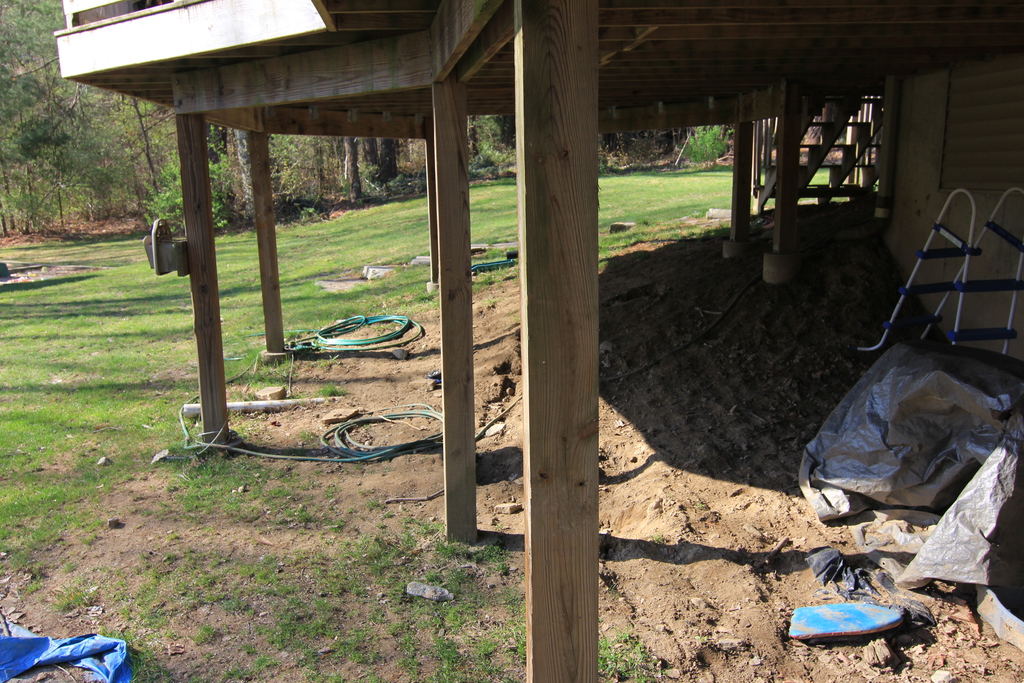
As I mentioned earlier, the first order of business will be to get some grass growing again around the pool. Next year, I think, we’ll tackle some of the landscaping in the immediate area of the patio.
Here are some statistics about the scope of the project:
Suffice it to say, it wasn’t a ton of work- it was many tons of work.
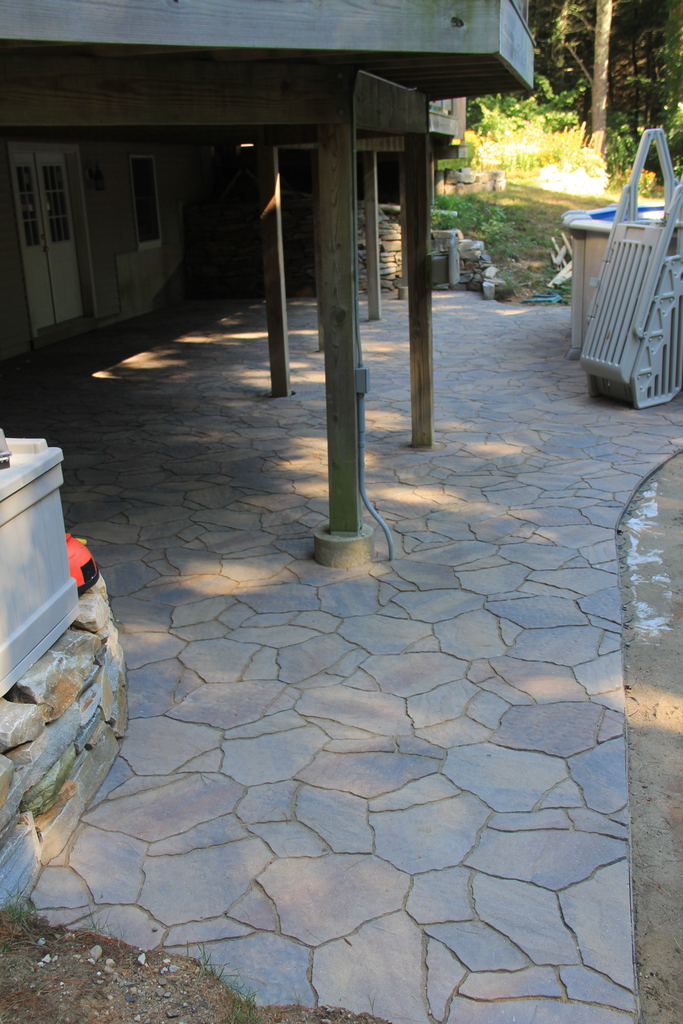
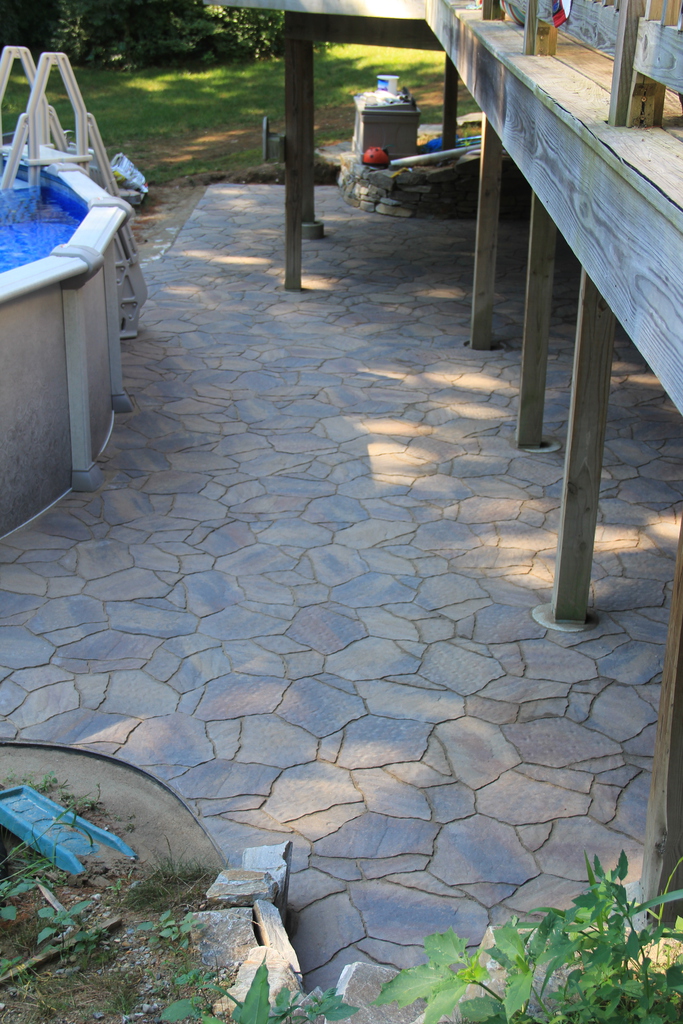
When this whole thing is done, I’ll have to put a page together showing the various stages of progress. As originally envisioned, the project is complete. However, due to realities on the ground, I have a final stage to complete- construction of a small retaining wall around the pool. Once that’s completed and then filled with river rock around the pool, everything will be done.
Polymeric sand.
In two words, that was my problem with finishing the pavers. That’s the short explanation. The long explanation is … considerably longer. And follows.
First, a quick education. Polymeric sand is special sand with an acrylic polymer that when exposed to moisture, activates and forms a pliable matrix, essentially making the sand a solid mass. A simpler explanation is that polymerized sand is to pavers what grout is to tile.
Polymerized sand is highly sensitive to moisture. There doesn’t need to be a steady stream or puddle of water, just dampness in the pavers is enough to activate the polymer.
So, yesterday was a beautiful day. Sunny with a few clouds with reasonable humidity levels. Unfortunately, it followed a couple of days of heavy persistent rain. The pavers were soaked. A fact that was made quite clear over the course of the 13 hours I spent working on them yesterday. For giggles, I’ll note that I was told it would only take a few hours to get complete the sand portion of the project. If only.
The pavers next to the pool dried first, a not inconsiderable amount of area, so that’s where I began spreading sand. I assumed that the rest of the pavers would dry out as I worked. I was only partially right. More pavers did dry out, but only those that saw persistent Sun. The pavers sheltered by the deck continued to linger with their dampness.
I started around 9AM. I put all the edging around the exposed portions of the paver edges. I then started sanding the area next to the pool, which was exposed to a steady diet of Sun and very dry. As I worked my way along, more of the pavers dried, but spotty patches of dampness still remained. With the rep’s warning that “Make sure it is ABSOLUTELY dry before spreading this sand…” echoing in my mind, I decided to try spreading it over a small area where there were a couple of damp spots. Just the dampness was enough to activate it. So I was stuck at that point.
I decided to compact the area that I’d done. I worked through it, hoping in the meantime the remaining damp areas would dry out. I started running a fan over those areas around 1 o’clock. It helped, but there was still a lot of dampness. Around 5 o’clock, I decided it was time to take more drastic action.
I pulled out a hair dryer and went to work.
It worked, but now time was against me, as well as a number of other factors. I still needed to finish spreading the product, compact it, re-spread it, re-compact, finish spread and then wet it. I now only a couple hours or so until I had no sunlight. Trying to think ahead, I checked the weather and our local forecast was showing the possibility of a thunderstorm in the early morning. With the humidity, I also started thinking that morning dew would screw me up.
In short, all the factors I could think of lead me to believe I had to finish it last night. So I continued working.
One thing about spreading sand over pavers that is hard to appreciate is the film that coats the pavers. The instructions on the bag and my inexperience with the product led me to believe I needed to clean the pavers thoroughly. I could never completely remove that haze from them though and finally, around 9:30 last night having filled, compacted and swept it several times over, I decided it was time to start wetting and hope I could wash the sand off.
By that time, I was working by flashlight. I had a porch light to help, but none of it was enough to really allow me to see the state the pavers were in. Making matter more difficult, the acrylic caused a foaming in the water which would have made it difficult to see the sand in good lighting conditions, let alone what I was dealing with.
By the time I’d finished wetting the pavers, it was almost 11 o’clock. I could still feel the grit under my shoes. But there was nothing more I could do. I couldn’t see the grit and couldn’t tell if I was actually moving it or not. Exhausted and sore, I finally wrapped things up for the night. Thus, my disappointed posting from last night.
A slight tanget- polymerized sand really sucks. I mean really sucks. The clouds of it from sweeping stick to sweaty clothes and skin. It goes up your nose and creates weird boogers. It gets in your hair and acts like a nasty mousse. There is literally a layer of muck on you after working with it.
This morning, I woke up and came down around 6:30 to see what kind of mess I had to deal with. As I’d suspected, I still had tons of sand and grit on the pavers surfaces. Also, as I’d suspected, it looked awful. Pavers that had dried had a haze that completed obscured their real color pattern.
I wasn’t without luck though. The overnight humidity had kept the pavers drying and sand from setting completely and I quickly figured out I could still clean the pavers using one of the spray settings on the hose nozzle. So I set to work with that job.
It was slow.
I essentially had to go paver course by paver course, washing each paver and pushing the sand down slope. About halfway, I had accumulated so much extra sand that I was having difficulty pushing it with the water from the hose. I then had to resort to a combination of sweeping it with a rubber broom and pushing it with the hose water.
The process was tedious, but it yielded results. I was able to walk on the pavers without feeling the grit under my feet nor the tackiness from the acrylic material. It ended up taking me several more hours and repetitions of sweeping, but I finally finished up earlier this afternoon. Pavers that have dried now look proper, without the haze from the acrylic. I’m not completely happy with the edges by the walls, but there’s only so much I can do there. Water tends to pool and it’s difficult to get the sand to flow away from those spots.
It never did rain this morning. Knowing that might have saved me a lot of work last night, but I wasn’t willing to gamble. Probably due to impaired judgment from breathing polymerized sand. Ironically, letting the sand sit wet for several hours overnight seemed to work in my favor. The surface sand could still be removed, but not at the expense of the joints that I wanted filled, so I was able to avoid gouging the sanded joints.
Whatever mistakes I made, the main thing is I was able to make it work and satisfactorily complete the project. Last night, I was concerned I might have to redo the sanding. Tonight, I’ll rest easy knowing I’m all done. A pleasant change of circumstance. I’ll post pictures when things have dried out a bit more.
I just finished up about 30 minutes ago after a marathon effort to get the sand in before tomorrow. I’m too tired go explain why right now. I’m also apprehensive about the sand. I think there’s a good chance it didn’t come out right. More after a night’s sleep.
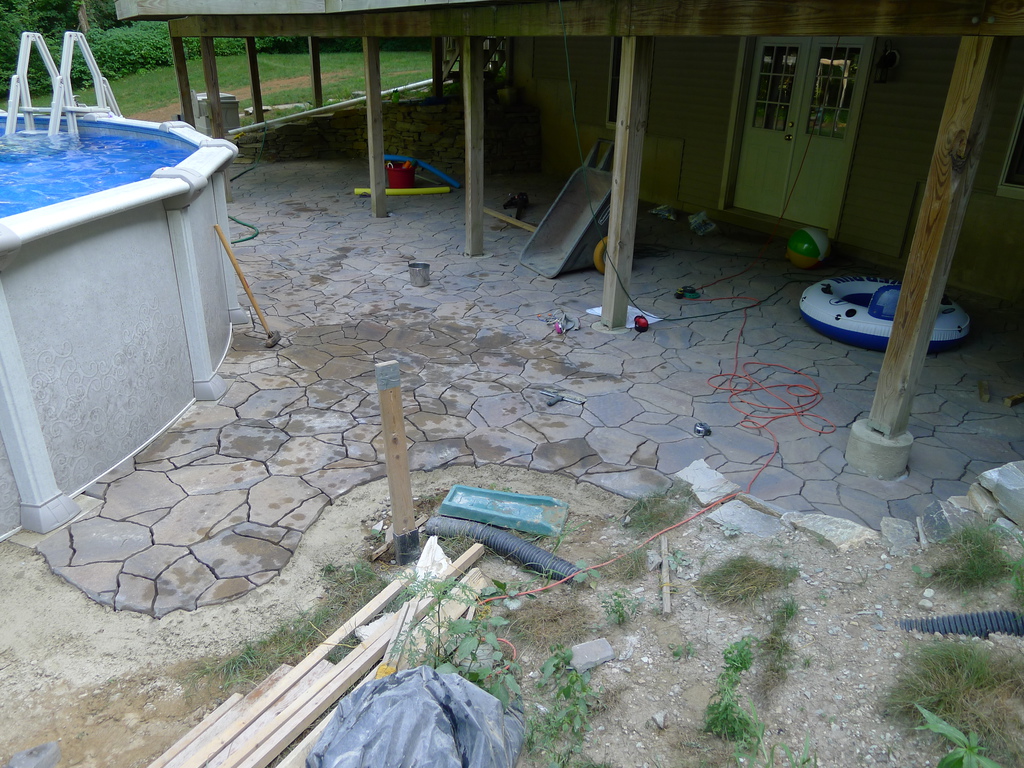
This is the best shot I could get of the final section of pavers I’ve laid. Actually, a friend came over to help me out so I shouldn’t claim I did it all myself. With it being as hot and oppressive as it was, that’s a good friend. Thankfully, we didn’t have a lot of pavers to lay so the work didn’t take us all day, we completed it a little after lunch time.
The little inner curve will give the Wife a place to plant a bush or tree or something, while the other section gives a path for people to access the yard from the patio. The guy who helped me out actually convinced me to go this rout versus what I originally had in mind. It took us a few more pavers to complete it, but I like his result better than what I had in mind.
At this point, I have to put the retaining trim in place, then spread the sand and perform the final compaction. Almost there.
The Wife has beaten me to the punch by posting pictures on Facebook. But, I was doing this before she was on Facebook so it’s not official until it appears here. So, without any further ado, our new pool:
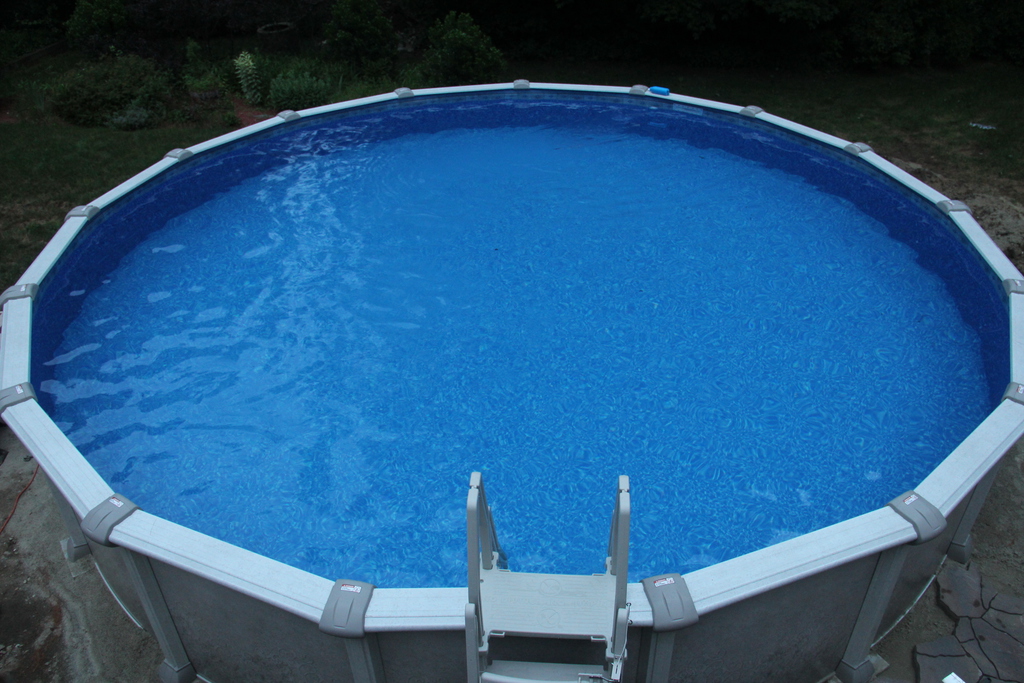
The boy was the first to get in the pool. The lass and I joined him for a bit as well. We ended up waiting all day because with the pool going in, I have more work to do:
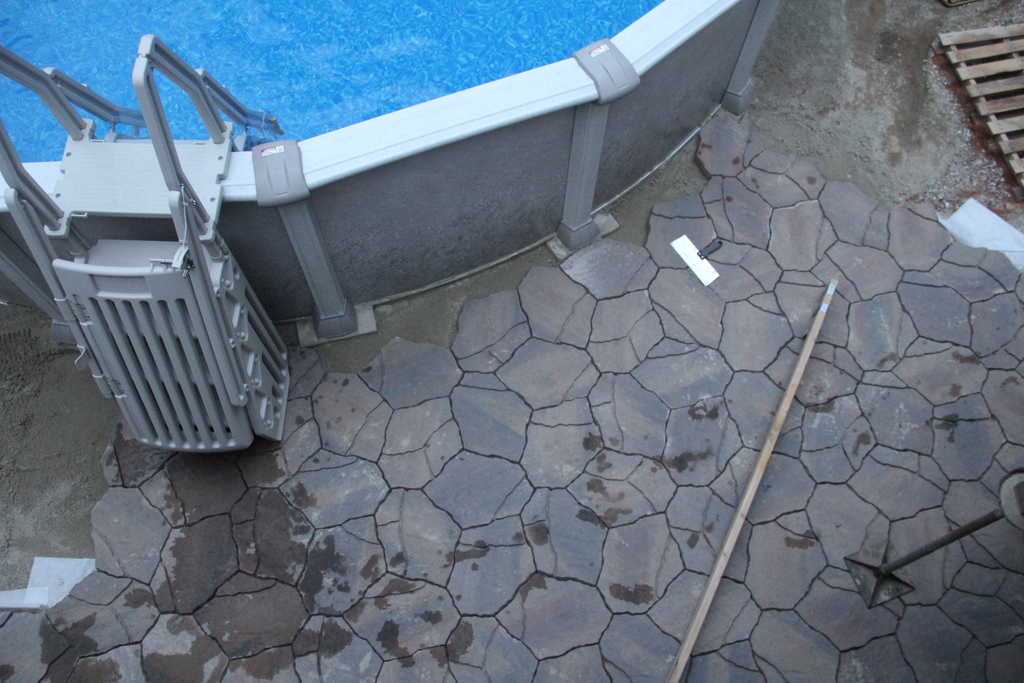
I spent a good part of the morning and early afternoon putting all those in. It’s a slow process since I can’t really spread the sand and skreet it all at once. I have to spread the sand as I go, so I can only get a couple of pavers down at a time before I have to work the next section of sand. Plus, I’m putting slight grade so water won’t run or puddle next to the pool so that makes it a little trickier.
I’d hinted in a prior posted about changes to the patio design, the stone wall being the subject of that post. These are a further part of those changes. My original idea for the contour of the patio really didn’t work well with the pool in, so I’m putting the extra pallet of pavers to good use. I’ll probably have to get more to complete it. The question is, how many?
So the timeline for completion gets shifted out a bit more. If I have to order more pavers, that’ll be longer yet. But I’ve got a plan in mind to make sure I have no extras, I’ll be sure to let you know how it works out.
I’m pretty sure I’ve seen this written elsewhere, but I’ll paraphrase it here: the first rule of design is that any design will not survive first contact with reality. The reasons for this are obvious to anyone who’s tried their hand at design: assumptions don’t pan out, facts on the ground change, etc. Personally, I always try to start with minimal designs because they tend to be easier to modify as needed.
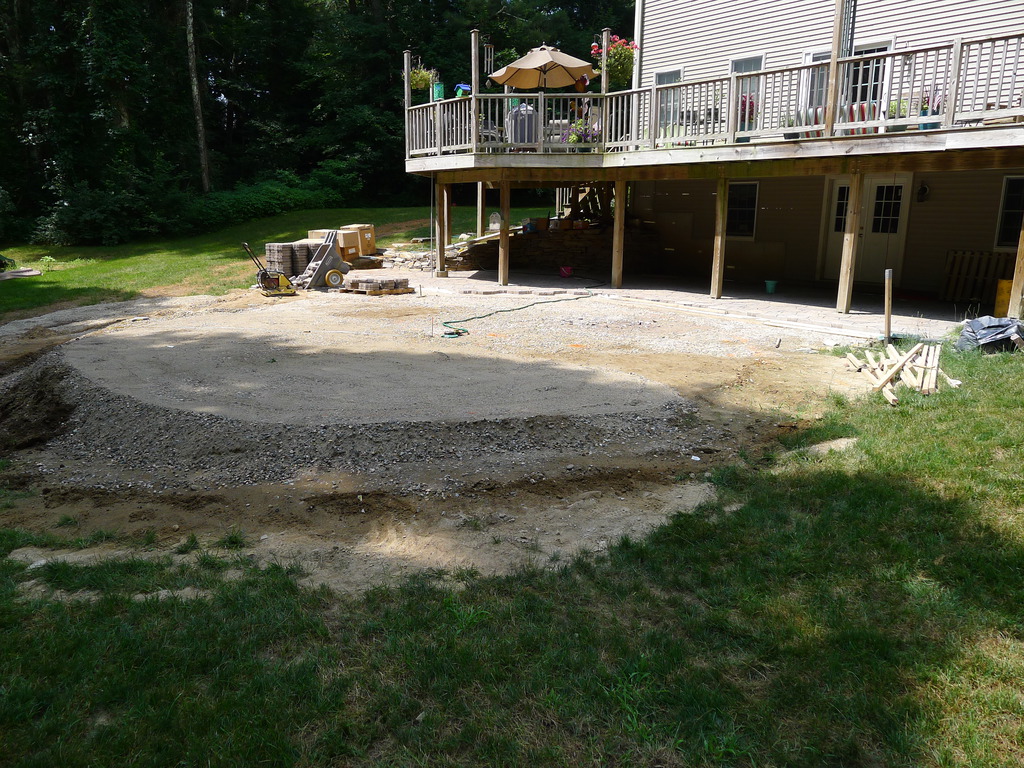
This is where the pool will be going. When the installers showed up on Friday, they explained that in order to avoid having to install a fence around the pool, the pool walls had to be 48 inches above the surrounding area for 3 feet. The pool we chose happens to have 52 inch high sides, so that gives us a little margin.
As can be seen from the picture, that margin is not nearly enough. The site is now level, and it had to be built up with about 18 inches of processed gravel on the “downslope” side to make it so. It’s deceiving how a small grade to the ground can add up so quickly.
So, I’d toyed with the idea of putting a ring of stone around the pool but now I pretty much had a third wall project on my hands. It would be the easiest of the 3 walls to build, but it was something I hadn’t anticipated in the beginning. Fortunately, it all works out with all the other stone work we already have in the yard. Plus, I still have left over stone from the first two walls, so I was able to make some progress today:
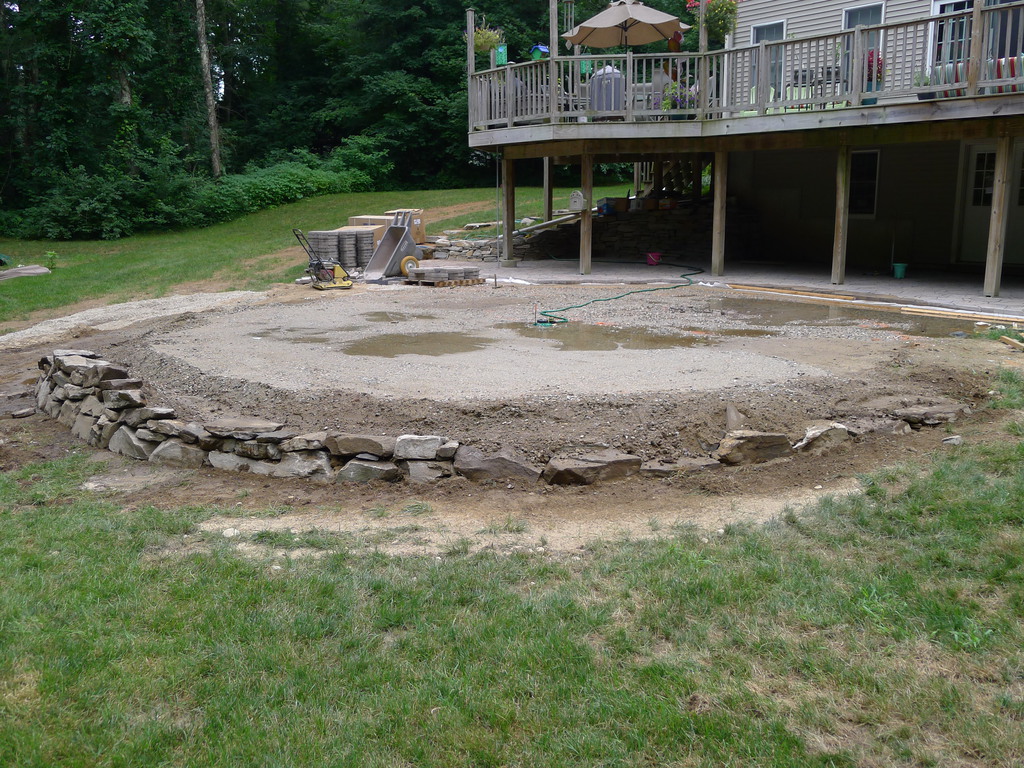
There are more changes coming as well, but those are related to the pavers and patio, which I’ll document in another post on another day. Suffice it to say, the first rule of design has worked it’s magic on this project.

All of the field pieces are laid and now I only have cuts around the post piers. The field had been completed several days ago, but I only finished all the cut-in work around the stone walls today. Here’s a flavor of what I was dealing with:
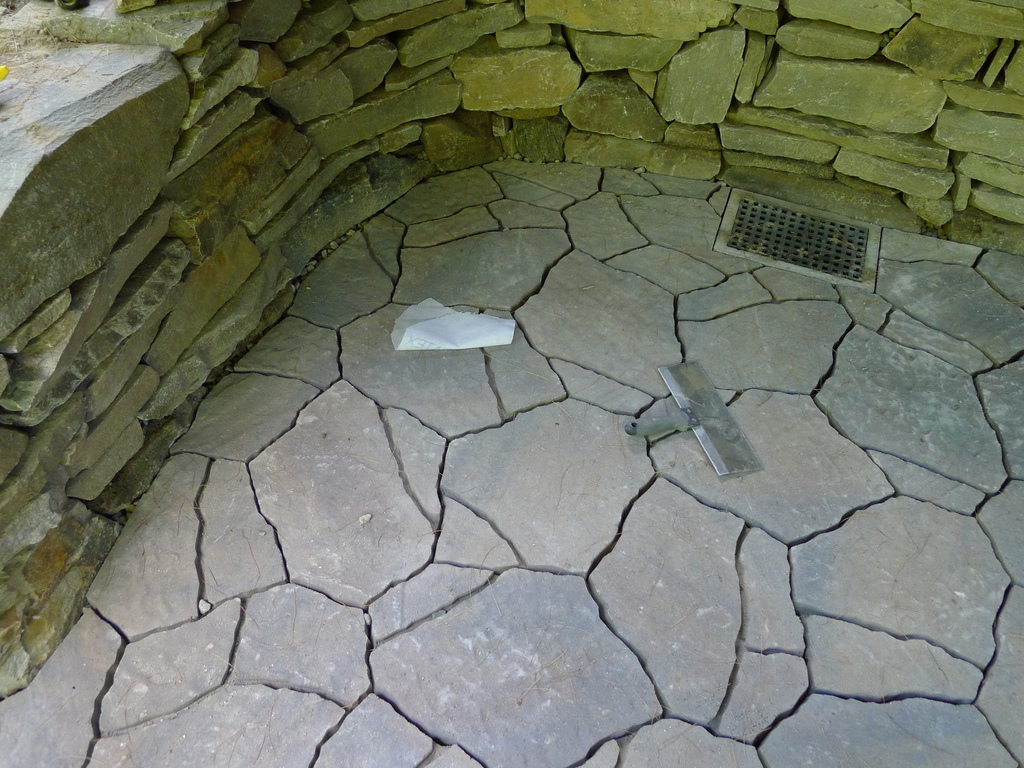
Just follow along the line of the wall and around the drain to get an idea. Some of those took a lot of work to get right. When the cuts weren’t difficult, getting the piece in was because of the combination of sand and stone next to the wall that I couldn’t skreet. I had to do that part by hand, which was tedious.
I would have completed the cuts around one of the piers today, but I was going to make the final adjustments to the piece and when I set it down, the piece cracked into two pieces. I was so disgusted I decided I was done. Not the best note to end on, but I wasn’t going to spend another 30 minutes cutting the arc again.
Cutting pavers is a miserable job, especially in this kind of heat. By the end of the day, I was caked in a layer of paver dust from head to toe. Thankfully, my Dad had me a breathing mask for just this kind of work. I was also outfitted with eye guards and ear plugs, making it a thoroughly unpleasant way to spend a day.
Be that as it may, a lot of work is done and the end is in sight.
I’m pretty beat, so I’ll save any technical explanations for another day. Here’s a shot of the progress I made laying pavers all day. In the heat, which felt worse than yesterday, remarkably.
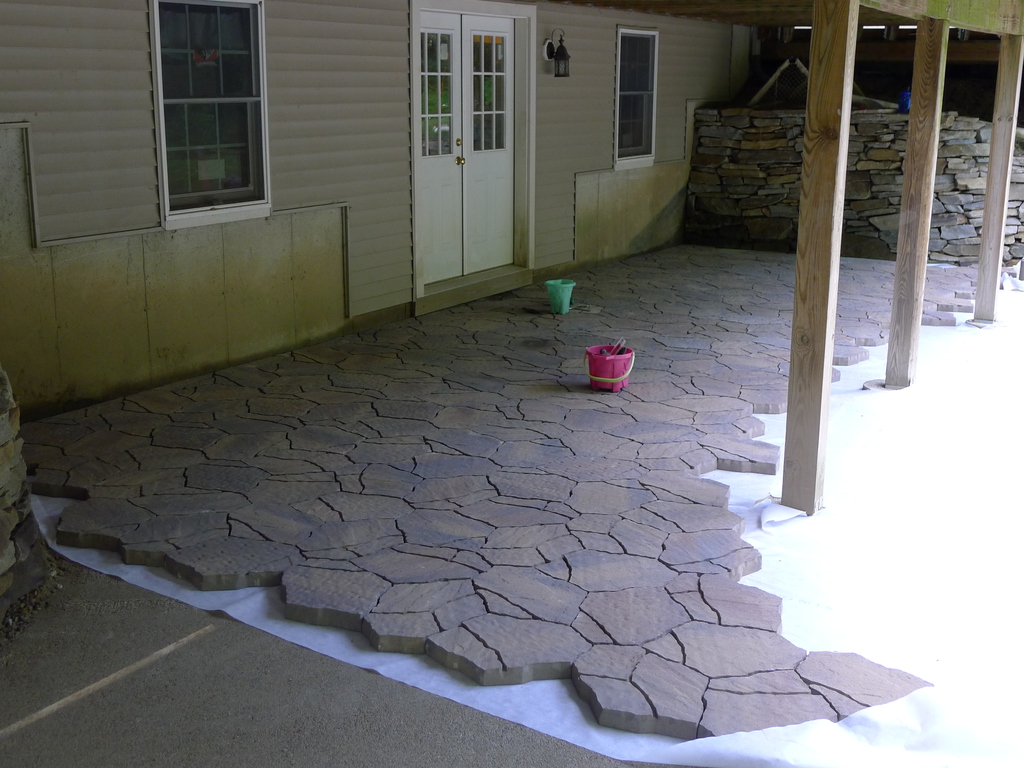
I’ve got shots of the individual pavers as well as the clover leaf pattern used to lay them down. Like I hinted earlier, for another day.
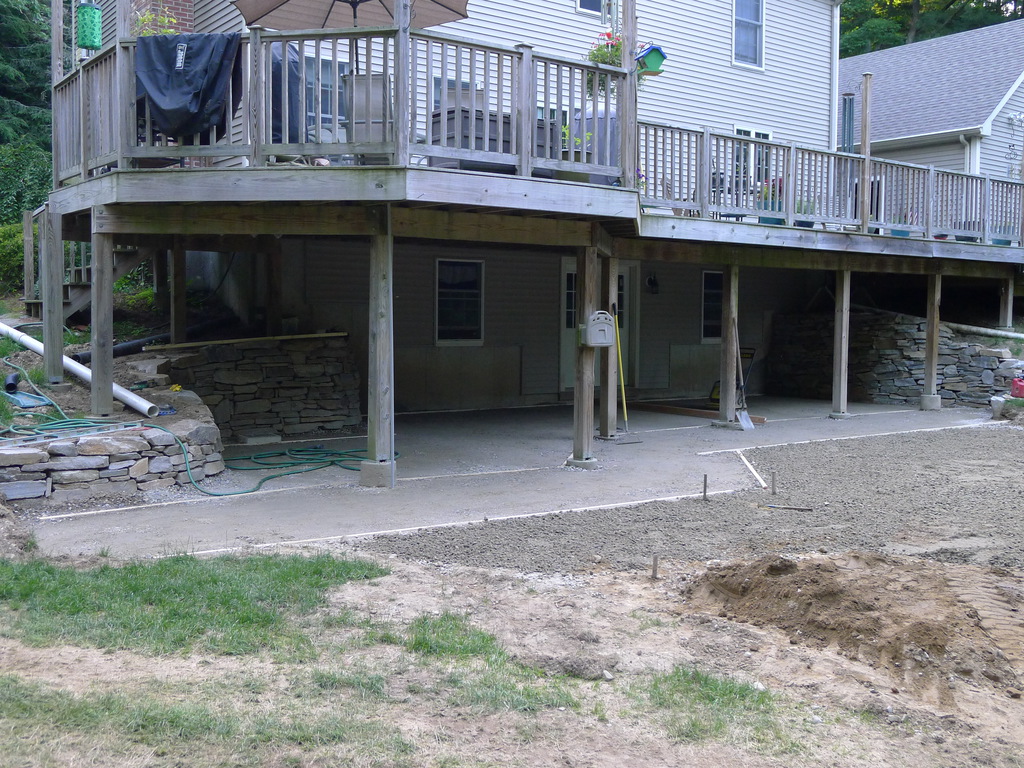
Almost all of the prep work is complete. All that’s left is the layer of sand that the pavers will rest on. That’s arriving today thank to our paver rep pulling some strings for me. The pavers arrive Monday- not sure when. This is the first picture where I think there is a feel of what it’s going to look like when the project is completed.
I noted before that actually building the walls took less time than all of the prep work. That’s going to hold true for the pavers as well- but even more extreme I think. Unlike the stone for the walls, the pavers are made to go together a certain way, so I’ll just set them and go. There will be details of course, but they’ll get taken care in due time. The majority of the pavers will be done within a day I’m willing to bet.
With the two retaining wall completed, the next phase is the pavers. Installing pavers, in theory, is pretty straight forward. Dig down, put a layer of gravel, followed by a layer of sand, followed by the pavers, followed by a final coating of sand to fill the joints.
The actual doing is a little more involved.
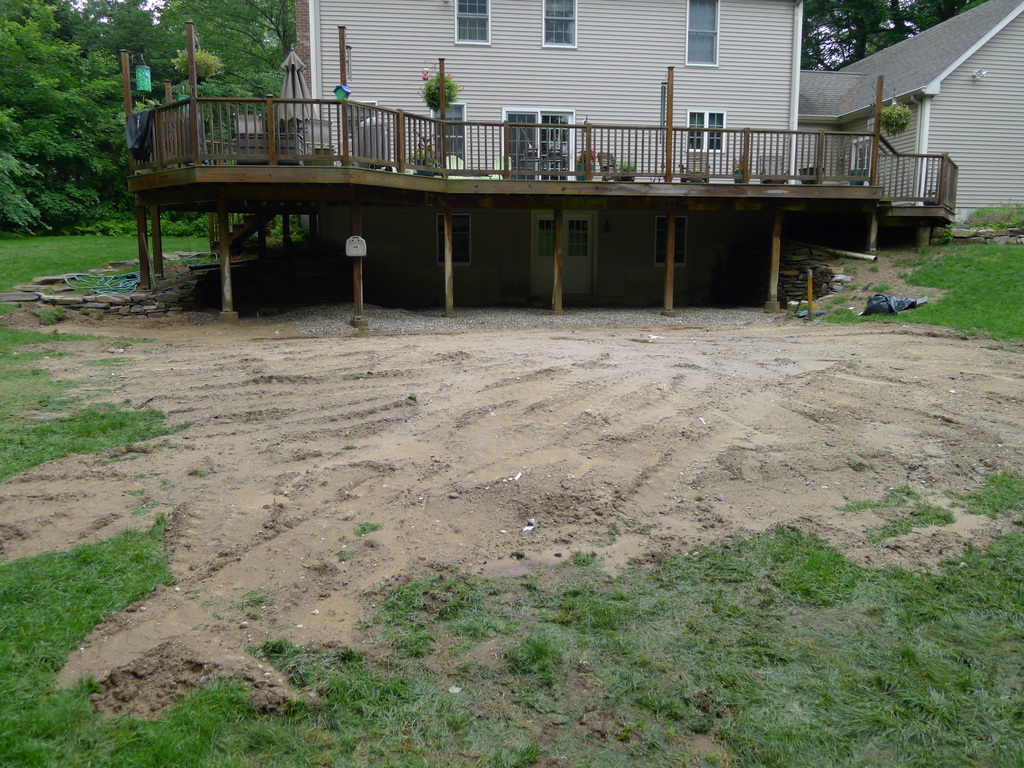
So that’s the result of the digging part. I had a guy who knows what he’s doing with a skidsteer do the digging under the deck. If I’d done it by hand, I’d still be digging into next year. He left it in piles and then left me the skidsteer to push the piles around for awhile. Since I had the machine, I also moved the remaining stone I had down under the deck. Saved me a lot of trip with the wheelbarrow. The result is the, uh, scene above.
There is no going back now.
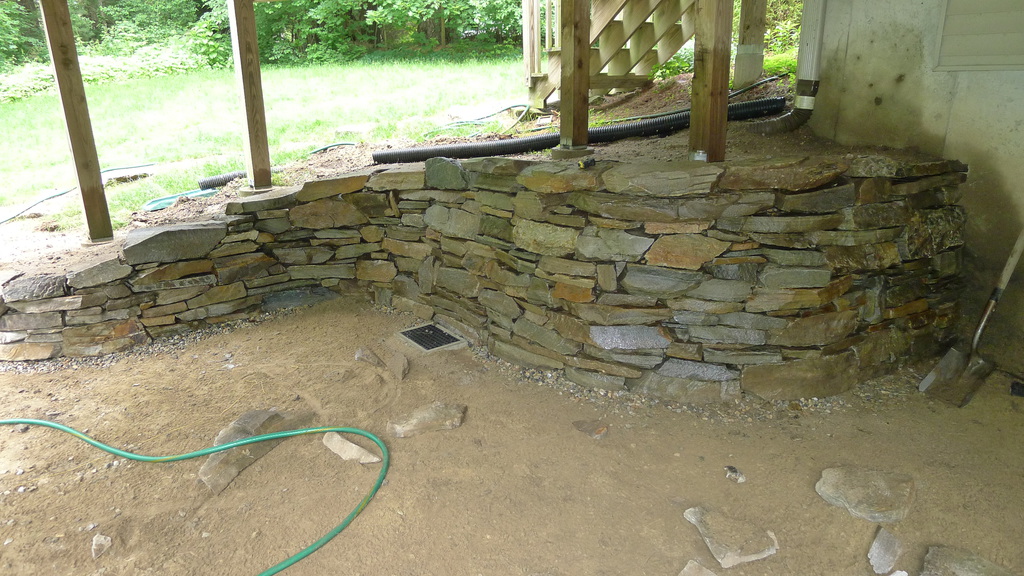
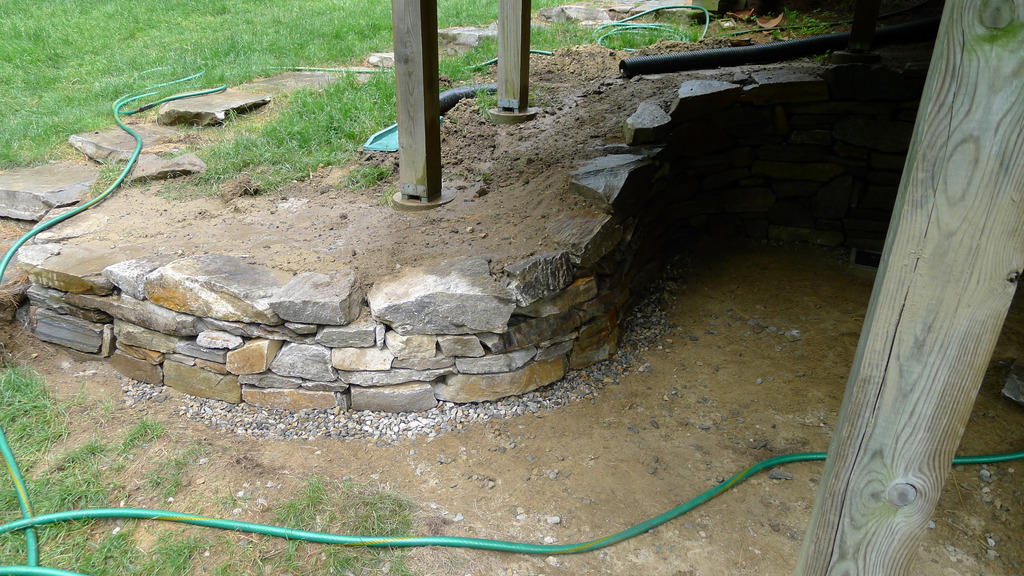
I can’t get a good picture of the whole thing, but these 2 should give the general sense of it. Having completed this one so soon after the first, I think it’s safe to say no two walls go up the same. Obviously, the shape changes. It’s more than that though- the material changes, the accessibility to the material changes (in other words, rocks on the top of the pile tend to get used first, rocks at the bottom last), plus the previous wall influences decisions about what’s acceptable and what isn’t. In this one, I used vertical rocks in a number of spots, versus the first I only did that in a couple of spots against the foundation wall.
That would be stage 2 completed. On to stage 3, which is the one I’ve been most anxious for.
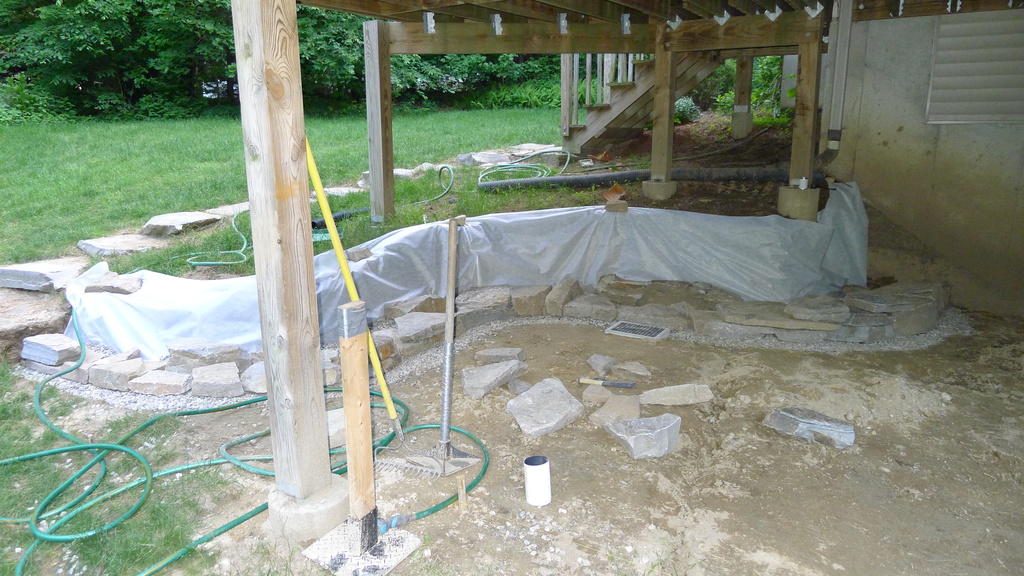
I’ve actually managed quite a bit of progress in the past week or so. I completed the excavation, over the course of the 3 hottest days no less. Additionally, all of the base stone has been filled and I’ve laid the first course of the wall. I’ve even started filling in behind the wall as well.
Worthy of note, I’ve added a catch basin to handle the our curtain drain. The original pipe posed a problem- the height of the pipe was going to interfere with the finished height of our patio. After speaking about it with a landscape guy, I basically had 3 choices: one, to cut and cap the pipe; two, to re-route the pipe; and three, change the height of the pipe using a catch basin.
The easiest was just to cut and cap the pipe. I also ruled it out almost immediately. Even though I’ve never seen water coming out of this pipe, I didn’t want to tempt fate. No, I wanted water to have some place to go. So, of the remaining two options, the catch basin was the simplest. The way it’s designed, I can even use a smaller pipe to make sure I don’t run into any problems with clearances.
If you’re wondering if I’m worried about the post on the far right, the answer is “a little”. I didn’t originally dig that close it it, but the dirt kept falling off. Luckily, with the wall going in now I’m less worried than I was since the back filling will shore things up.
As for wall features, it’s obvious this one is much longer but much shorter. Hmmm, that last sentence reads funny. What I mean is it won’t need to be as tall as the other wall, but it is much longer with the ‘S’-curve design. The height will gradually fade from about three-and-a-half feet at the house to about 18 inches at the other end. I’ll be following the same basic build process- build up the wall, then back fill with large stone and the three-quarter inch stone, cover with the landscape cloth and complete the back filling with sand and top soil.
One quick observation about this wall versus the other is I’ve been able to use larger stone more consistently on this first course. Looking at how the other wall came out, I’m not sure if that’s good or bad. On the one hand, the larger stone on the bottom theoretically makes the wall stronger. On the other, I think the randomness of rock size makes for a better overall look. That said, it’s early days for this wall. I seem to remember not knowing what to think of the first one and it ended up better than I’d hoped for. Perhaps the medium is the key and as long as I build it solidly, the appearance will take care of itself.
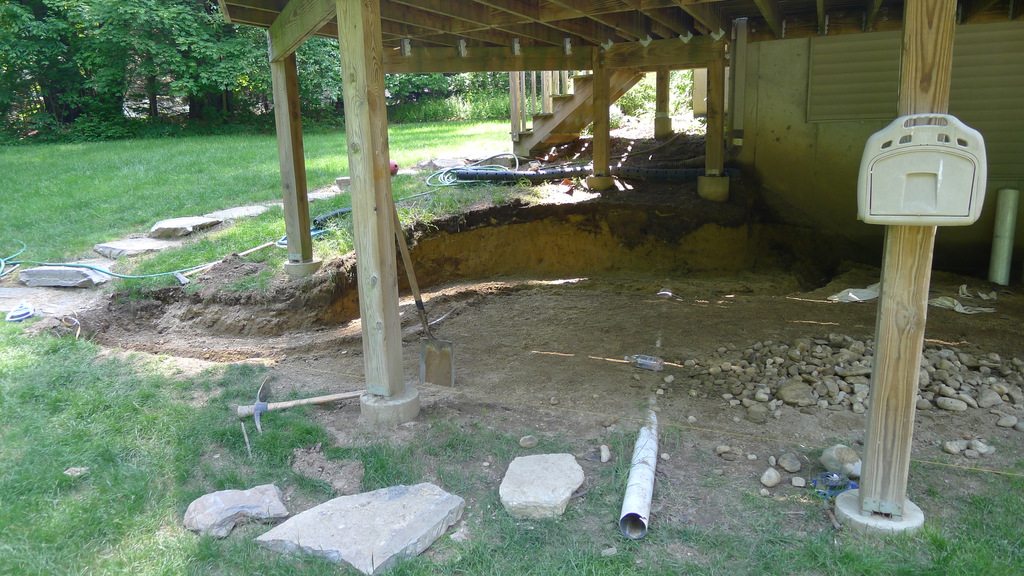
Completion of the other wall is only part of the project. Now, I get to do the same basic stuff on the other side. This wall will be easier in some ways, and more difficult in others.
As should be obvious from the excavation, it will have more curves to it. This will help to increase the patio area quite dramatically. Really, under the deck looks bigger already, excluding for the two massive pile of dirt I have in the center. But where it has the “S” curve feature, it won’t be nearly as tall- standing only about three-and-one-half feet at it’s tallest.
Aside from that, it’s more of the same. The next step is to dig down about a foot, line it with rip-rap and then fill with stone. Then I get to start building and backfilling.
Oh, almost forgot. I’ve also got to do something with that drain pipe. Don’t worry, I’ve got plans for it.

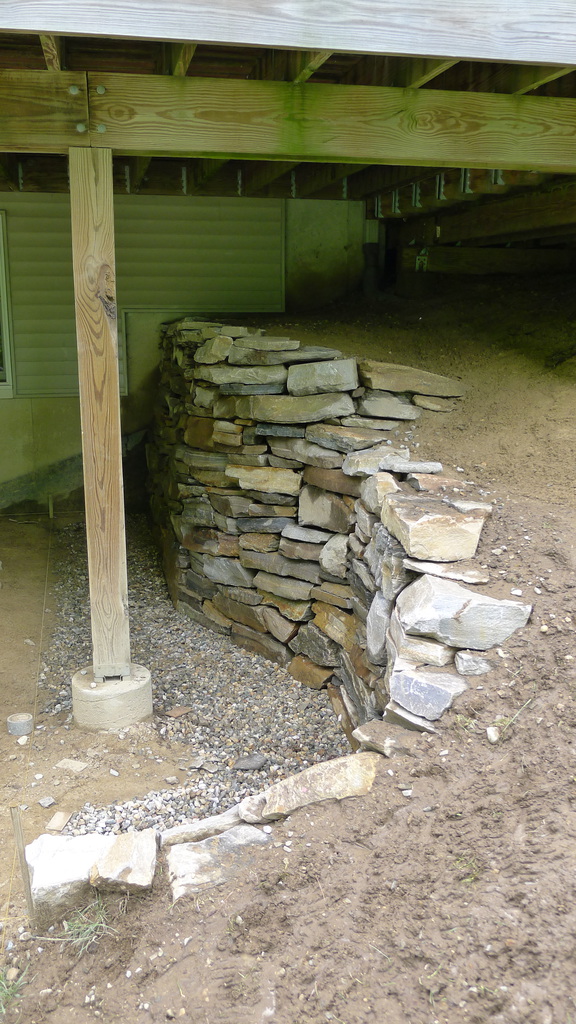
I tried to find a suitable quote from A Song of Ice and Fire but was unable to do so. So, suffice it to say, this wall is complete.
By the end, even the kids wanted to help. Mostly, I think, because they were able to climb up onto the top of it and “play.” I had them grading the backfilled area. If nothing else, it was an initial active load test to make sure the wall is solid. It seems to have passed with flying colors.
Next up, the other side of the house, where the next wall awaits. That one won’t be as high as this, but it will have more curves and, I think, be a little longer. I’ll enjoy this one for a day or so before starting the next one.
Alright, that post title is deliberately trolling George RR Martin fans. And if you don’t get that reference, well, it wasn’t meant for you.
I should have known that moving all that earth and stone was going to cost me. My whole body has been hurting for the past couple of days. Shoveling out several yards of earth by hand and by wheelbarrow is not for the faint of heart. Literally- don’t do this stuff if you have a heart condition. Now that I’ve started moving rocks around for the wall, my forearms ache. Plus the blisters.
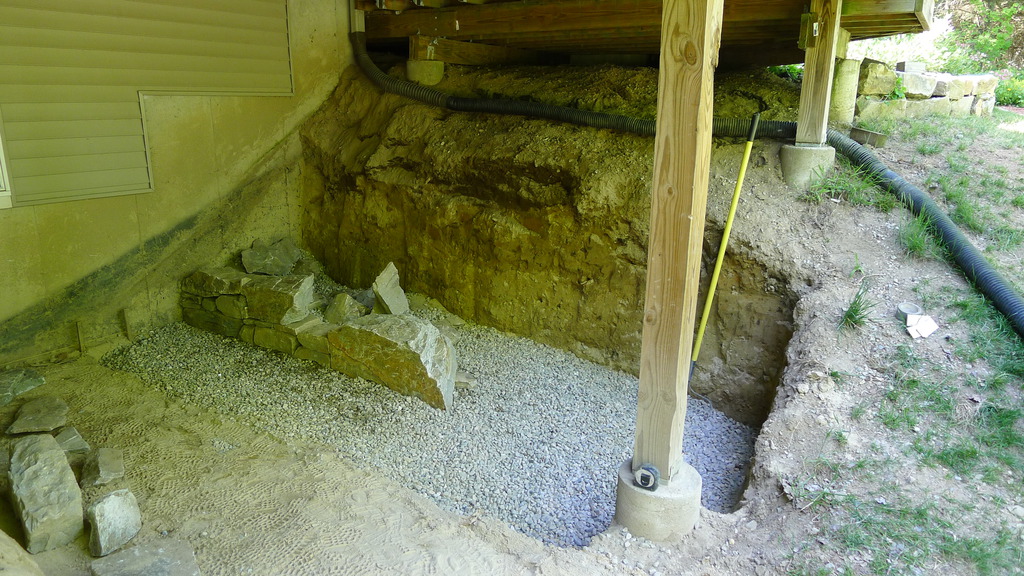
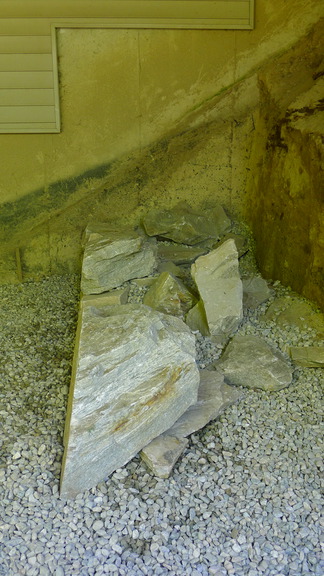
So this is the progress so far. I’m not sure if I should be pleased or not. On the one hand, that represents 3 days worth of work. On the other hand, the first day I only got to work on stacking rocks for a couple of hours, and yesterday for about 45 minutes. Today, I got another couple of hours worth of work into it. So from that standpoint, it’s not too bad. Still, days are ticking away.
The second picture shows my general tact for buttressing the wall against collapse. I’m back filling with large stone right now for weight purposes, and filling the gaps with the smaller three-quarter inch stuff. As I get a bit higher, it’ll start to narrow up since there will be less weight pushing against it up there. The big rocks should provide stability, the little rocks drainage as well as locking everything together.
That’s the idea anyway.
I’d intended to spend the day working on the wall. Life conspired against me to a degree though. First, there was the trip to the grocery store, 90 minutes gone. Then, I had made arrangements to get new tires for our car, so I went to take care of that. Another 90 minutes, gone. Next up, the sidelights for our front door needed to be painted. It’s a small paint job, so I figured I could bang it out in a few minutes. After 10 minutes, I realized I’d underestimated the time because it’s all cut-in work. Chalk up an hour there. Throw in whatever other random odds and ends needed attending like dogs, laundry, lunch, phone calls, email and it’s almost 1 o’clock. In 2 hours, I have to pick up the kids from school and then my evening starts. So I got my couple of hours worth done on the wall, which was actually more like 90 minutes since I stopped so I could squeak a shower in.
Then the shuttling began. Pickup the kids from school, bring them home. Listen to them fight. Remind them they have to get ready. NOW. Listen to more fighting. Remind them again. WE’RE GOING TO BE LATE. The lass can’t find her dance stuff. THERE it is, at the bottom of a load of laundry. WTF!?! How do they have that much laundry? Go start a load while they finish getting ready. Finally get them in the car and off we go. Get the obligatory “What are we having for dinner?” question. I threaten them with chicken.
Drop off the boy at martial arts, continue on with the lass to dance class. Stop at dance class long enough to see her class start, then off to wait on the boy. Stop and gas up the car along the way. Wait at martial arts class for 30 minutes, then back to the dance school. Wait 40 minutes for her to finish up. It’s 6 o’clock. The boy has homework to complete and I never got anything going for dinner. Probably my biggest shortcoming on the at-home-parenting qualification list. So we stop at Wendy’s.
Now we arrive home. We eat our gourmet meals. Feed the dogs, feed the birds. The boy has to finish his homework. The lass has to practice her “easy” spelling words. I go do the laundry shuffle (washing machine to dryer), then I have to put a second coat on the sidelights (remember those?)
CRAP! The boy’s birthday is this weekend and he wants to bring brownies into his class tomorrow. Start the brownies. Time for bed- for the kids. Get them to bed, then it’s back down to fold laundry.
Finally, sit down. Eat a quart of ice cream. Sit down, type a blog post. With lots of typos. Proofread.
What did you do today?
The beginning of phase one of the patio project has, uh, begun.
The idea is pretty simple. We’ve got a lot of space under our deck that would make for a nice sitting area. Until now, it’s just been a pit. That is going to change rather drastically over the next several weeks. We’re putting in a paver patio down there.
But before I can lay any pavers, I need a couple of retaining walls. For one, they’ll increase the usable area down there because otherwise the slopes of the ground eats up a sizable portion of the available space. The other benefit of the retaining wall is it will provide a nice border to build the pavers out to.
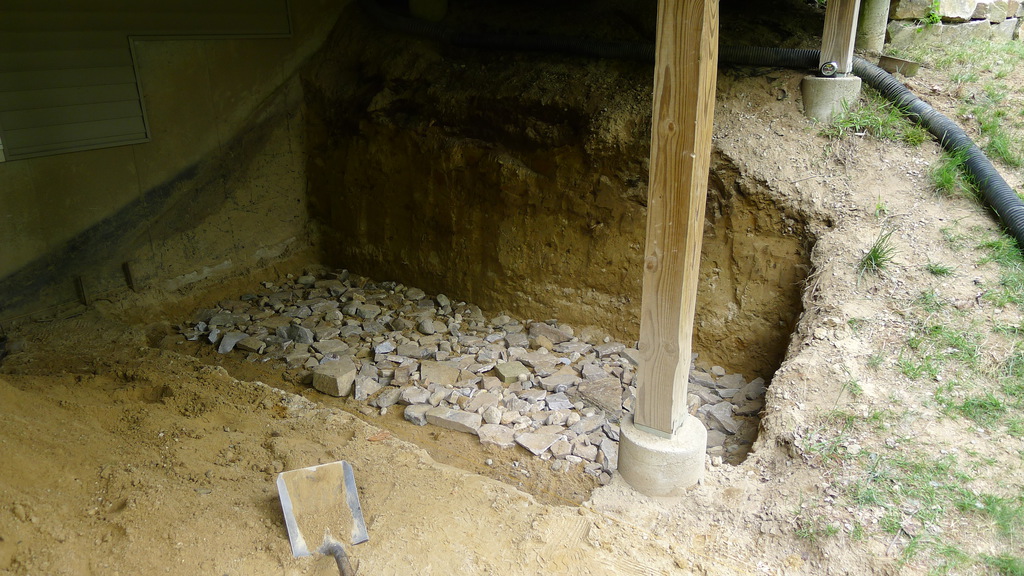
I’ve dug the hill out here by hand. Yes, I did that with a shovel, an adz and a wheelbarrow. I’ve pull some finished level lines that aren’t visible in the picture, but I’ve dug down about 12 inches and then put a layer of rip-rap down. The edge of the wall won’t actually be lined up with the edge of my digging here, rather it’ll be back about a foot, thus why there’s a void between the edge of the digging and the rip-rap.
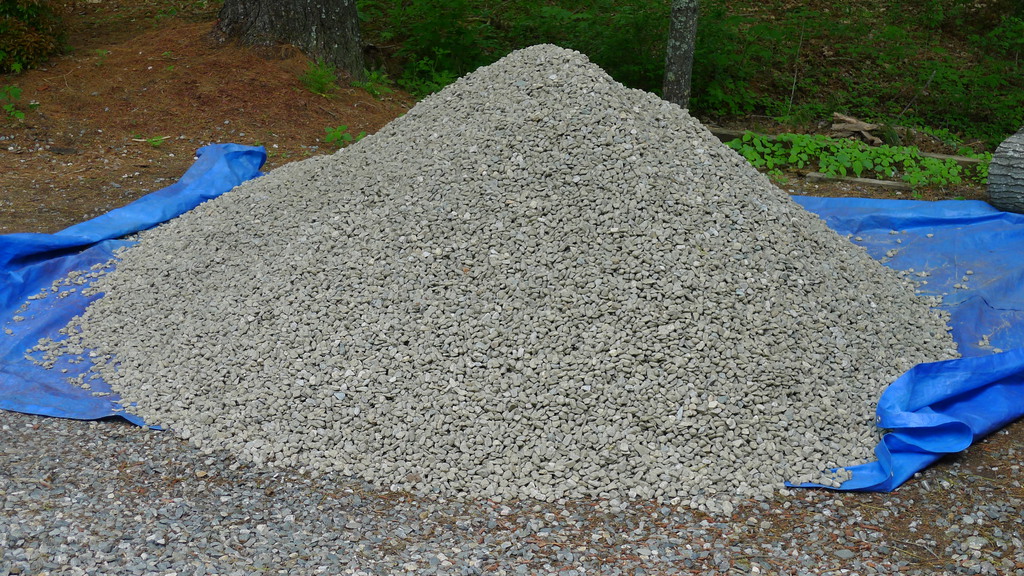
That’s the pile of 3/4″ stone I’ll be using to create drainage for the wall. Tomorrow’s job will be filling the hole with this stone. I’ll also be back filling the wall using some of this stone as well. Whatever it takes to keep the amount of water behind the wall to a minimum.
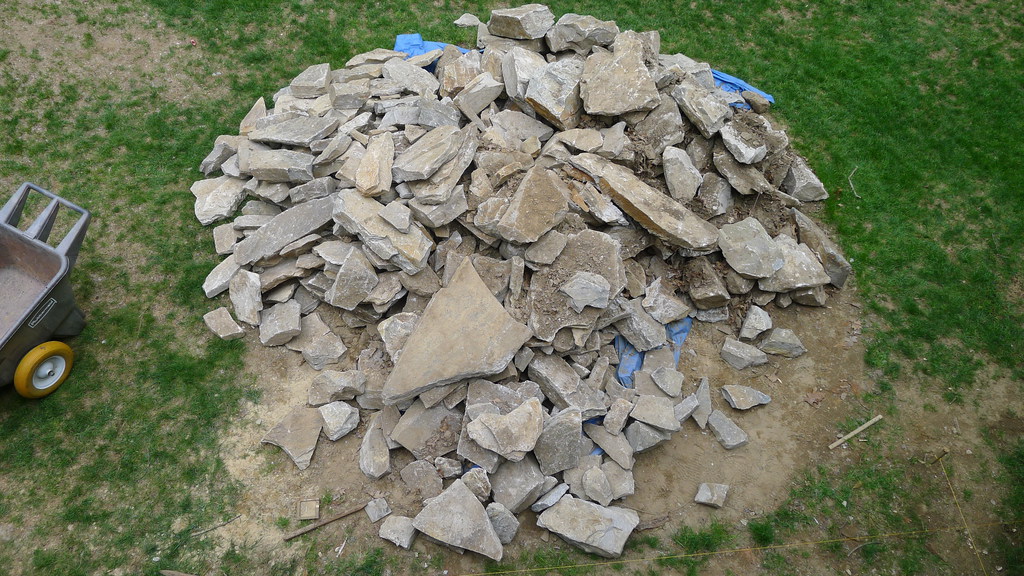
And here’s what the wall will be built with. That’s about 10-ton of stone. It all looks gray, but there’s actually quite a bit of color in it- orange and red to be exact. Some of those rocks go about 150, maybe 200 pounds. Those are the ones I’ll want to get things started with. Best eat my Wheaties tomorrow for breakfast.
Oh, and the digging isn’t done yet. It’s just done enough that I can start laying some wall now. The wall is going to continue out from under the deck and create a semi-circle going up the little hill there. The Wife can do some more planting or something there when it’s done.