Categories
DIY Notweet

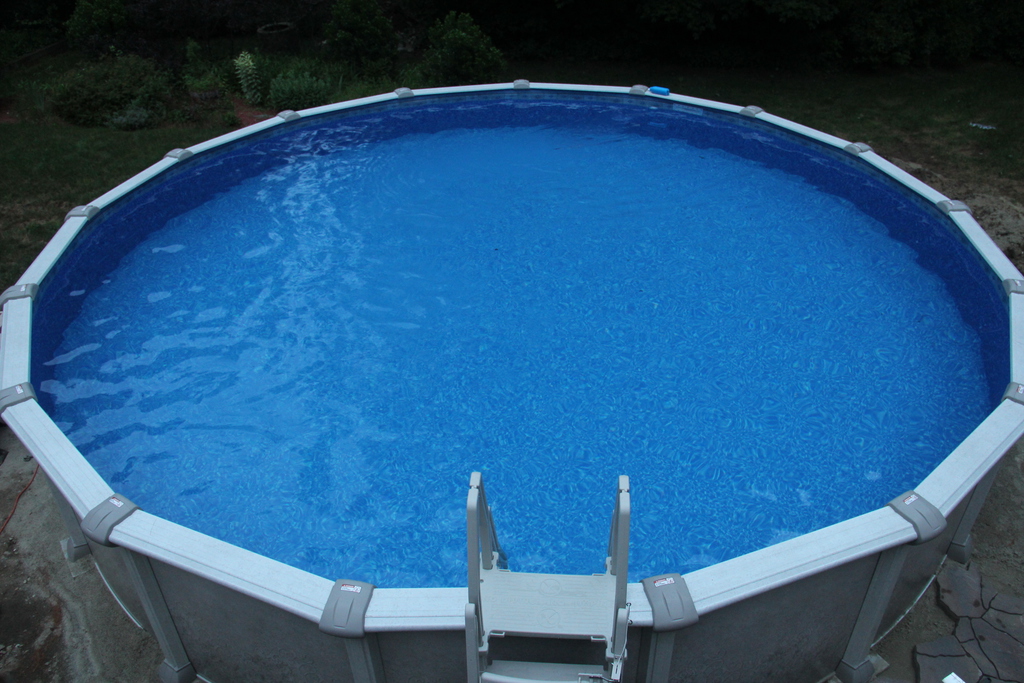
Pool’s Open

image

Well, sort of.

Mainly, I wanted the cover off because I was concerned something might have been damaged during the winter freeze.  There were quite a few pops and pings on the coldest nights and then, when things finally started thawing, I had a steady trickle of water from the skimmer.

Which made no sense, since there is a plate on the inside covering the skimmer opening; the skimmer itself was covered by the winter cover and finally, I’d drained the pool well below skimmer level.  So why was water coming out of it?

Given all that, I was a bit anxious to get the cover off and see what the deal was.

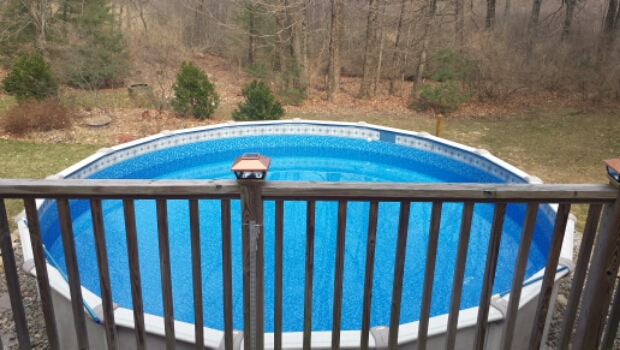
Thankfully, nothing seems to have happened.  No leaks, no damage anywhere.  Just one very large block of ice.  Give it another week or two and I’ll be able to hook up the filter and we’ll be in business.

Categories
DIY Family

Today’s Project

image

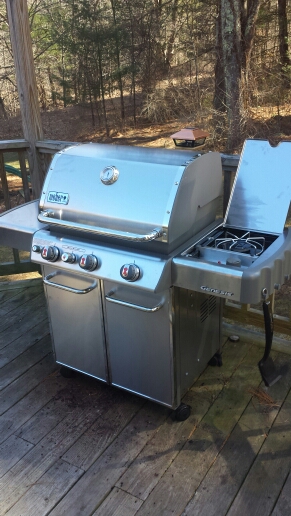
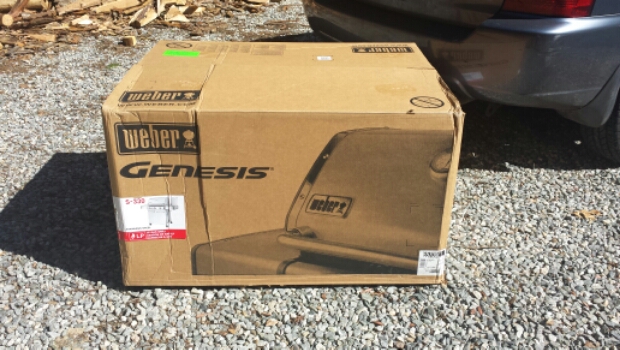
Our previous Weber gas grill has served us well for almost 15 years.  They weren’t 15 easy ones either.  It’s completely exposed to the elements.  Many times the cover was left off, including the entirety of this past Winter.  I like to think of it as well-seasoned.

When the grease pan on the bottom finally rotted out and fell off from rust, it was pretty obviously time for a new grill.  It’s not like we don’t get lots of use out of it.  Hopefully, this new one will serve us as well as its predecessor.

UPDATE:

image

Here it is, all assembled. The boy helped me put it together. Using a socket wrench flummoxed him for a bit, but he got plenty of practice and I was in no hurry. I find that’s important, that there be no timetable, when he helps. It’s more for me than him. When time is pressing, I tend to take over and he just sits and watches. Today, I sat back and let him figure things out and also offered little hints where I could. My main job was to make sure he finished the job.

Anyway, it’s a handsome enough contraption. Hopefully it cooks as good as it looks.

Categories
DIY

Drain Pipe Angioplasty

One of my favorite nuggets of wisdom I remember is one that originated with my Dad’s Dad. It’s pretty straight forward: “There are two types of people in this world, fools and plumbers.”

I remember this anytime something goes wrong with something plumbing related in the house. The main problem is that plumbers are expensive and difficult to get to show up for anything that isn’t a 3+ hour job. Thus, when the drain for the sink gets clogged, I’m pretty much forced into the role of “fool.”

The Wife texted me 2 weeks ago about the kitchen sink getting backed up. I was out at a racquetball game at the time. I came home and the next morning, tried to flush it with Drano or Liquid Plumber or what-have-you to no avail. So I snaked it, got things flowing again and declared victory.

The Wife texted me a week ago about the kitchen sink getting backed up. I was pretty sure I’d been down this road before since, once again, I was at racquetball. Once again, the next morning I snaked the pipe and unclogged it. Once again, I declared victory.

The Wife texted me on Monday that the sink was clogged. I came home from racquetball (of course) and tried things out and the sink seemed to be draining, so I left it. I wasn’t declaring victory, though.

Last night, the Wife texted me a picture of the sink backed up.

Based on my previous failures, I hypothesized that I was dealing with a grease plug that my snake was penetrating but not really clearing. What I needed was something that could essentially scrape the inner wall of the pipe all the way to the junction with the 4 inch pipe at the other end. I toyed with the idea of a Franken-monster snake with pipe cleaners attached to it. After a bit, I decided a trip to a HIC might be worth the trip for a decent solution.

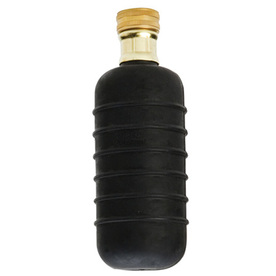
So today I went to Lowe’s and came home with one of these:

It wasn’t this one exactly. The one I got was appropriate for the pipe size I was dealing with.

After digging out and thawing out a garden hose from our attic, I went to work. The instructions say to insert the bladder into the pipe, then turn the water on to full blast to use water pressure to clear out the pipe.

I didn’t follow directions.

Instead, I snaked that sucker down through the pipe. It turned out to be a bit tricky since the coupling between the hose and the bladder made it difficult to navigate through the couple of right-angle turns in my pipeline. It also got hung up at pipe junctions. But, it did push down through a good ways. At that point, I got brave and had the Wife turn on the water, slowly. (I also made sure to have a bucket under the pipe where I was working.) After a few seconds water came pouring out the pipe. So I still had a clog.

So I continued to work the thing down through the pipe. My next attempt with the water went better. Nothing came back up the pipe and when I went into the basement, I could hear the water rushing through the pipe system.

So consider this a somewhat endorsement of the device. Note that, if you choose to use it as instructed you’ll need to make sure there aren’t alternative trunks between the bladder and the plug for water to flow through. No pressure that way and you might get water unexpectedly running up through a sink elsewhere in the house. Also, if there are a lot of turns in the drain pipe, then it will be very difficult to “snake” the pipe with this and a garden hose. The 2 right angles I had to deal with were difficult enough. If you’re situation meets these conditions, then this little device can perform a nice little bit of drain pipe angioplasty.

So yes, I’m once again declaring victory. Third time’s the charm and all that.

Categories
DIY

Backsplash Tile Job

It turns out installing tile is a lot like every other project I do. Tons of prep work followed by 5 minutes of payoff work. My Dad and I spent the day installing some mosaic tile for our kitchen backsplash to replace the previously painted drywall.

The hard part was deciding on how to deal with the pattern. It’s hard to explain without seeing the actual tile sheets, but each sheet covers a square foot, just not in a square. Because of the mosaic pattern within the tile sheets, the edges are designed to interlace with successive sheets so that it’s virtually impossible to tell where one sheet ends and the next begins. The edge forms a pattern that repeats every 6 courses of tile within the sheet and in order to maximize tile usage, we took some time to figure out how to work with that.

Once we figured that out, we started cutting. Since it’s a kitchen, there are light switches and outlets all along the wall. All hail the electrical code! Actually, it’s nice when you’re using the kitchen, but cutting tile around all those outlets and switches is a PIA. We had to pull the individual tiles off the sheet to cut them. We managed not to screw up a single cutout for the outlets, certainly that defies some law of probability.

So after all the layout stuff was finished, we’d butter the wall and place the tile which, as I noted earlier, is the payoff part and took less time than any other step in the project.

So, with all that said, here’s the before and after results:

Now, they get to sit for a bit while the mastic sets. Then, the grout job begins, probably on Sunday.

Categories
DIY

Garage Door Opener Update

When last we’d spoken of this saga, I had broken the carriage that runs in the track of the new garage door opener. The carriage has an arm that hangs down and is attached to the garage door. Additionally, the carriage catches on a “bullet” (Genie’s term) that’s on the belt. Thus, without the carriage the garage door opener is useless. I’d broken the carriage while trying to get the opener to properly detect an obstruction under the door such that it would stop travelling down and then reverse and go back up.

The replacement arrived from Genie today, free of charge. Many kudos to Genie for that. So I spent about an hour reinstalling the carriage. It’s a time consuming operations because the track has to be disassembled to remove the old one and then reassembled with the new one in place. In order to disassemble the track, it has to be disconnected from the wall and the motor. Oh well.

The good news is the operation is a straight-forward one, regardless of the tedium involved. I had everything back hooked back up in less than 30 minutes. I proceeded through the setup process again, upper and lower limits, and then tested the force-close for the door. I had the same results as last time. Luckily, I didn’t break the carriage this time around.

What I noticed this time around is that the track bowed when under strain. In fact, if probably bowed a good 2 inches or so. Which got me to thinking that the motor probably wasn’t sensing force so much as it was measuring distance. Or, more correctly, the travel distance of the belt. Why else would the setting the lower limit be required prior to testing the “force close”?

Anyway, if it was measuring distance then the flex in the track was probably enough to allow the belt to travel such that the motor CPU simply thought the door was in the full down position. Thus, a simple way to fix the problem was to put a stop above the track to prevent it from flexing. So I cut a 2×4 to length so that it ran from the track, while in it’s normal unstrained position, up to a joist directly above the track. The 2×4 simply blocks the track from flexing upwards like it had been doing, thereby eliminating any false travel i.e., travel that wasn’t due to the door going down.

On the next test, the opener performed as expected. Without the play from the track flexing, the motor stopped and reversed direction with the obstruction under the door preventing it from closing all the way.

With that problem fixed, it was a small matter to complete the setup, including getting the remotes to work with the new opener and the other opener (an older Genie model). I also managed to get our car’s built-in garage door opener to work with the new opener. So we are finally back to square 1 where garage doors are concerned.

Categories
DIY

A Frustrating Afternoon

Our garage door opener was broken, and I needed to fix it.

A couple of days ago, our Genie garage door opener started acting funny. It wouldn’t close all the way, inexplicably reversing at some point on it’s way down. With a bit of persistence, it could eventually be made to close. Afterwards, it seemed like it was OK.

When the problem recurred a second time, I started investigating. That’s when things went downhill fast. I thought perhaps the “force close” setting was off, so I tried adjusting that. The power started cutting out entirely for the board. I eventually ended up calling Genie customer support and after about an hour on the phone and trying various things and debugging, it was determined that the circuit board had failed.

The unit was out of warranty and the support person told me they could send out a new board, but it was $85 dollars or so. She advised me that with the age of the opener, my money might be better spent on a new more modern opener since the motor was near the end of its life as well. After checking the prices, I ended up following her advice.

Today, I spent the afternoon installing the new garage door opener. It’s one of Genie’s SilentMax models, which is belt driven. I’d have preferred the chain version, but the belt versions were all that was available at the hardware stores. The install wasn’t overly difficult and most of the tedious marking and measuring had already been done to install the previous unit. It only took a couple hours for me to take the old one down and get the new one up in its place. I’ll add that the instructions supplied with the unit were excellent.

I then followed the instructions in the manual for setting up the unit. The process consists of setting the fully closed point, the fully open point and then testing the force close. The force close test makes sure the unit will stop closing and then reverse and open if there is an obstruction in the way of the door. I couldn’t get the closed limit set properly so that the force close test worked. So I kept incrementally adjusting the down limit. The problem was, I could here the motor straining under the load, so I couldn’t keep doing this.

It was while I was struggling with that whole sequence when I heard a loud pop. Shortly after that, the carriage that serves as a means to connect the door to the belt stopped travelling with the belt, and I realized that in less than a day, I’d broken the damn thing.

My hope was I could possibly fix the carriage, but after another call to Genie, I was disabused of that notion. It was broken, no fixing it. The only good is it is under warranty and they sent me a replacement carriage, which won’t be here until later next week.

So after an afternoon’s worth of work, I was back where I’d started. Our garage door opener is broken, and I need to fix it.

Categories
DIY Patio

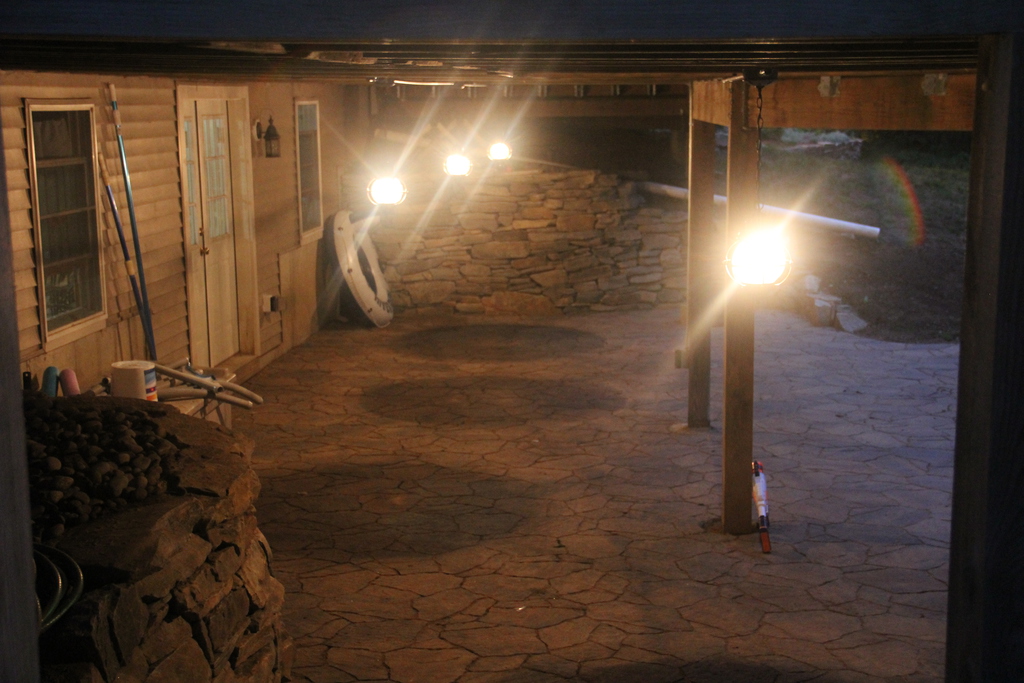
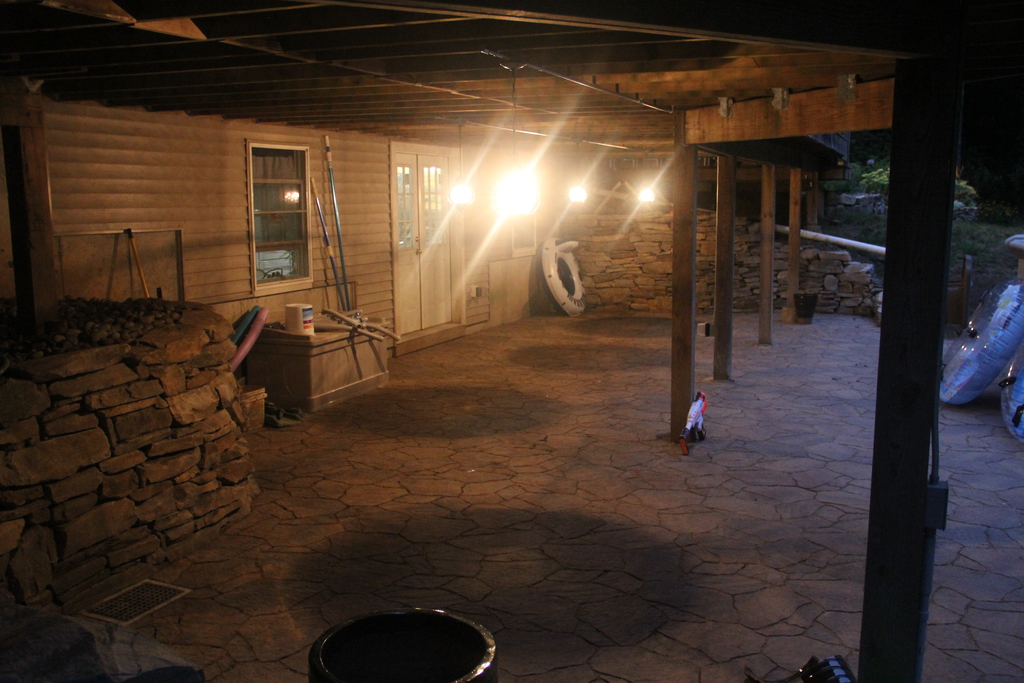
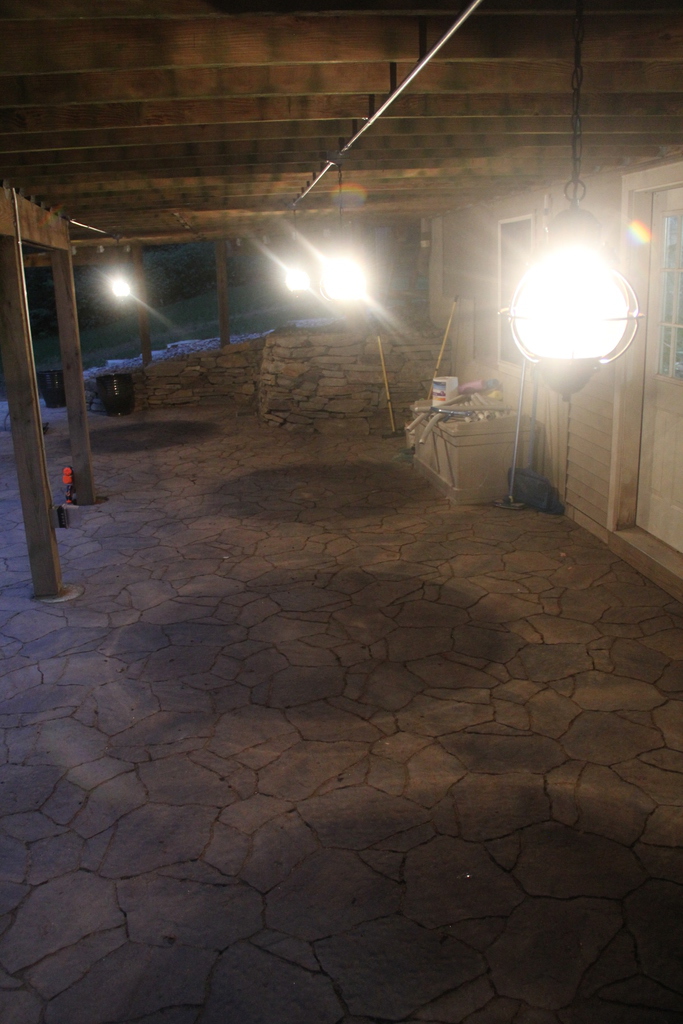
Let There Be Light!

I’m not much of a photographer, but I think these will do.

Categories
DIY

Pool Chemistry

We had a pool growing up and I actually did a fair amount of the maintenance for it, especially as I got older. So when we got our own pool this Summer, I had a fair amount of practical experience with pool care. Still, there is a difference between being the laborer versus being the guy responsible. Then, I was the laborer. Now, I’m the guy in charge of the pool.

My first learning experience was with our sand filter. Growing up, we had a DE filter and it basically had 2 operating modes: filter and backwash. The new sand filter has filter, backwash, circulate, rinse, closed, winter and a couple others I’m forgetting. When I started running it I had it set to “circulate”, which seemed reasonable at the time because I hadn’t noticed the “filter” option. I realized something was wrong the first time I vacuumed and realized nothing was getting accomplished.

Filter issues aside, the biggest deal with a pool is chemistry. Namely, maintaining pH, alkalinity and free chlorine levels such that swimming is a pleasant experience. All three of those are, to a certain degree, interrelated. Arguably, the most important of those is the free chlorine level. That’s what keeps the pool clean and sanitary. The trick is, too much and the pool’s liner or filter life can be greatly shortened. Too little and the water is not that pleasant to swim in.

Fortunately, we got off to a good start and never had any problems, though I did have one minor issue that made me go to the web looking for answers. As part of our “kit” we got from the installer, our filter has a chlorinator. Within the first couple of weeks, I went through 2 cartridges of chlorines tablets for the chlorinator. I asked at the store if that was normal and they indicated that a cartridge should be lasting me a month or so.

So, I started my search and came across Trouble Free Pool, which is full of useful information about pool care and chemistry. Since I wasn’t having any real water issues, mainly a chlorine level issue, I opted to try the advice from there using liquid chlorine to maintain appropriate chlorine levels. I haven’t spent any money on the fancy test kits recommended there(I use test strips), but I’ve saved myself some money not buying expensive chlorine packs while still maintaining crystal clear water.

As for Trouble Free Pool, they’ve got a wealth of information there about pool care and the forums are a civil and an informative place to find help for dealing with problems of all sorts. It’s definitely worth a look see for pool related issues.

Categories
DIY Patio

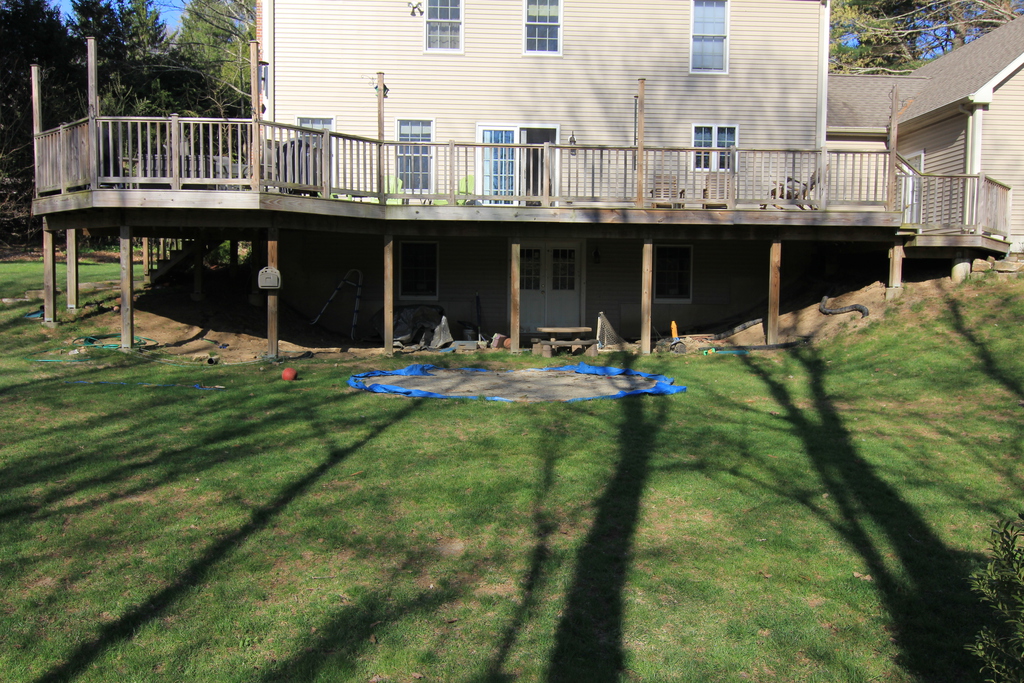
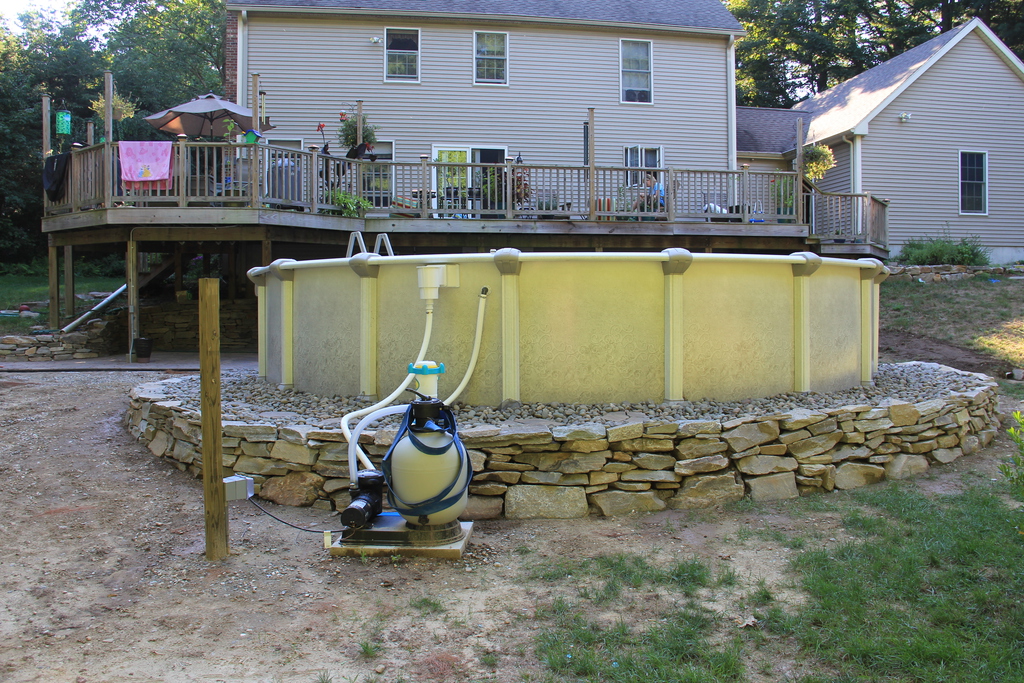
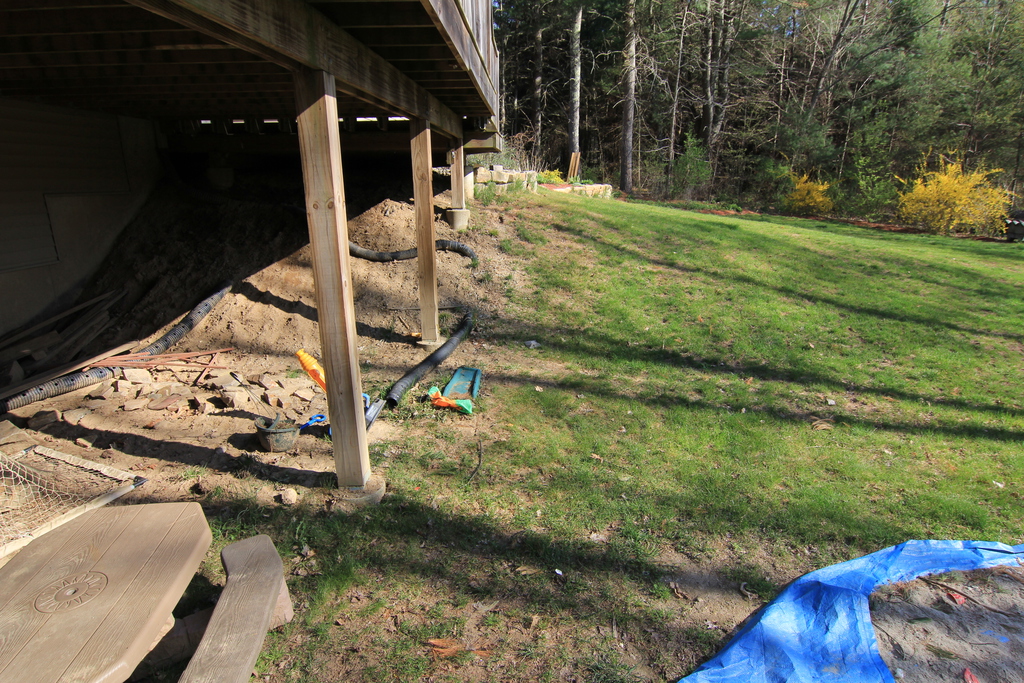
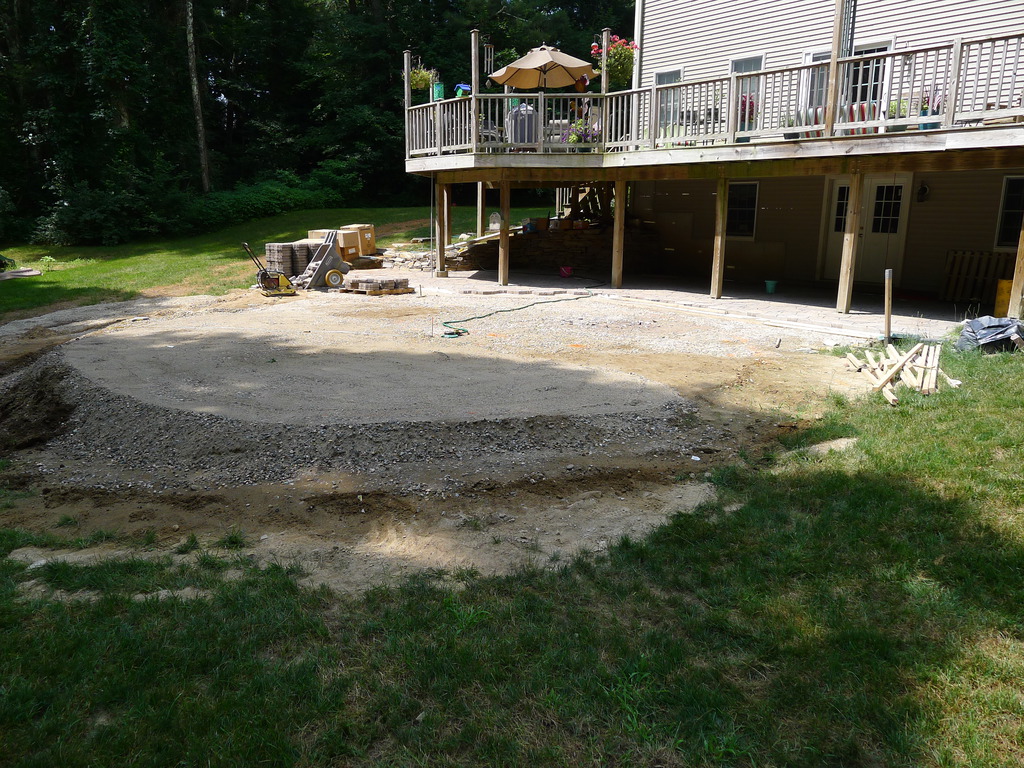
Before and After

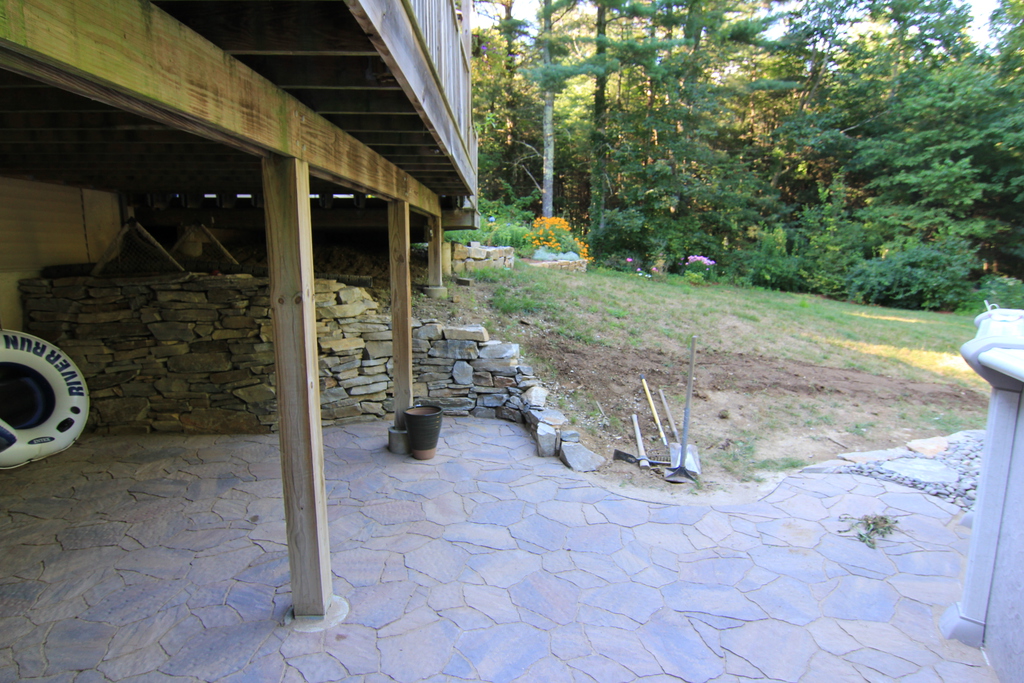
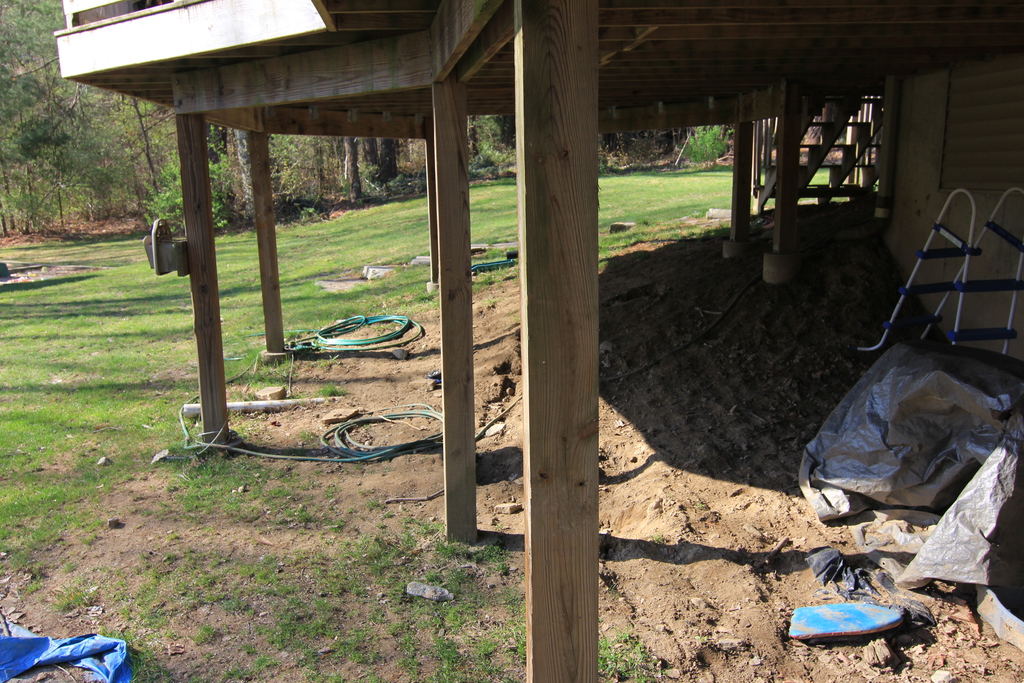
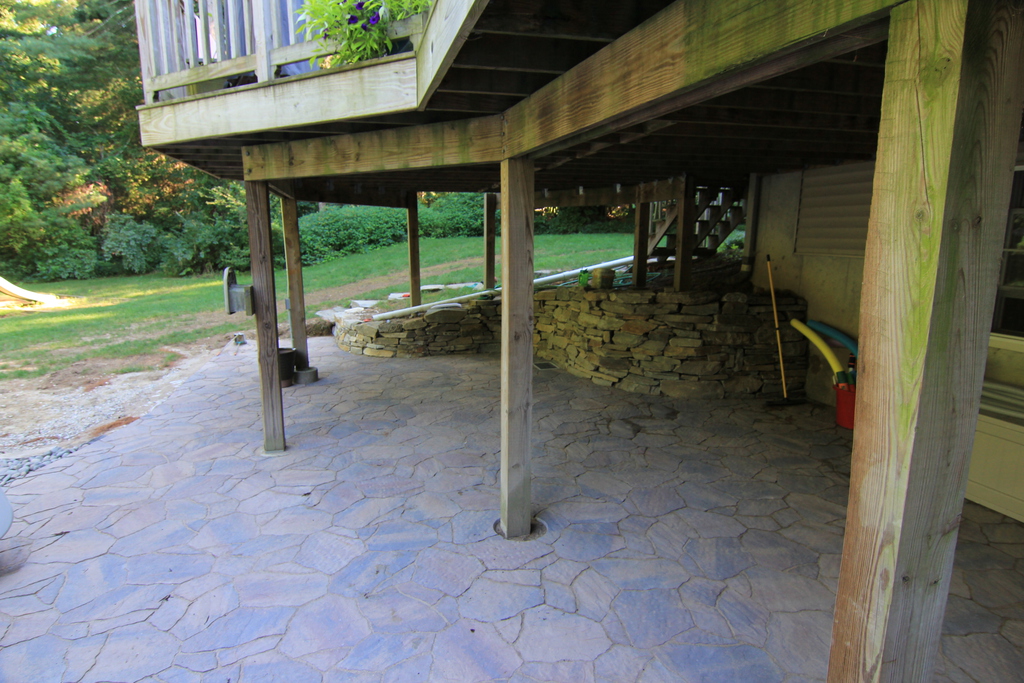
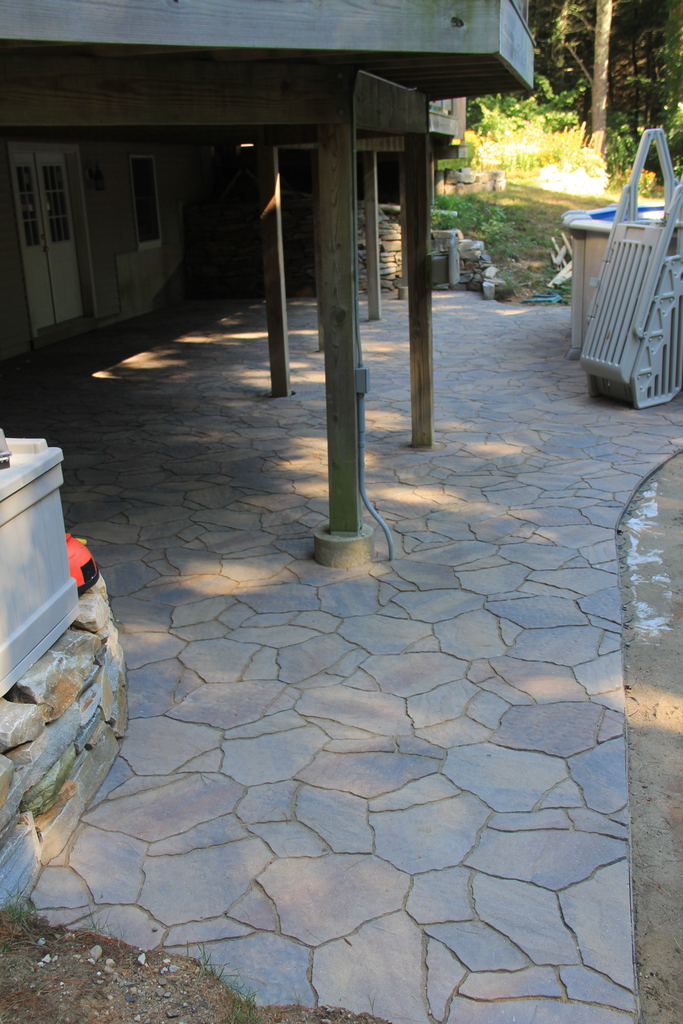
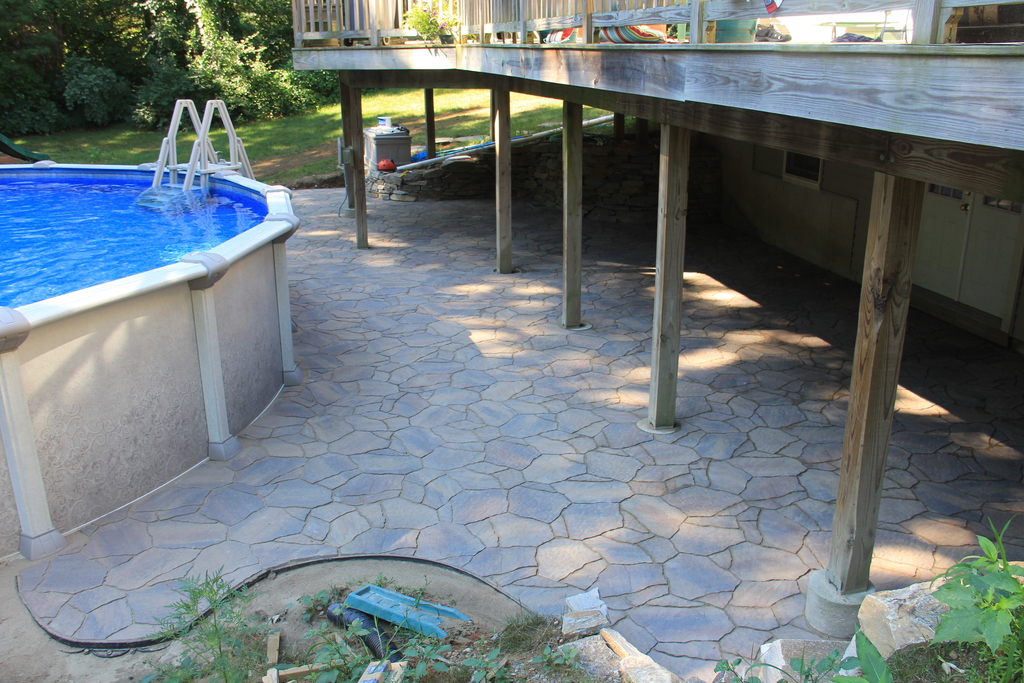
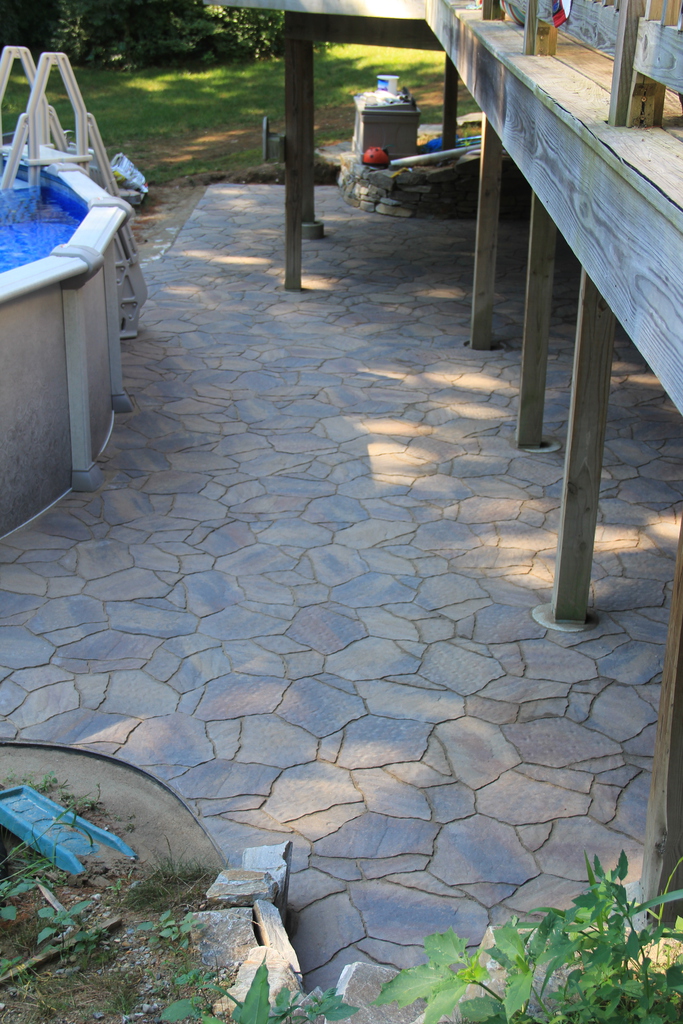
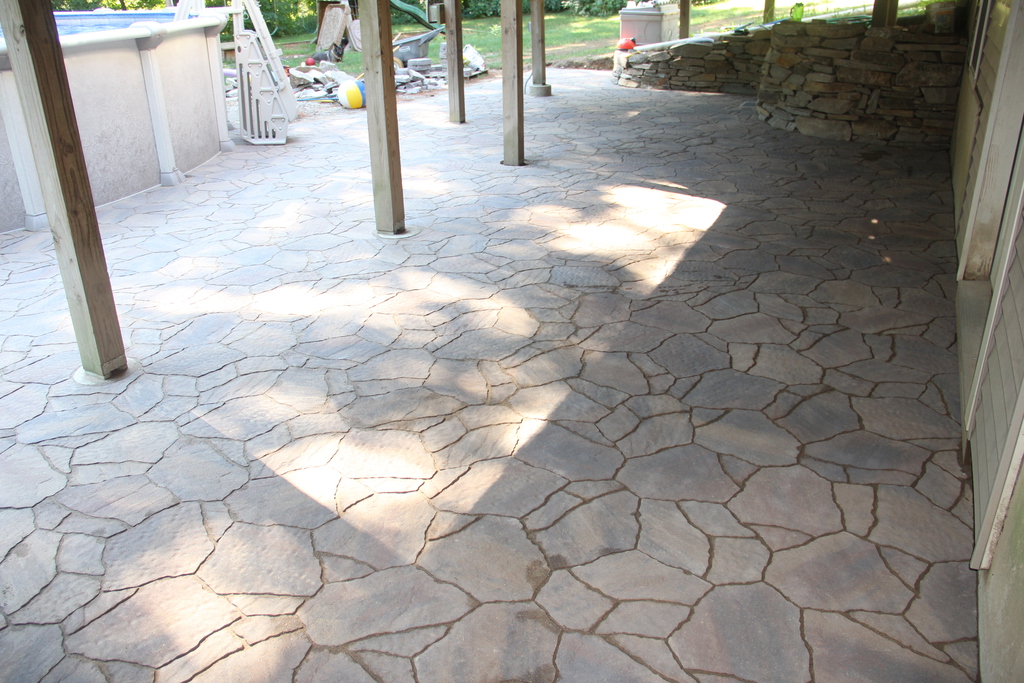
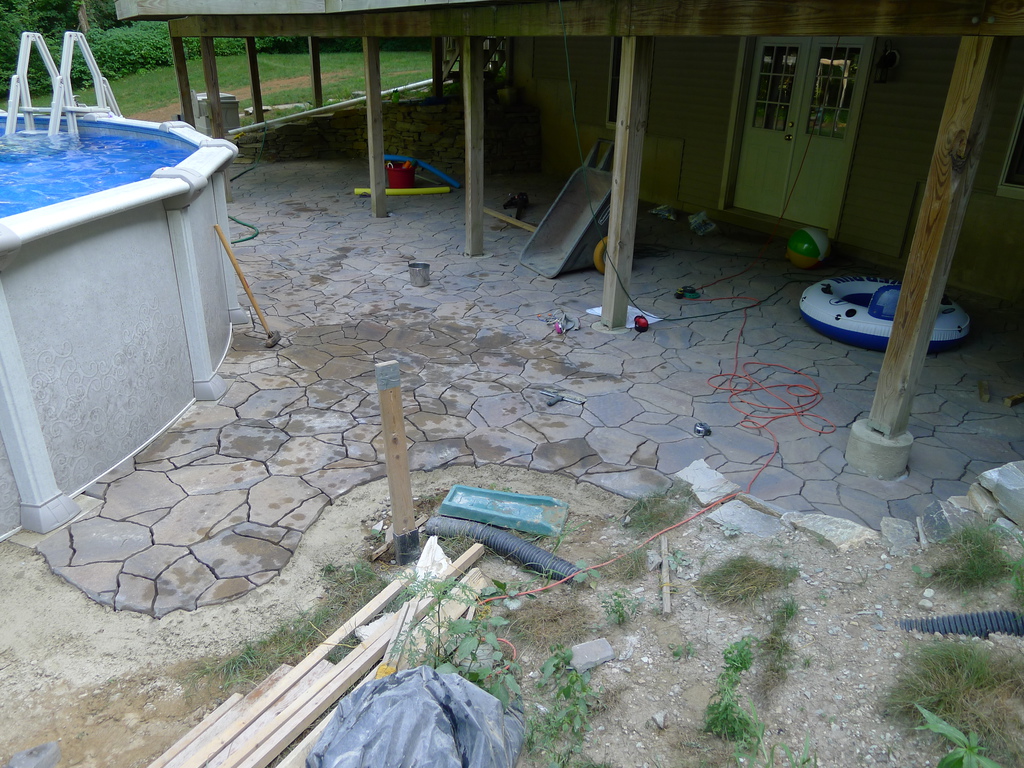
Now that it’s basically completed, I thought some before and after pictures for the patio area were in order. My first pictures were taken on May 1st, while today is, well, today. I wasn’t able to work every day on it during that time between weather, vacations, trips and other duties or logistical delays. I’d guess I have about 250 hours into it as of today.

First, a wide view:

Tough to see much there with the pool dominating the foreground. And yes, I’ve got to get some grass growing again. I did say “basically” done.

Now, here’s the left side as viewed from under the deck:

Just a little different. Now the right side:

As I mentioned earlier, the first order of business will be to get some grass growing again around the pool. Next year, I think, we’ll tackle some of the landscaping in the immediate area of the patio.

Here are some statistics about the scope of the project:

  • There are 20 tons of wall stone in the 3 retaining walls.
  • There are 20 tons of 3/4″ stone used behind the retaining walls and under the patio.
  • There are 15 tons of 3/4″ processed gravel (this is a combination of sand and gravel) in the project, about 10 of those are under the patio and the remainder is under the pool.
  • I had to move about 30 tons of earth between digging out for the retaining walls and then down to set the patio height. Most of that is under the pool, the rest I spread out in different parts of the property.
  • There are about 11 tons of pavers in the patio.
  • There are roughly 7 tons of sand, a couple under the pavers and the rest under the pool. There is another quarter ton of polymeric sand filling the paver joints.
  • The apron around the pool has about 3 tons of 4″ river rock.

Suffice it to say, it wasn’t a ton of work- it was many tons of work.

Categories
DIY Patio

Patio Pix

When this whole thing is done, I’ll have to put a page together showing the various stages of progress. As originally envisioned, the project is complete. However, due to realities on the ground, I have a final stage to complete- construction of a small retaining wall around the pool. Once that’s completed and then filled with river rock around the pool, everything will be done.

Categories
DIY Patio

Pavers Done

Polymeric sand.

In two words, that was my problem with finishing the pavers. That’s the short explanation. The long explanation is … considerably longer. And follows.

First, a quick education. Polymeric sand is special sand with an acrylic polymer that when exposed to moisture, activates and forms a pliable matrix, essentially making the sand a solid mass. A simpler explanation is that polymerized sand is to pavers what grout is to tile.

Polymerized sand is highly sensitive to moisture. There doesn’t need to be a steady stream or puddle of water, just dampness in the pavers is enough to activate the polymer.

So, yesterday was a beautiful day. Sunny with a few clouds with reasonable humidity levels. Unfortunately, it followed a couple of days of heavy persistent rain. The pavers were soaked. A fact that was made quite clear over the course of the 13 hours I spent working on them yesterday. For giggles, I’ll note that I was told it would only take a few hours to get complete the sand portion of the project. If only.

The pavers next to the pool dried first, a not inconsiderable amount of area, so that’s where I began spreading sand. I assumed that the rest of the pavers would dry out as I worked. I was only partially right. More pavers did dry out, but only those that saw persistent Sun. The pavers sheltered by the deck continued to linger with their dampness.

I started around 9AM. I put all the edging around the exposed portions of the paver edges. I then started sanding the area next to the pool, which was exposed to a steady diet of Sun and very dry. As I worked my way along, more of the pavers dried, but spotty patches of dampness still remained. With the rep’s warning that “Make sure it is ABSOLUTELY dry before spreading this sand…” echoing in my mind, I decided to try spreading it over a small area where there were a couple of damp spots. Just the dampness was enough to activate it. So I was stuck at that point.

I decided to compact the area that I’d done. I worked through it, hoping in the meantime the remaining damp areas would dry out. I started running a fan over those areas around 1 o’clock. It helped, but there was still a lot of dampness. Around 5 o’clock, I decided it was time to take more drastic action.

I pulled out a hair dryer and went to work.

It worked, but now time was against me, as well as a number of other factors. I still needed to finish spreading the product, compact it, re-spread it, re-compact, finish spread and then wet it. I now only a couple hours or so until I had no sunlight. Trying to think ahead, I checked the weather and our local forecast was showing the possibility of a thunderstorm in the early morning. With the humidity, I also started thinking that morning dew would screw me up.

In short, all the factors I could think of lead me to believe I had to finish it last night. So I continued working.

One thing about spreading sand over pavers that is hard to appreciate is the film that coats the pavers. The instructions on the bag and my inexperience with the product led me to believe I needed to clean the pavers thoroughly. I could never completely remove that haze from them though and finally, around 9:30 last night having filled, compacted and swept it several times over, I decided it was time to start wetting and hope I could wash the sand off.

By that time, I was working by flashlight. I had a porch light to help, but none of it was enough to really allow me to see the state the pavers were in. Making matter more difficult, the acrylic caused a foaming in the water which would have made it difficult to see the sand in good lighting conditions, let alone what I was dealing with.

By the time I’d finished wetting the pavers, it was almost 11 o’clock. I could still feel the grit under my shoes. But there was nothing more I could do. I couldn’t see the grit and couldn’t tell if I was actually moving it or not. Exhausted and sore, I finally wrapped things up for the night. Thus, my disappointed posting from last night.

A slight tanget- polymerized sand really sucks. I mean really sucks. The clouds of it from sweeping stick to sweaty clothes and skin. It goes up your nose and creates weird boogers. It gets in your hair and acts like a nasty mousse. There is literally a layer of muck on you after working with it.

This morning, I woke up and came down around 6:30 to see what kind of mess I had to deal with. As I’d suspected, I still had tons of sand and grit on the pavers surfaces. Also, as I’d suspected, it looked awful. Pavers that had dried had a haze that completed obscured their real color pattern.

I wasn’t without luck though. The overnight humidity had kept the pavers drying and sand from setting completely and I quickly figured out I could still clean the pavers using one of the spray settings on the hose nozzle. So I set to work with that job.

It was slow.

I essentially had to go paver course by paver course, washing each paver and pushing the sand down slope. About halfway, I had accumulated so much extra sand that I was having difficulty pushing it with the water from the hose. I then had to resort to a combination of sweeping it with a rubber broom and pushing it with the hose water.

The process was tedious, but it yielded results. I was able to walk on the pavers without feeling the grit under my feet nor the tackiness from the acrylic material. It ended up taking me several more hours and repetitions of sweeping, but I finally finished up earlier this afternoon. Pavers that have dried now look proper, without the haze from the acrylic. I’m not completely happy with the edges by the walls, but there’s only so much I can do there. Water tends to pool and it’s difficult to get the sand to flow away from those spots.

It never did rain this morning. Knowing that might have saved me a lot of work last night, but I wasn’t willing to gamble. Probably due to impaired judgment from breathing polymerized sand. Ironically, letting the sand sit wet for several hours overnight seemed to work in my favor. The surface sand could still be removed, but not at the expense of the joints that I wanted filled, so I was able to avoid gouging the sanded joints.

Whatever mistakes I made, the main thing is I was able to make it work and satisfactorily complete the project. Last night, I was concerned I might have to redo the sanding. Tonight, I’ll rest easy knowing I’m all done. A pleasant change of circumstance. I’ll post pictures when things have dried out a bit more.
Categories
DIY Patio

Pavers Done?

I just finished up about 30 minutes ago after a marathon effort to get the sand in before tomorrow.  I’m too tired go explain why right now.  I’m also apprehensive about the sand.  I think there’s a good chance it didn’t come out right.  More after a night’s sleep.

Categories
DIY Patio

Paving Done

This is the best shot I could get of the final section of pavers I’ve laid. Actually, a friend came over to help me out so I shouldn’t claim I did it all myself. With it being as hot and oppressive as it was, that’s a good friend. Thankfully, we didn’t have a lot of pavers to lay so the work didn’t take us all day, we completed it a little after lunch time.

The little inner curve will give the Wife a place to plant a bush or tree or something, while the other section gives a path for people to access the yard from the patio. The guy who helped me out actually convinced me to go this rout versus what I originally had in mind. It took us a few more pavers to complete it, but I like his result better than what I had in mind.

At this point, I have to put the retaining trim in place, then spread the sand and perform the final compaction. Almost there.

Categories
DIY Patio

The Pool

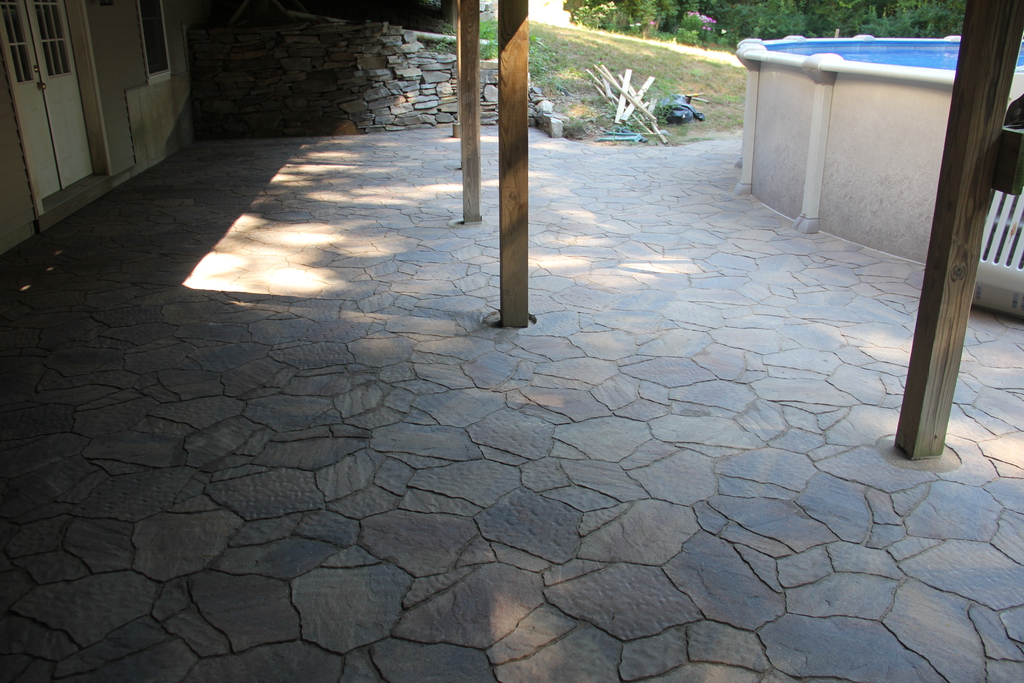
The Wife has beaten me to the punch by posting pictures on Facebook. But, I was doing this before she was on Facebook so it’s not official until it appears here. So, without any further ado, our new pool:

The boy was the first to get in the pool. The lass and I joined him for a bit as well. We ended up waiting all day because with the pool going in, I have more work to do:

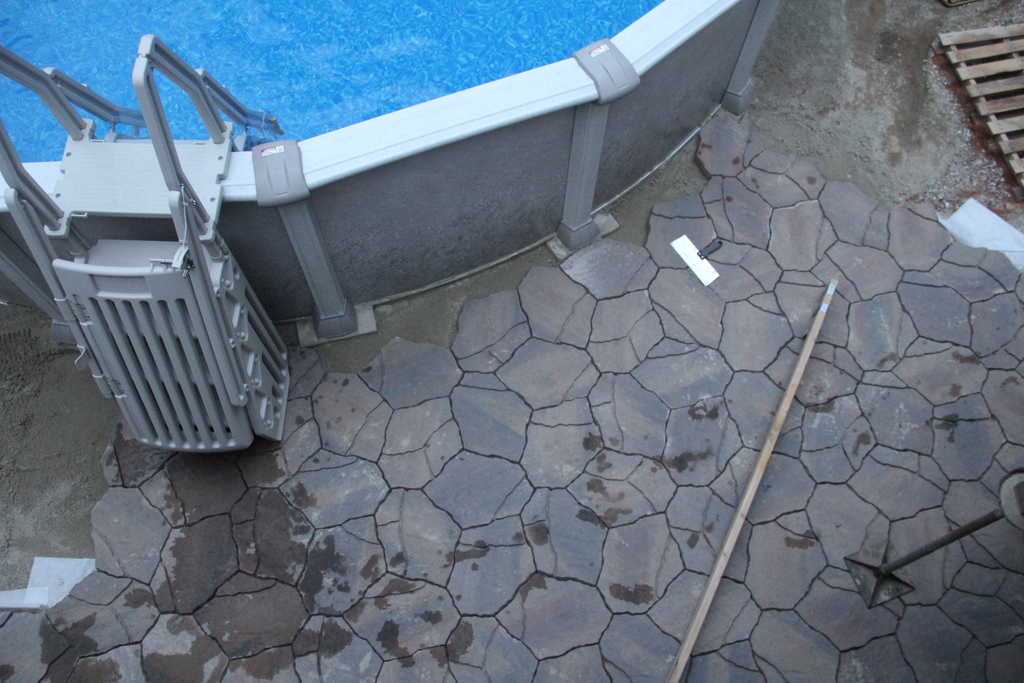
I spent a good part of the morning and early afternoon putting all those in. It’s a slow process since I can’t really spread the sand and skreet it all at once. I have to spread the sand as I go, so I can only get a couple of pavers down at a time before I have to work the next section of sand. Plus, I’m putting slight grade so water won’t run or puddle next to the pool so that makes it a little trickier.

I’d hinted in a prior posted about changes to the patio design, the stone wall being the subject of that post. These are a further part of those changes. My original idea for the contour of the patio really didn’t work well with the pool in, so I’m putting the extra pallet of pavers to good use. I’ll probably have to get more to complete it. The question is, how many?

So the timeline for completion gets shifted out a bit more. If I have to order more pavers, that’ll be longer yet. But I’ve got a plan in mind to make sure I have no extras, I’ll be sure to let you know how it works out.
Categories
DIY Patio

The First Rule of Design

I’m pretty sure I’ve seen this written elsewhere, but I’ll paraphrase it here: the first rule of design is that any design will not survive first contact with reality. The reasons for this are obvious to anyone who’s tried their hand at design: assumptions don’t pan out, facts on the ground change, etc. Personally, I always try to start with minimal designs because they tend to be easier to modify as needed.

This is where the pool will be going. When the installers showed up on Friday, they explained that in order to avoid having to install a fence around the pool, the pool walls had to be 48 inches above the surrounding area for 3 feet. The pool we chose happens to have 52 inch high sides, so that gives us a little margin.

As can be seen from the picture, that margin is not nearly enough. The site is now level, and it had to be built up with about 18 inches of processed gravel on the “downslope” side to make it so. It’s deceiving how a small grade to the ground can add up so quickly.

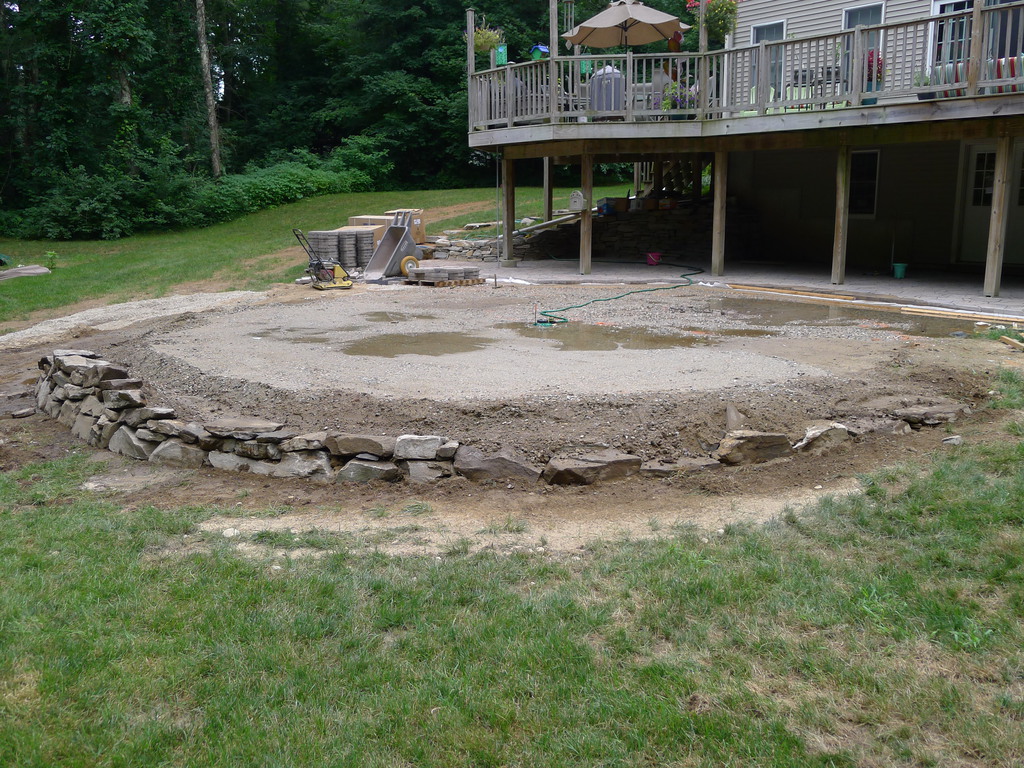
So, I’d toyed with the idea of putting a ring of stone around the pool but now I pretty much had a third wall project on my hands. It would be the easiest of the 3 walls to build, but it was something I hadn’t anticipated in the beginning. Fortunately, it all works out with all the other stone work we already have in the yard. Plus, I still have left over stone from the first two walls, so I was able to make some progress today:

There are more changes coming as well, but those are related to the pavers and patio, which I’ll document in another post on another day. Suffice it to say, the first rule of design has worked it’s magic on this project.

Categories
DIY Patio

Patio Update

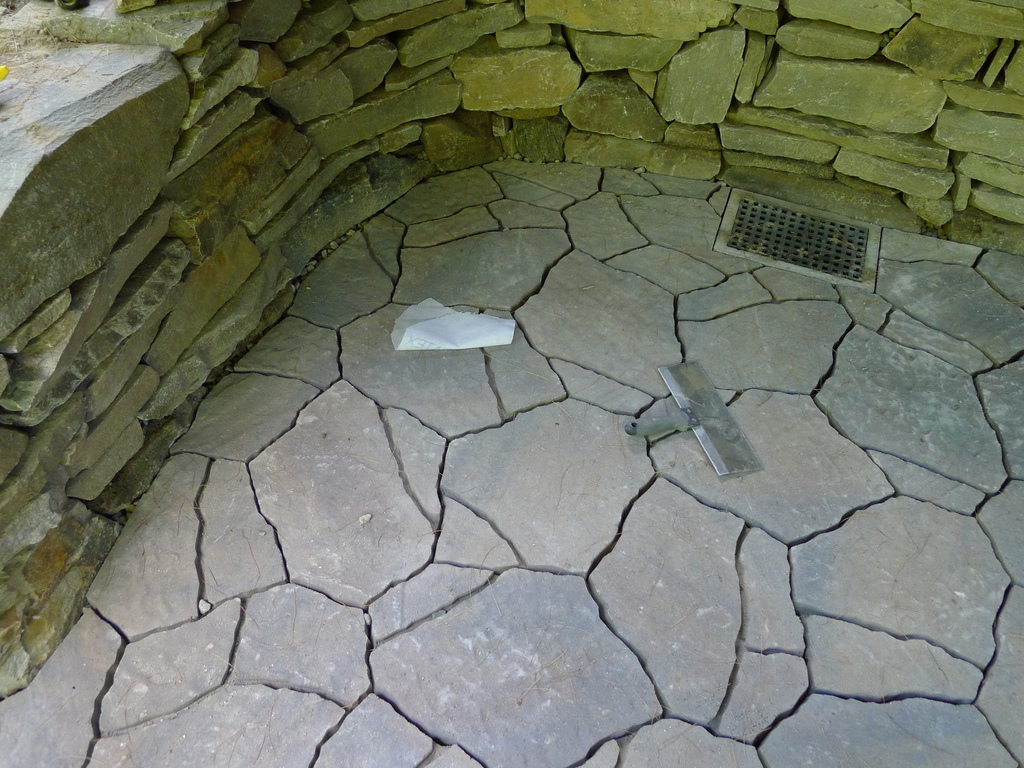
All of the field pieces are laid and now I only have cuts around the post piers. The field had been completed several days ago, but I only finished all the cut-in work around the stone walls today. Here’s a flavor of what I was dealing with:

Just follow along the line of the wall and around the drain to get an idea. Some of those took a lot of work to get right. When the cuts weren’t difficult, getting the piece in was because of the combination of sand and stone next to the wall that I couldn’t skreet. I had to do that part by hand, which was tedious.

I would have completed the cuts around one of the piers today, but I was going to make the final adjustments to the piece and when I set it down, the piece cracked into two pieces. I was so disgusted I decided I was done. Not the best note to end on, but I wasn’t going to spend another 30 minutes cutting the arc again.

Cutting pavers is a miserable job, especially in this kind of heat. By the end of the day, I was caked in a layer of paver dust from head to toe. Thankfully, my Dad had me a breathing mask for just this kind of work. I was also outfitted with eye guards and ear plugs, making it a thoroughly unpleasant way to spend a day.

Be that as it may, a lot of work is done and the end is in sight.

Categories
DIY Notweet

Stair Handrail and Balusters

It’s interesting to me coming back to my parents place and helping out with my Dad’s improvement projects. Growing up, I helped him out with many projects from tiling floors to acoustical ceilings, from decks to planting trees he pretty much ran the gamut.

Through them all, my role was clear- I was the helper. Of course, back then that made sense because what did I know about hanging drywall or fixing a sink? Dad knew all that stuff. That or he did a great job of making everyone think he knew what he was doing.

So given that background, it’s interesting to help out now because Dad clearly views me as more of an equal in the realm of carpentry. Getting my opinion asked about what I think is the best way to proceed is a big change from the way it was.

Not that he listens to everything I say. He’s still got tons more experience with this stuff than I do, so even if I might have my way of doing it, it’s still his project and his way will still prevail if he’s so inclined. Justifiably so as well sometimes. Like with the epoxy we used today to help secure the balusters in the stairs- I didn’t think it would flow as easily as it did. That made it easier to fill the holes the balusters sit in than I thought it would be.

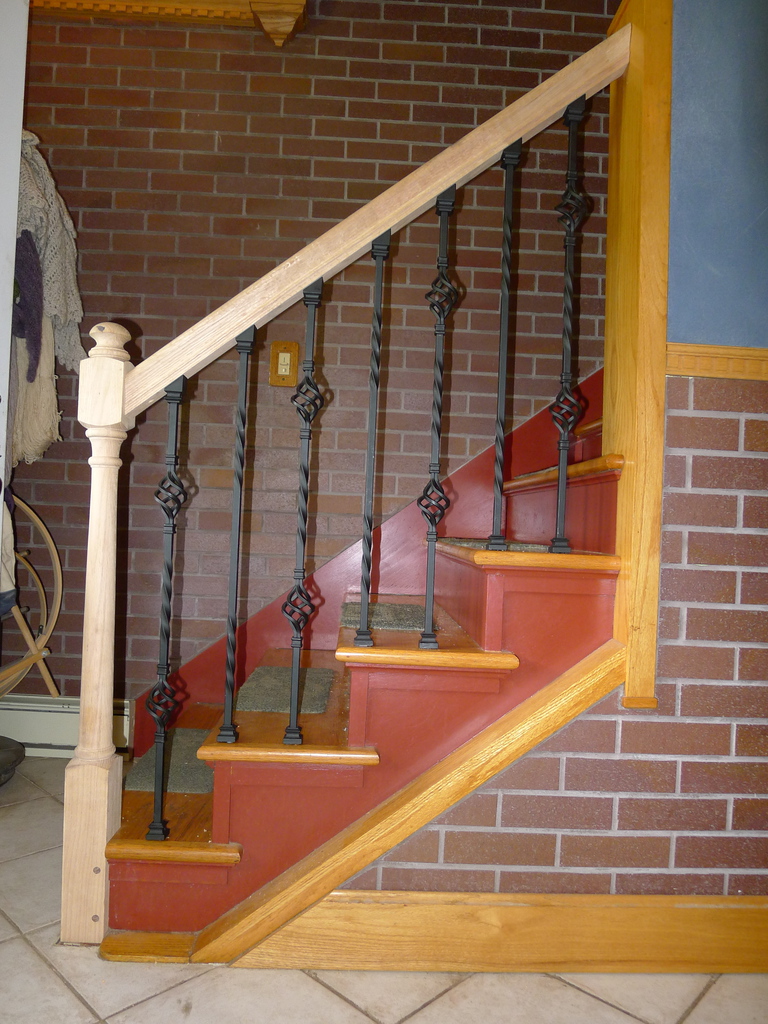
As for putting the handrail, newel post and balusters in, the process is basically as follows:

  1. Cut to height and install the newel post securely. There are hardware kits for that purpose, but in our case we just lagged it in from two sides. One into the stringer and the other into the steps.

  2. Cut the handrail to length. This step is complicated by the fact that the handrail has to be cut at the proper angles on each side so it fits flush against the newel post and the wall. We actually did this in 3 steps: first, cut it to a manageable length; second, lay it along the stairs and mark the angle against the wall; finally, set it against the wall and mark the cut against the newel post.

  3. Temporarily install the handrail- we just marked and drove in 3 inch wood screws into the newel post then tacked it in place against the wall.

  4. Mark the center of the baluster locations on the steps.

  5. Using a level, project the baluster centers up to the handrail.

  6. Measure the distance from the steps to the handrail. Then, add an inch or so for the portion of the baluster that will sit up in the handrail and another inch for the portion that will sit down into the tread.

  7. Now cut all of the balusters to length. Make sure to mark them all so it’s clear where they will go in the final assembly.

  8. Tape off the treads where the holes will be drilled for the balusters and tape off the bottom portion of the hand rail. The tape will make the cleanup from the epoxy and construction adhesive a lot easier. Also, tape off the portion of balusters that’s just below where they will insert into the handrail.

  9. Mark the angle the balusters enter the handrail or use a bevel gauge to coy the angle. Then, remove the handrail and drill the holes for the balusters. Make the holes a little deeper than necessary and about 1/4″ bigger in diameter than the balusters are. For instance, if the balusters are 1/2″ then drill 3/4″ holes.

  10. Now, where the balusters will enter the treads, mark the profile of the foot. Then, inside that profile, drill two smaller holes and a slight angle towards the center. These holes will be used to pour epoxy into, so something in the 1/4″ range should suffice. Just make sure they are well withing the boundary of the baluster foot.

  11. Now, drill the main hole the balusters will go into. Again, add 1/4″ to the baluster diameter for the hole size.

  12. Insert the balusters into the holes in the treads. Make sure all the feet and caps are placed on the balusters.

  13. Fill the baluster holes in the handrail with contractor’s adhesive, then install the handrail, including permanently attaching it to the wall. As this step is done, insert the balusters into the holes in the handrail.

  14. Lift the balusters up as high as they can into the handrail hole. Use a spring clamp attached at the bottom of the baluster on the stair tread to hold it in place. Mix some of the epoxy up and then pour it into the tread hole using the two smaller holes as an aid to fill it. Allow the epoxy to set before removing the spring clamp. Repeat this for each of the balusters.

  15. Remove the tape from the treads and the handrails, then set all of the feet and the caps (if used) using the set screws.

There are a ton of details that I haven’t gone into hear. In particular, the angles for cutting the handrail can be tricky to figure out. A not complete list of tools and materials needed for the job is a drill, spade bits and various sizes of drill bits, a screwdriver, a miter saw, a chop saw or a hacksaw, epoxy, construction adhesive, a putty knife, some paper cups, some masking tape, a level, a square, and a tape measure. I’m almost certainly missing something as well.

It took us an afternoon and a day to get the job done. Mostly, because of multiple trips to the hardware store for various items we realized we didn’t have like lags, screws and other miscellaneous tools. That’s what happens when you don’t truly know exactly what you’re doing. But we got it done, and it’s even pretty sturdy. All that’s left are the finishing touches like plugging holes and sanding and finishing the wood.

One more father-son project completed.

Categories
DIY Patio

1 Day of Pavers

I’m pretty beat, so I’ll save any technical explanations for another day. Here’s a shot of the progress I made laying pavers all day. In the heat, which felt worse than yesterday, remarkably.

I’ve got shots of the individual pavers as well as the clover leaf pattern used to lay them down. Like I hinted earlier, for another day.

Categories
DIY Patio

Waiting for Pavers

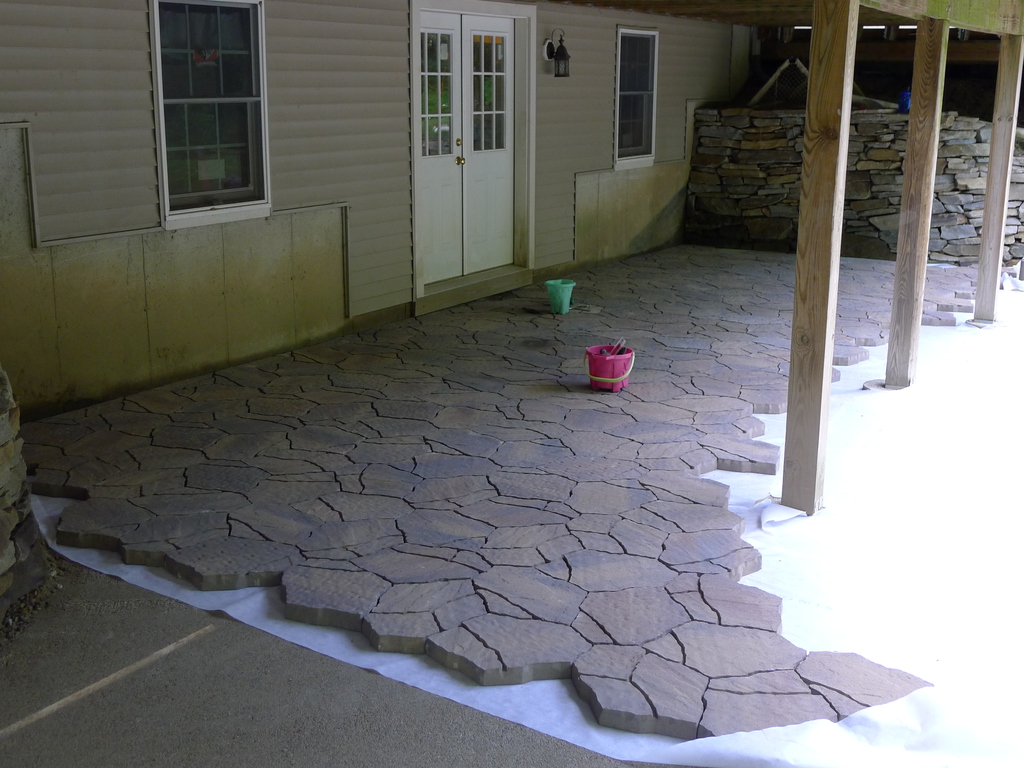
Almost all of the prep work is complete. All that’s left is the layer of sand that the pavers will rest on. That’s arriving today thank to our paver rep pulling some strings for me. The pavers arrive Monday- not sure when. This is the first picture where I think there is a feel of what it’s going to look like when the project is completed.

I noted before that actually building the walls took less time than all of the prep work. That’s going to hold true for the pavers as well- but even more extreme I think. Unlike the stone for the walls, the pavers are made to go together a certain way, so I’ll just set them and go. There will be details of course, but they’ll get taken care in due time. The majority of the pavers will be done within a day I’m willing to bet.

Categories
DIY Patio

The All In Point

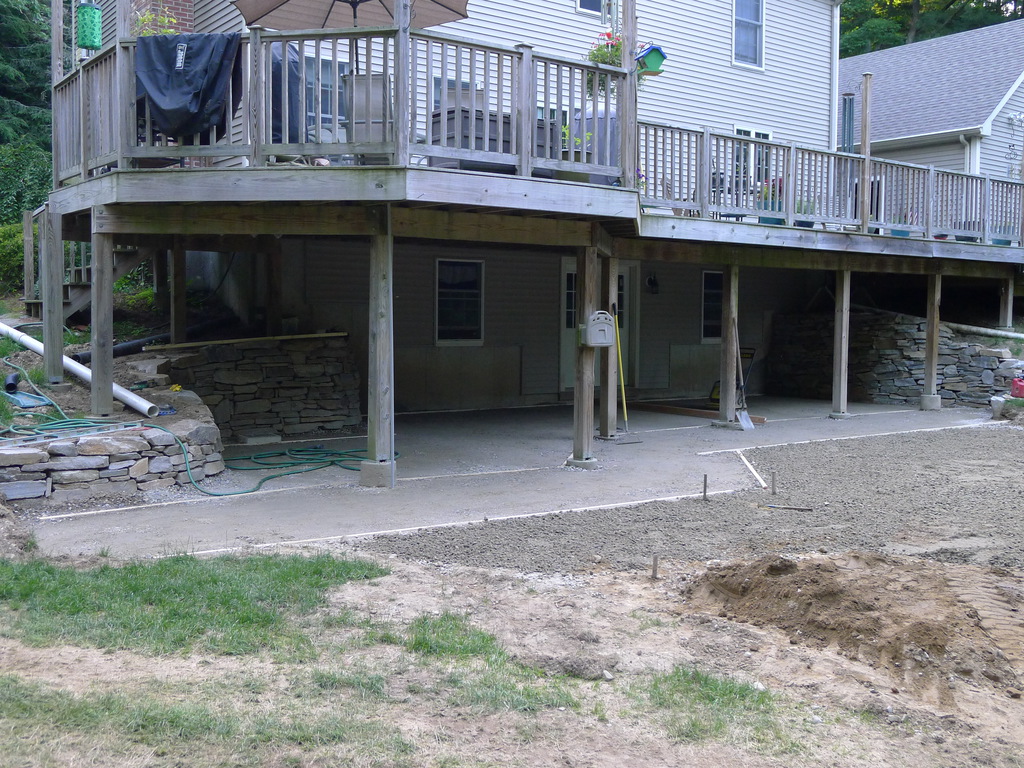
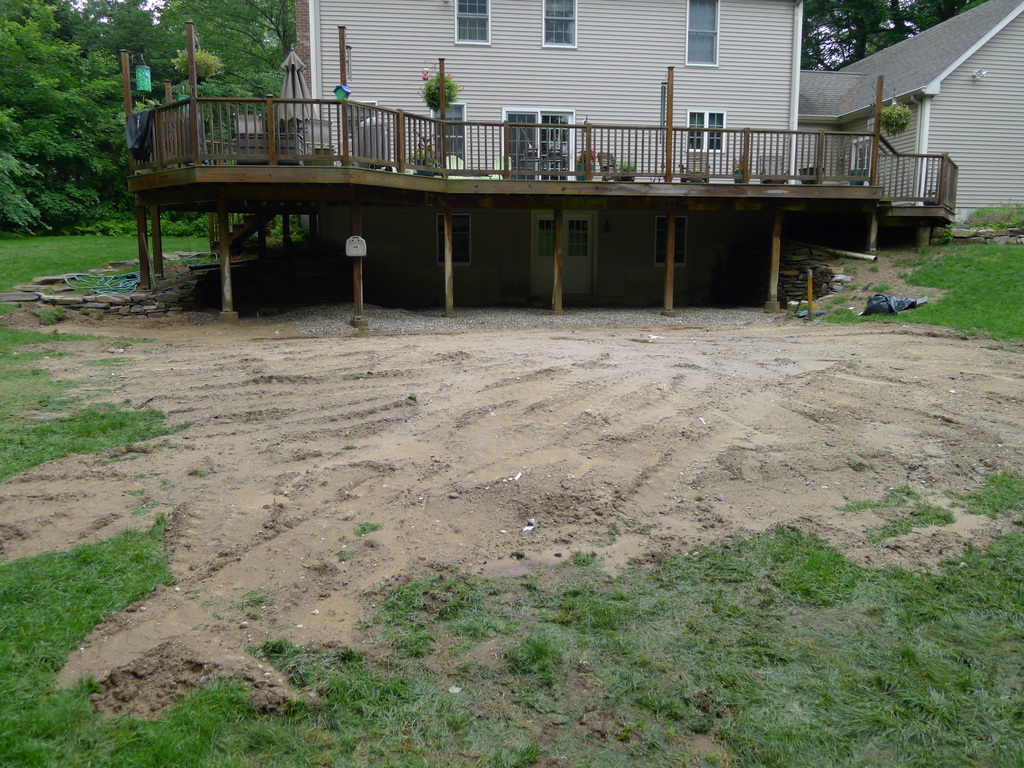
With the two retaining wall completed, the next phase is the pavers. Installing pavers, in theory, is pretty straight forward. Dig down, put a layer of gravel, followed by a layer of sand, followed by the pavers, followed by a final coating of sand to fill the joints.

The actual doing is a little more involved.

So that’s the result of the digging part. I had a guy who knows what he’s doing with a skidsteer do the digging under the deck. If I’d done it by hand, I’d still be digging into next year. He left it in piles and then left me the skidsteer to push the piles around for awhile. Since I had the machine, I also moved the remaining stone I had down under the deck. Saved me a lot of trip with the wheelbarrow. The result is the, uh, scene above.

There is no going back now.