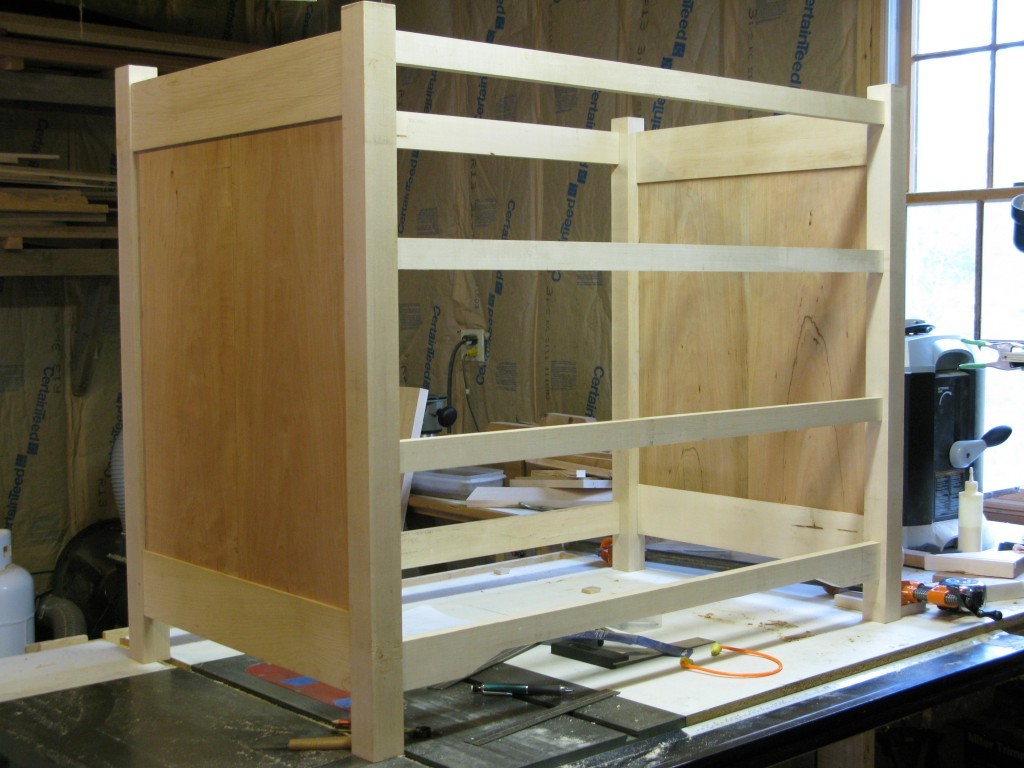
All right, here’s a shot of what’s been accomplished so far. Nothing is glued up here, everything is just dry fit. I still have to mill dado’s for the rear panel and I also have to put a taper on the adjacent inner sides of each of the posts. That will all be easier to do if it isn’t glued up. I’ll also put a fairly wide chamfer on the front corners of the posts. Again, easier to do if everything isn’t assembled. Mainly it’s assembled to make sure the panels don’t warp.
Having it assembled I got my first sense of how big the piece is going to be. The width as measured to the outsides of the posts is almost 44 inches. The depth is 26 inches outer to outer and the height to the top of the posts is 36 inches. The three drawers spaces are large enough for a full 8 inch high drawer (the rough opening is 8 1/4)- as measured by the face of the drawer front.
Speaking of the drawers, I’ll be using Blum Tandem drawer slides with Blumotion. What’s that? That’s woodworking talk for a soft-close feature on the drawer. Blum has developed a closing mechanism that engages when the drawer is within about 3 inches of closing. The mechanism does 2 things: one, it prevents the drawer from being slammed; 2, it pulls the drawer completely closed from that point. Another nice feature of the slides is that they are invisible when the drawer is pulled out- they attach on the underside of the drawer. Everything I read about them leads me to believe that their slides are topnotch. The drawers have to be built within some fairly strict tolerances, but I think I understand what’s going on.
The other element that needs to be dealt with is the inner framing for the drawer supports. It’s not obvious from the picture, but the panels are only 5/16″ so they can’t be used to support drawers. Incidentally, that was a disappointing development. I had stacked all the wood and stickered it, but the wide boards warped anyway. When I resawed them, I had to take a lot more away than I wanted to. Anyway, now that I’ve got the slides spec’d, I can start working up the supports for them. I’ll be putting drawer separators in as well so there is still some work to be done before I can glue anything up.
I took a fair amount of care in milling out the mortises and tenons and I have to say, it really paid dividends. The thing is almost perfectly square in all directions. I was most concerned about the unit being racked as viewed from the top, but I measured the inner corners and it’s perfect. I’m real pleased with that. The most it’s out is 1/16″ on the back side. I’ll double check all the mortises to make sure they are clean and I should be able to get that back. That’s the nice thing about mortise and tenon joinery- when you get it right, everything sits good and square.
I had some extra milling work as tenons that meet at the corners actually touch each other because of the depth I chose to work with. That’s the sort of thing that is difficult to plan out, but is easy to deal with as the pieces are worked through. I used the router for the majority of the milling and just trimmed it off using the chisels.
The big job left to do that hasn’t been mentioned yet are the 3 drawers. Looking at the span of the drawers, it’s safe to say that the bottom is going to be 3/8″ material of some sort. That’s the only way I’ll be able to get the support. As I mentioned earlier, now that I’ve got the slides figured out, work on the drawers isn’t too far away.