To finish the armoire, I need cove molding. Unfortunately, I can’t just run down to the local Lowe’s or Home Depot because they don’t carry cove molding in cherry. But that’s what I need. So I had to fabricate some molding myself today.
The molding I made is made use 3/4″ stock. I ripped the boards to a 4 inch width, then set about hogging out the material using my table saw. I’ve seen it done where the wood can be push at an angle across the blade, thus hogging out the desired arc in one fell swoop. I didn’t use that technique. Instead, I kept adjusting the depth and position of each cut until I’d removed all the material I could. The result is a series of steps that rough out the arc. For each cut, I’d set the blade and fence, then pass the wood over it, turn the board end-for-end and do it again, so the arc ended up symmetrical.
My initial cuts were in the 2 deepest cuts in the center. I then switched to working from outside to in. Initially, I tried eyeballing each cut, but that didn’t work so I traced an arc from the middle to one edge so I had a line to work to for each cut.
When that was all done, I tried to sand the results to smooth it out. After going through 3 pieces of sandpaper on my first piece of wood, I decided to give my curved card scraper a try. That worked out much better and I finished the job that way. After the jump are pictures of the stock at varying points in the process.

See stock.
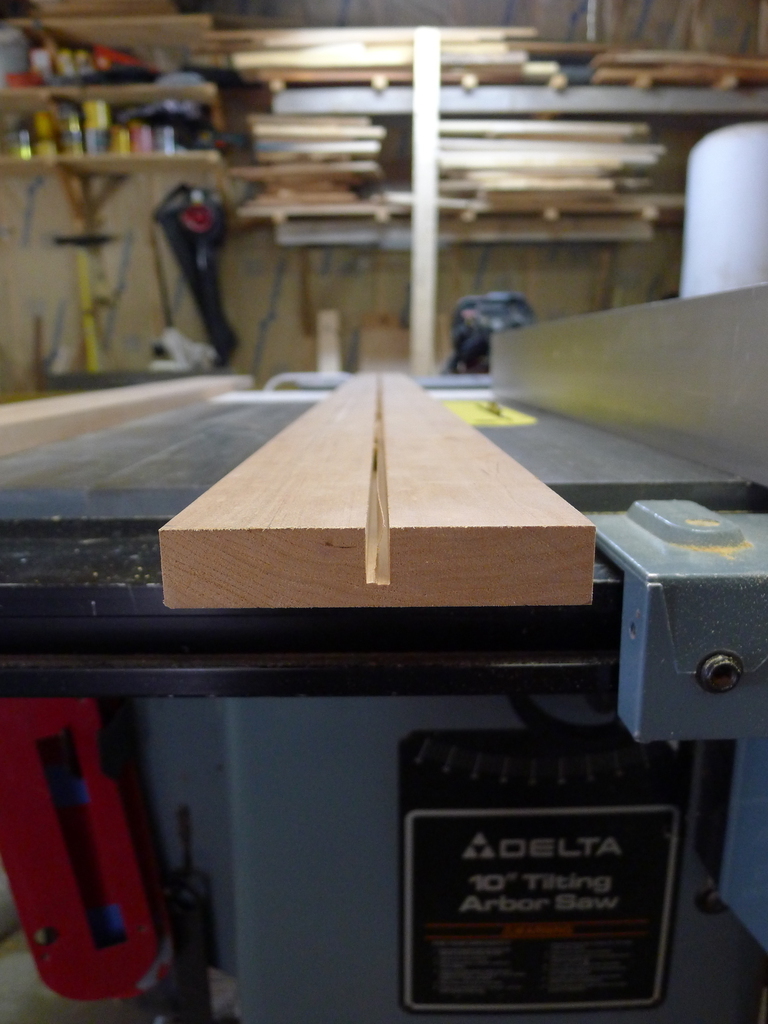
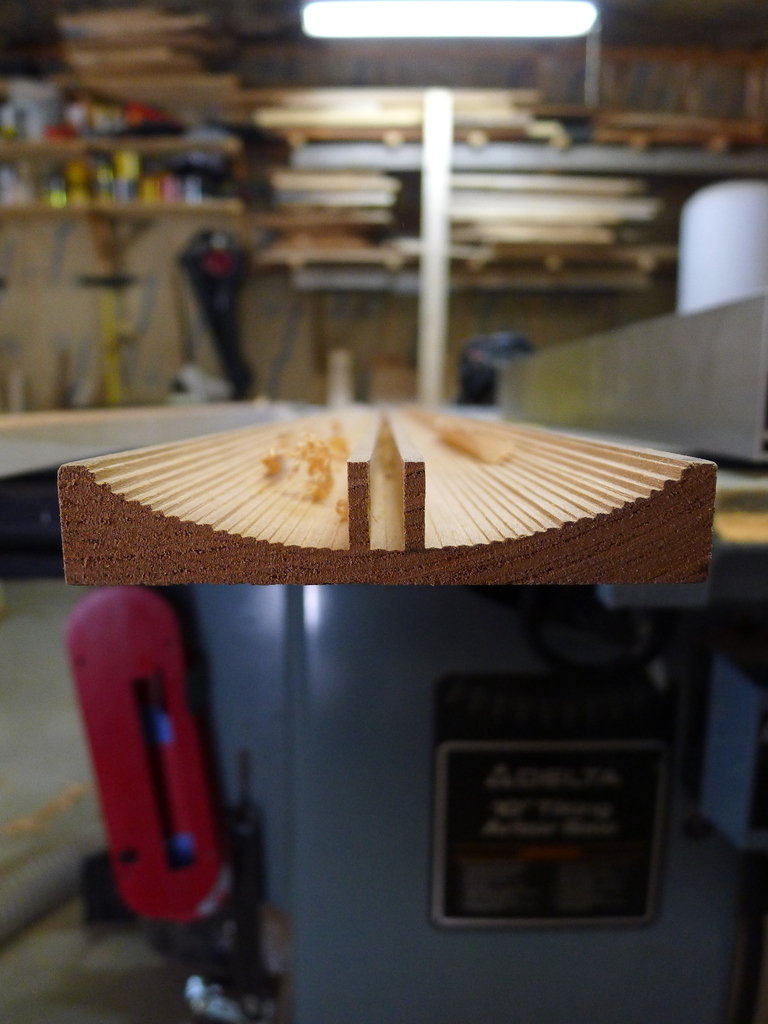
Initial 2 centered cuts. This gave me something to work towards once I switched to working from the outer edge inward.
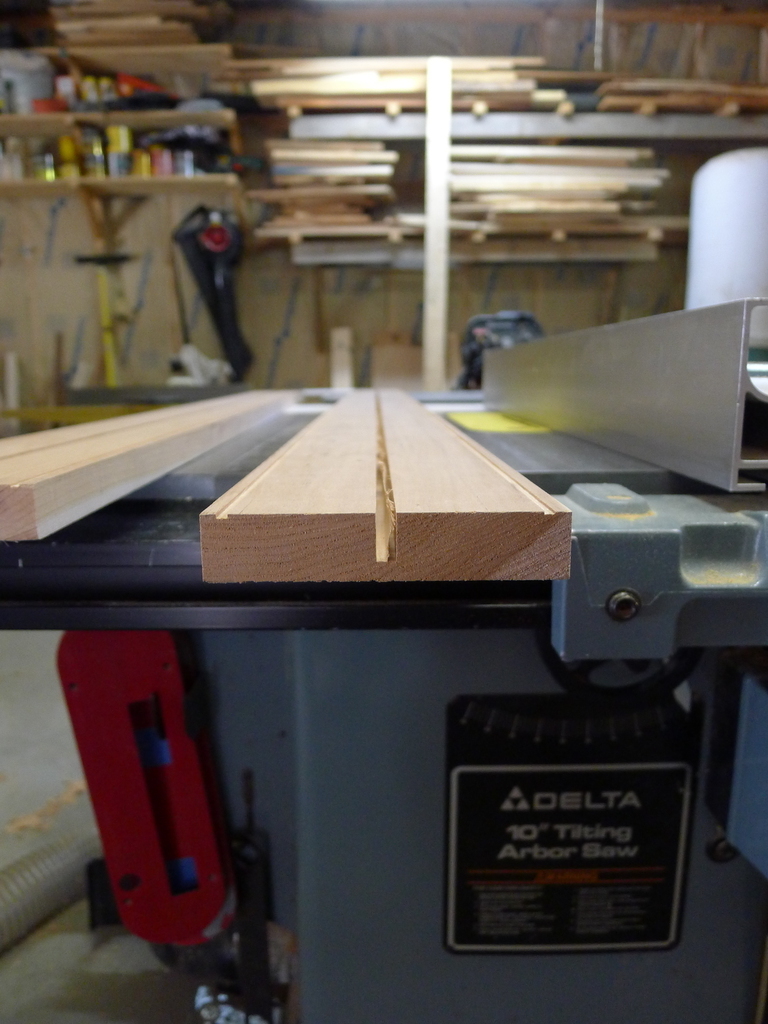
And here I’ve made the 2 two cuts on the outer edges. Again, all I did was set the fence and the blade depth, then cut the board one way, rotate it end for end and cut it with the other edge against the fence.
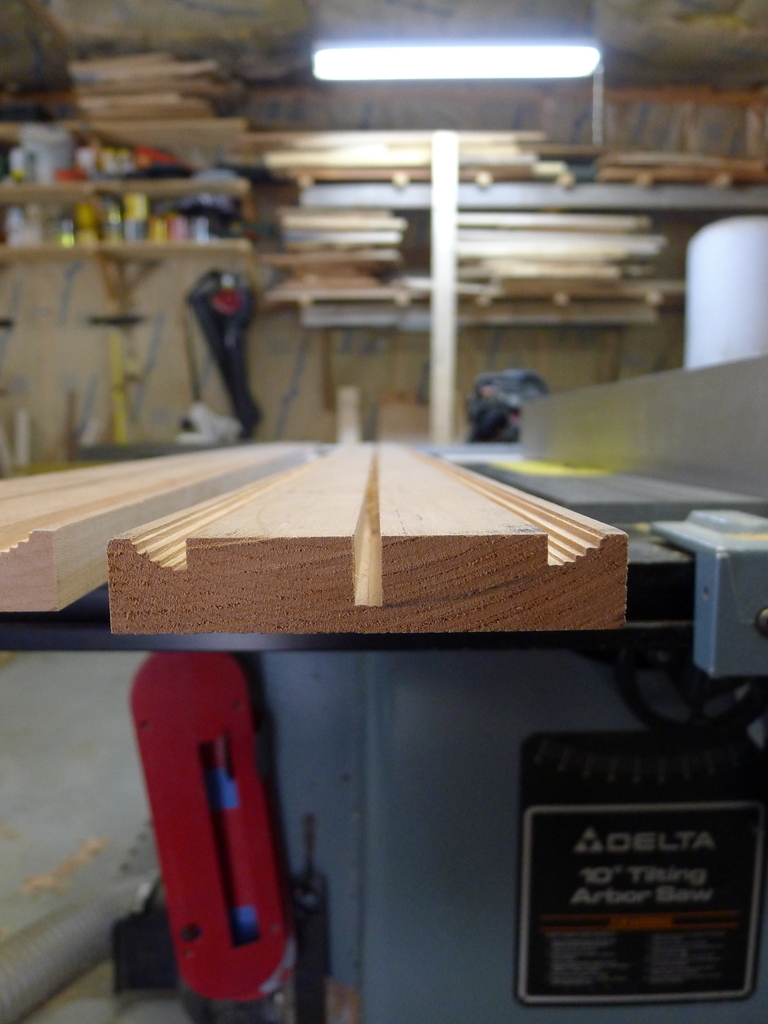
Here, the arc I traced as a cutting guide is visible. I’ve probably made 6 passes or so by this point.
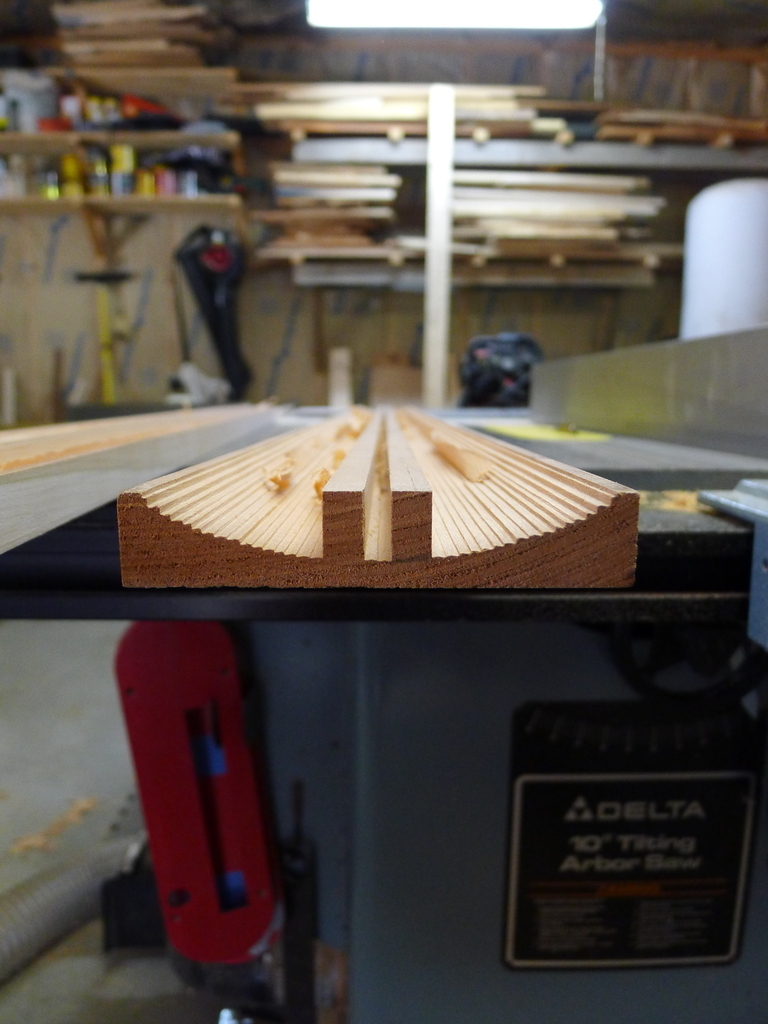
Just a few more snapshots as I continued to work towards the center of the board. I was actually cutting 2 lengths of cove molding, that’s what the 2nd board to the left of the featured one in the pictures is.
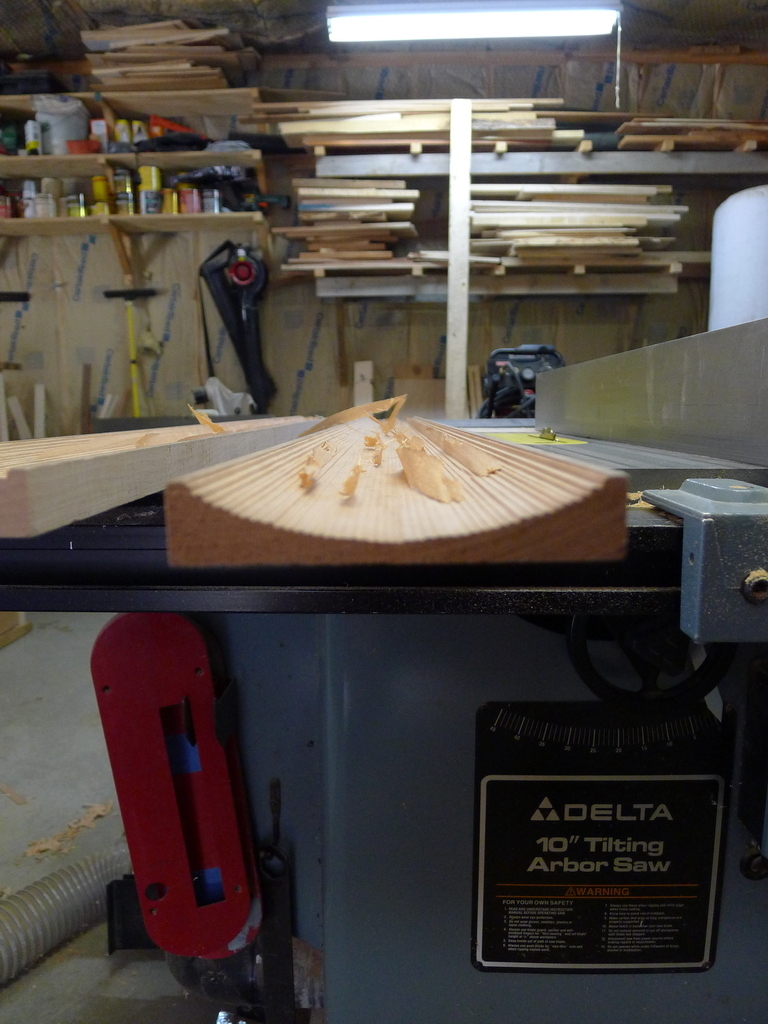
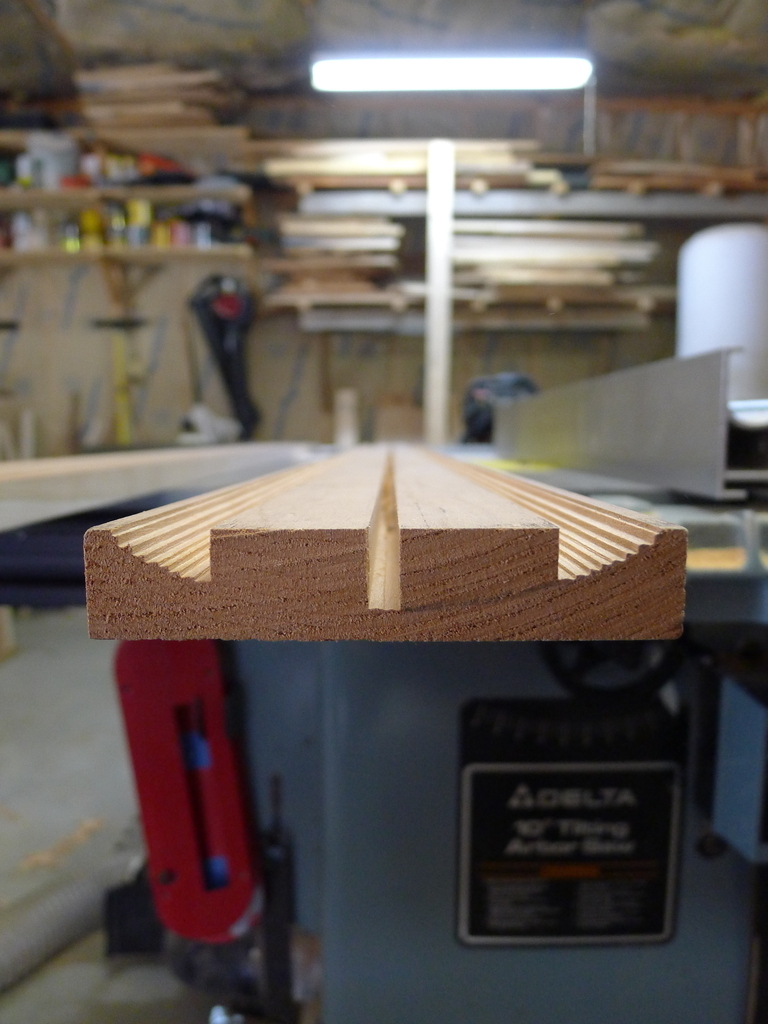
And here the hogging out is finished. You don’t even have to squint to see the arc. Kind of cool, really. That said, I wasn’t going to leave those ribs there. After attempts to sand it out using my orbital sander, then by hand, I finally opted for an curved card scraper I have.
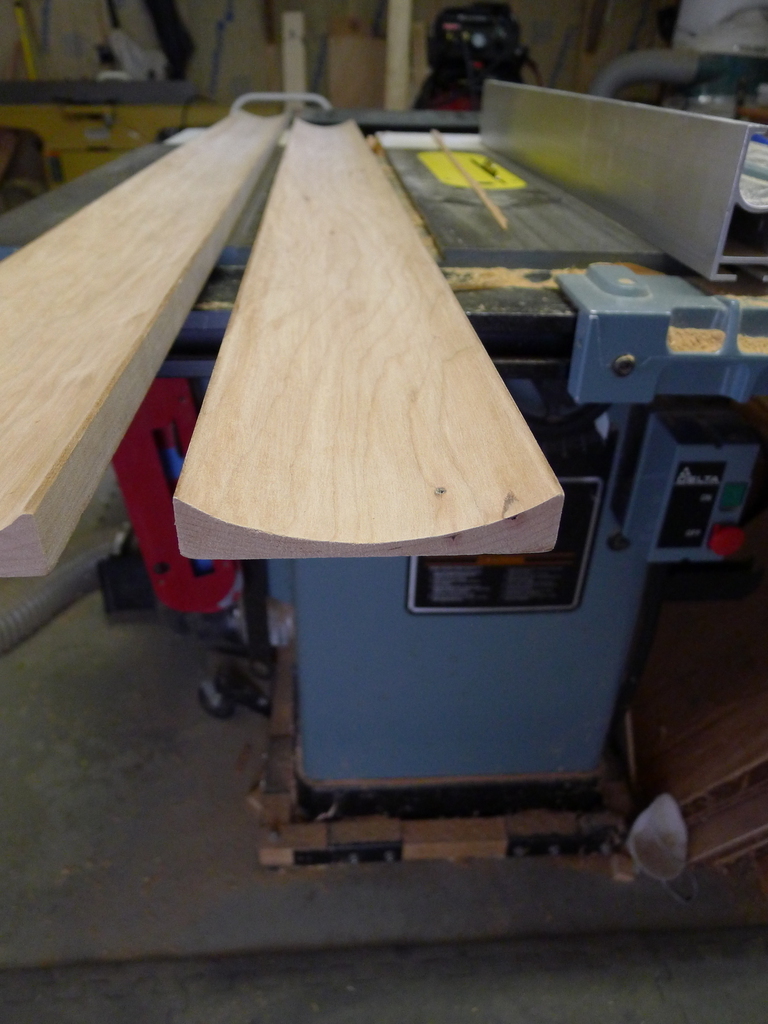
Here’s the final result, all smoothed out. No ribs. It only took me about 4 hours worth of work to get to that point for about 8 lineal feet of cove. With the learning curve out of the way, my production runs could probably yield 12 feet or so in the same time frame. Yeesh.
After finishing off the scraping, I hit it in turn with 80, 150 and 220 grit sand paper. This cove will help to form a cap that will finish off the top of the armoire cabinet.
2 replies on “Cove Molding The Hard Way”
The cost ….. PRICELESS ! ! !
Good Job ! ! Norm, watch out ! !
I’ve used the angle technique..not that difficult..much quicker..lot easier to sand out..worth trying.