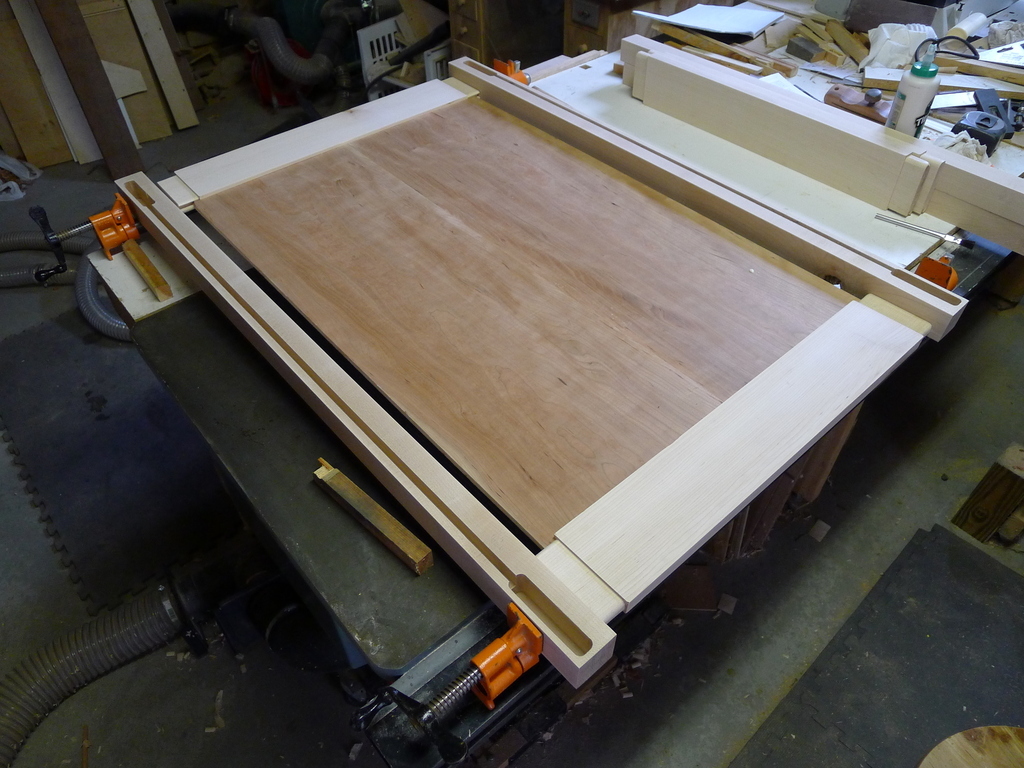
In the end, the sides of the upper cabinet of the armoire were straight-forward to assemble.
My glue of choice is there in the background: Titebond III. It’s supposed to be stronger and more water resistant, but the main reason I chose it is because it has a longer open time. Since I was the only one doing the assembly (sadly, the boy wasn’t interested) and I had to coat all 4 mortises and tenons before putting things together, open time was going to be key. The only thing I don’t like about it is it’s runny, certainly more so than version II. I accounted for that by applying and spreading it in small doses.
One deviation from “normal” panel assembly, I suppose, was putting the panel into the rails before I’d glued the rails into the post. I chose to do that because the panels are warped enough that I didn’t think they’d slide into the groove on the rails very easily. Pre-installing them in the rails avoided that problem and turned out to be a non-issue for the overall assembly.
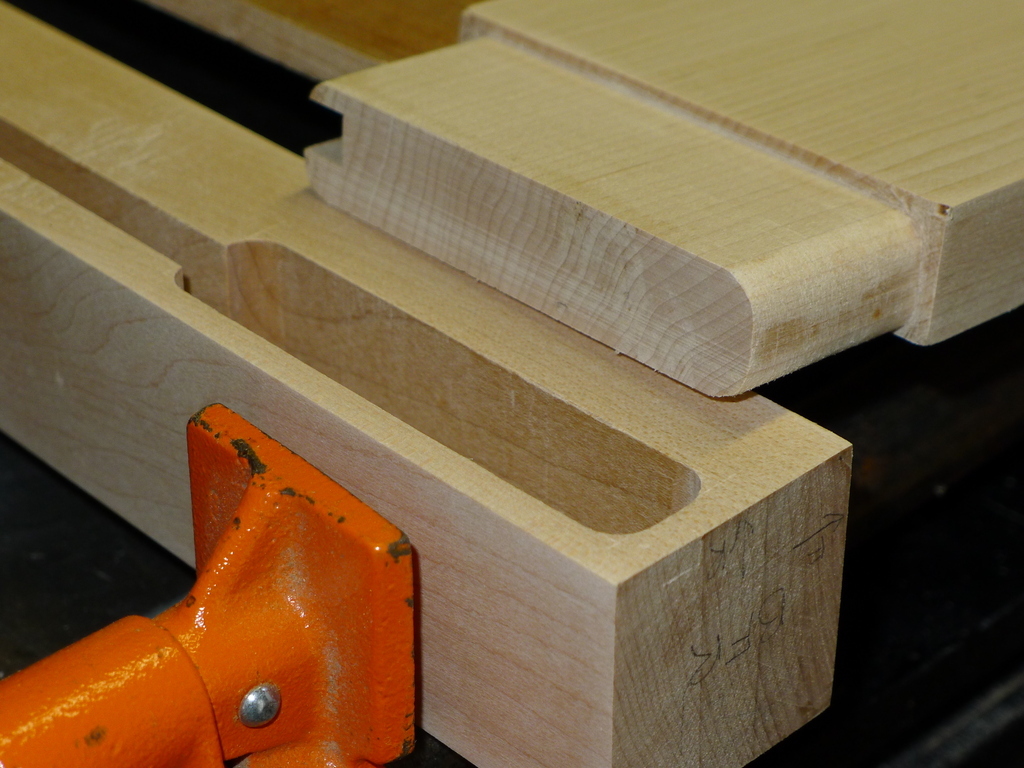
I “oopsed” here with the mortise and tenon.
The mortise is that close to the bottom of the post because there’s 1/8″ shoulder on the tenon, to hide the mortise, plus another 1/8″ extra that I’ll utilize to register this upper half with the already finished lower-half. I’ll mill an 1/8″ or so mortise into the top (of the lower assembly) that the post will sit down into.
I’d intended to haunch the mortise and tenon, but it slipped my mind. So, in an effort to maintain a little more strength in the post I opted not to square off the mortise. This decision necessitated more work on the tenons, but I managed and it seems to have paid off. None of the post ends split during assembly.
The shot also shows some of my layout marking. I marked the bottom of the posts with notation so I’d know which post I was working with and how it was oriented. The BFR means Bottom Front Right. In my case, “left” or “right” is always with-respect to standing in front of the piece while facing it. I also added tick marks on the sides to indicate alignment with the another post faces. All 4 posts have similar notation. It’s a simple means of keeping them straight so that I didn’t cut a mortise into the wrong edge.
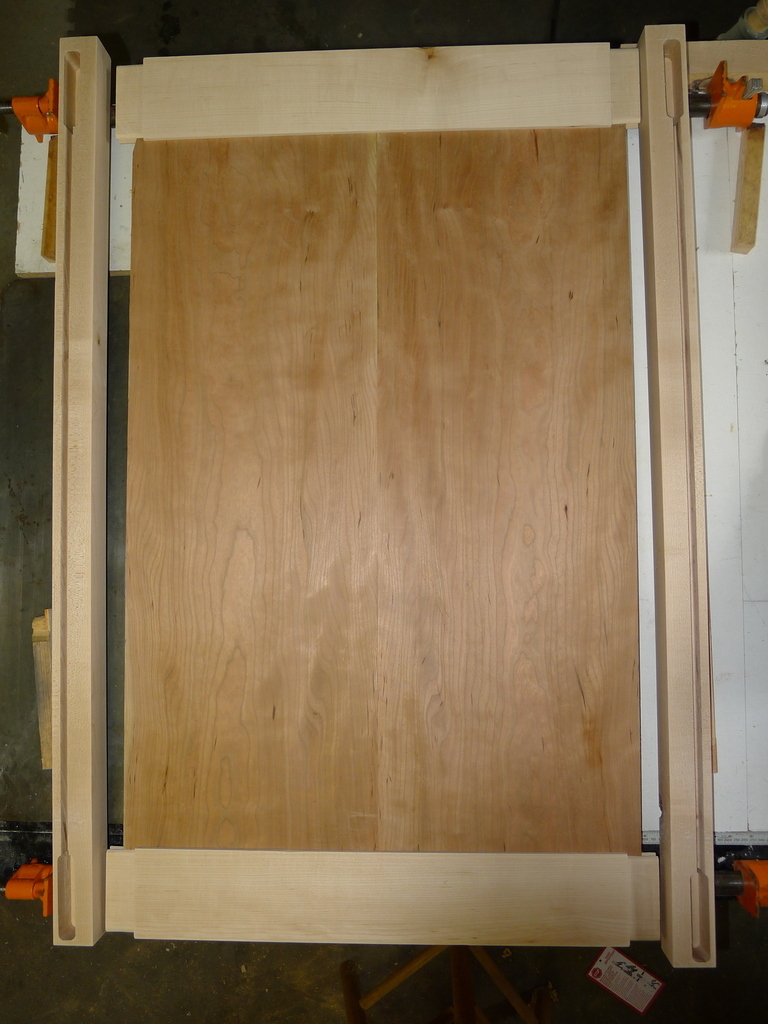
Here’s an attempt to showoff the bookmatching of the cherry panel. The visible portion is about 22″x33″ or so. The assembled dimensions are, roughly 41 1/2″ edge-to-edge for the rails, and 26 1/2″ outer-edge to outer-edge for the posts. The posts are 42″ long, but when the piece is finished the full length won’t be visible.
I’ll also note they’re heavy.
From here, I have to make 3 stretchers that will attach the sides together to form the upper cabinet. I’ll also be making 2 cherry doors; milling some kind of molding for the top and making more panel glue ups for the back and top. Nothing as difficult as the dovetailing in the drawers.
I think the light at the end of the tunnel is coming into view.
2 replies on “Both Sides Coming Together”
So – WHO took all the pix ? ?
That would be me.