As I was sitting here pondering a universe in which the Patriots are in yet another Championship game, the Wife come down the stairs and informs me that “The faucet has a steady stream and I can’t get it to stop. I tried turning the handle as far as I could and it still won’t shut off.” She doesn’t have to say the last part because it’s obvious, I need to fix it.
I’ve done this before and I know exactly what I’ll need: my pair of force grips and a set of allen wrenches. I got half-way up the steps and had a brilliant idea: I’ll blog it! Complete with pictures! It would be the my most tedious post yet!
Hey, I’ve been sniffing paint today, as opposed to pine, from the kid’s derby cars. I’ll get to those in another post.
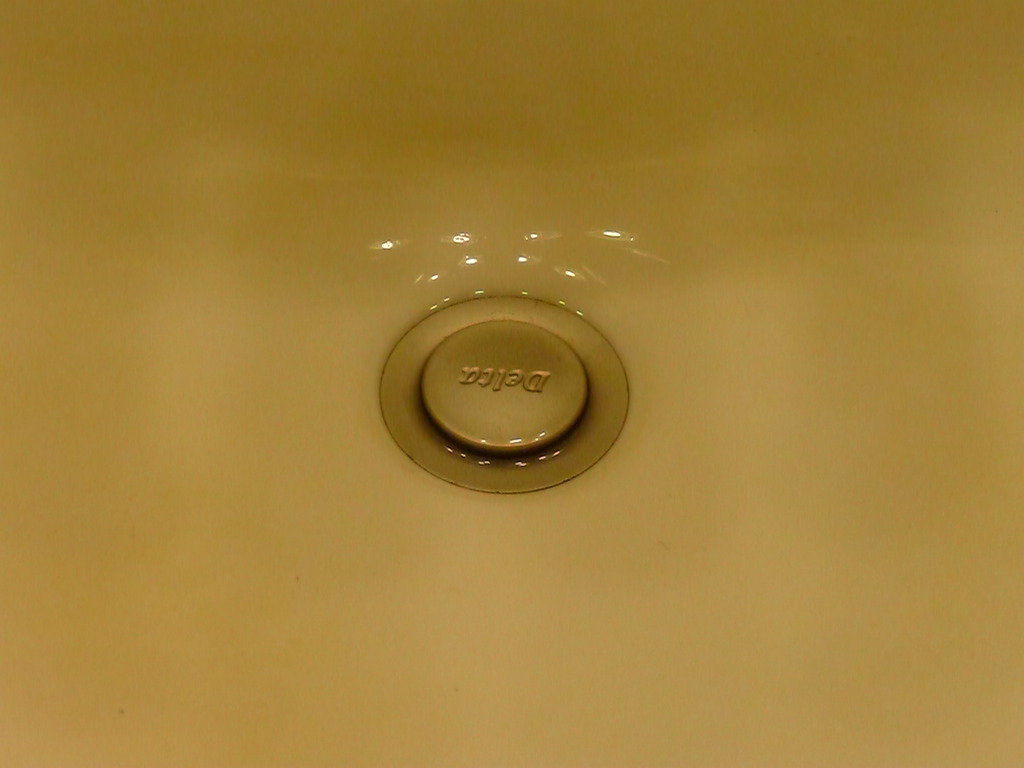
For the record, this procedure is for the cold water feed. Obviously, things would be RADICALLY different if it was the hot water feed because, well, it’s the other handle on the faucet. Just make sure you know which handle needs to be dealt with.
So, to start- this is the most important step of the whole process. Close the drain. NOW. Not later. There are some small parts we’ll be dealing with and closing the drain will prevent you from losing them down the drain when they fall out of your hand, into the sink, do a complete circle around the sink- teasing you into think your ninja-like reflexes and sharpshooter eye will allow you to catch it before it goes down the drain. In short, closing the drain can be the difference between a 5-minute job and an hour-plus job.
Next step, turn off the water supply. That’s what those little handle thingies under the counter are for. As you look at it, the one on the right is for the cold water, on the left is hot water. Unless your plumber was dumb. In which case, turn them both off just to be sure.
Don’t proceed until you’ve done the above two steps: close the drain, turn off the water. If you’re not confident with these two steps, then you have no business being in a bathroom with wrenches. Also, only chew gum while sitting, for your’s and everyone else’s protection.
Okay, next step- taking off the handle. You’ll need an allen wrench to loosen the set screw. No big thing, just a couple of turns. Try not to back the screw out all the way, they can be a pain to put back in.
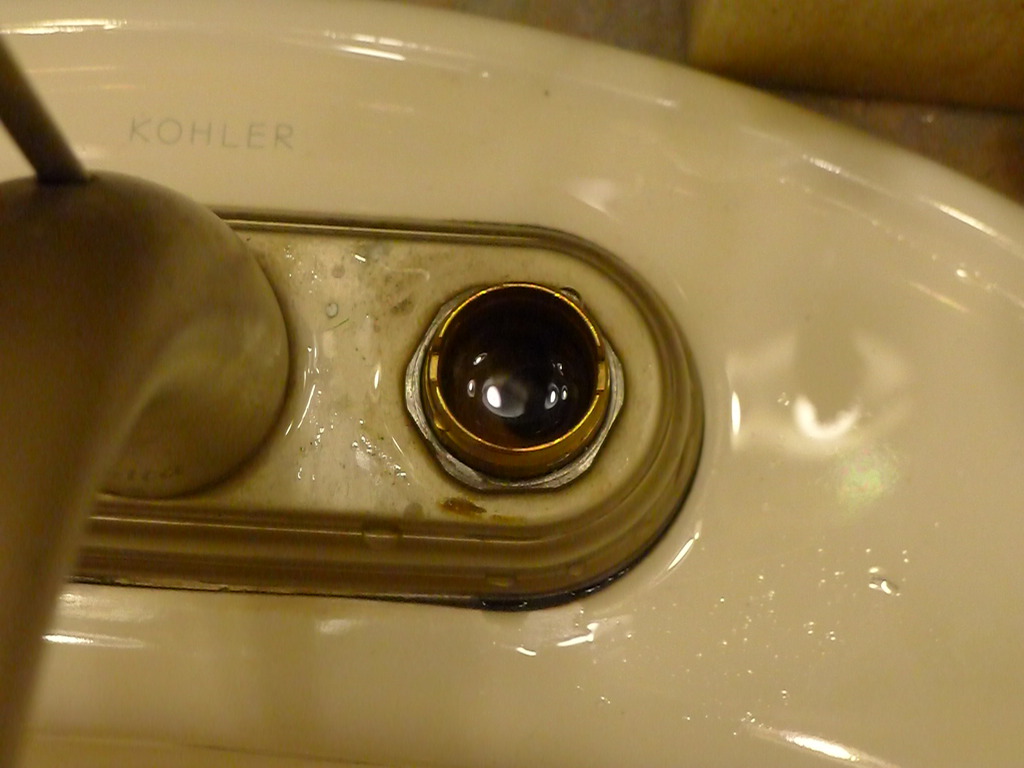
Lift the handle off and set it aside, here’s what you’ll see:
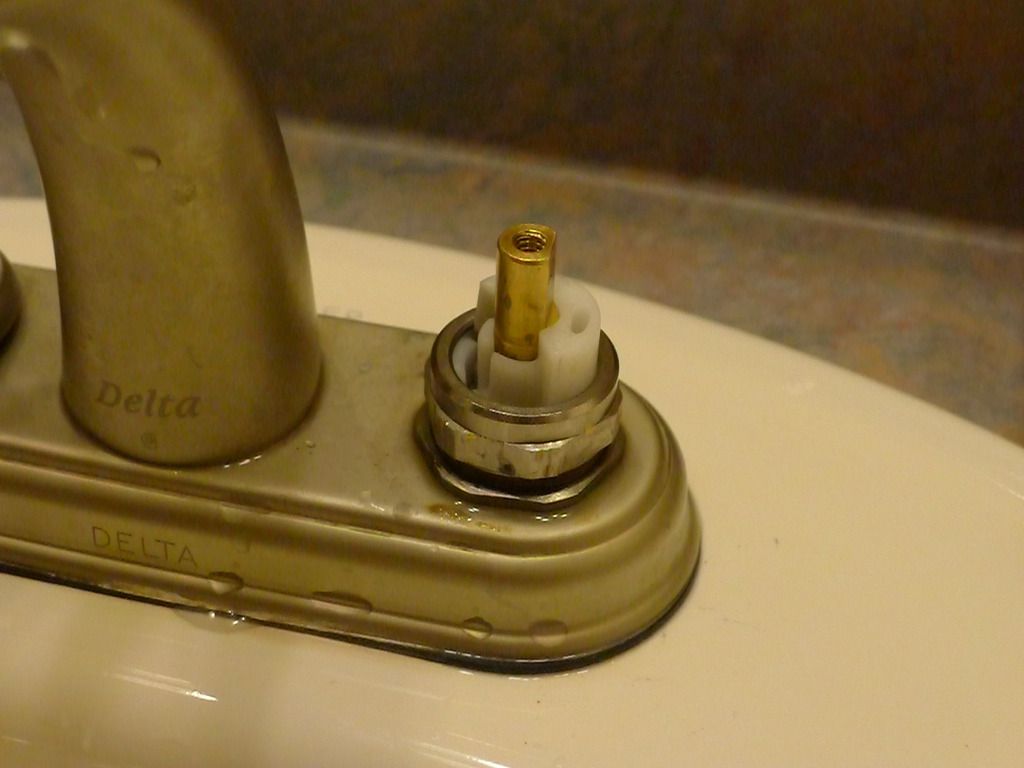
That’s a spindle assembly and it’s held in place with a cap nut. You’ll need the force grips to remove the nut. It shouldn’t be too difficult. Try not to chew anything up with the force grips. Just remember the tool is a lot tougher than the nut, even thought they are both metal. They are not the same metal. One is strong and made to take abuse. The other is kinda strong and made to look pretty. “Take abuse” trumps “look pretty” in this scenario. This ain’t no beauty pageant.
Oh, you remember to pull your pants up, right? Just checking…
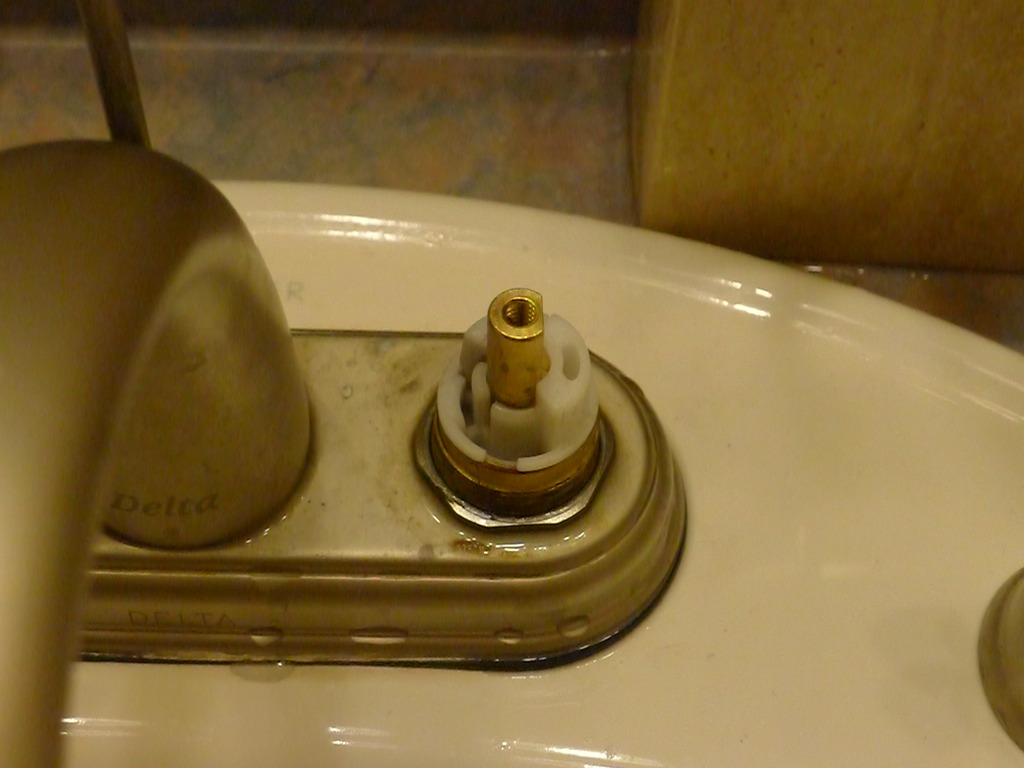
With the cap nut off, the spindle assembly can be removed. It’s not clipped in or screwed in, simply a friction fit. Prior to removing it, note the orientation of the flat side of the spindle for when it’s time to put everything back together again. It will save you time later. It will be a little difficult to remove because there is no easy way to grip it. A flat blade screw driver might be useful here, but I’d be worried about marring the plastic. Best just to work at it a bit with your fingers.

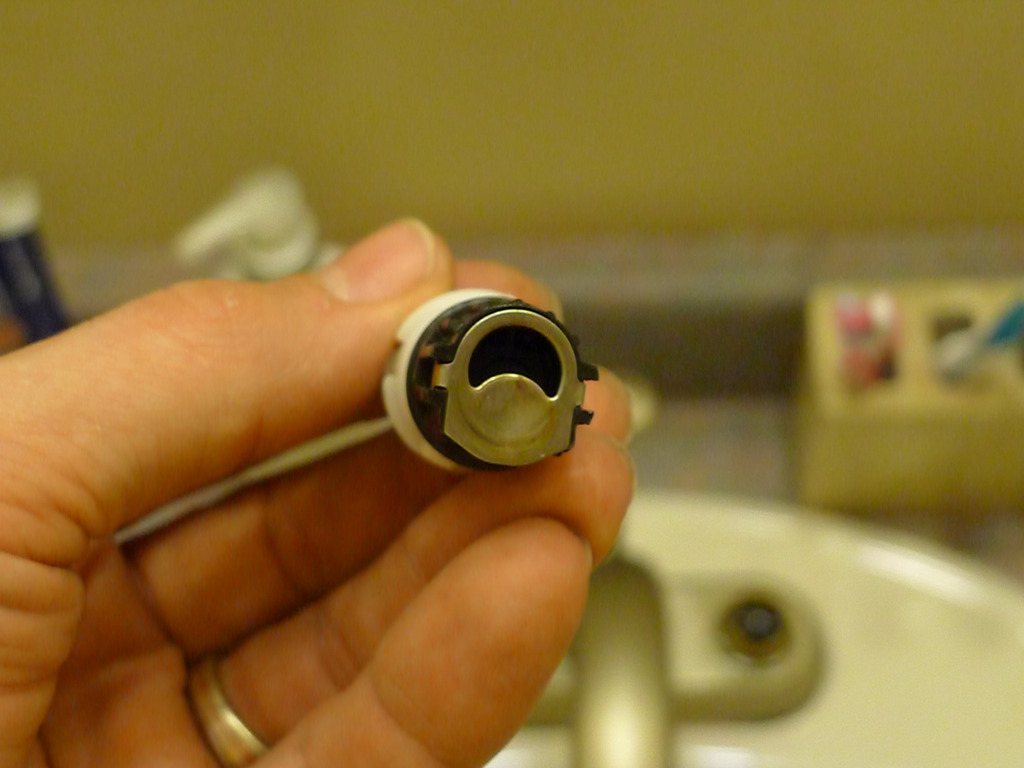
Here’s a couple of shots of the spindle. There’s an o-ring there as well as some fancy plastic stuff attached to it. Just inspect the bottom of it to make sure it’s clean and there are no obstructions. That flat offset part on the bottom is what shuts off the water- it simply covers the water feed up when the handle is turned to the OFF position. The reason the faucet is dripping is because that cover isn’t sealing the water off properly.
Alright, don’t panic. That water will stop running. It’s just a bit to equalize the pressure in the system and it’s coming from the other feed. If you turned off both feeds, then nice job and you won’t see any water. If you didn’t, now is NOT a good time to turn on the other water feed. You’ve been warned. As long as you’ve turned off the feed for this faucet, you’re good. If you didn’t then, well, you’re probably soaked now and you’ve ruined your computer. What the hell were you thinking bringing a computer into the bathroom?
So, the spindle is out and there’s one more assembly to remove. There’s a gasket and spring down at the bottom there covering the spot where the water flows through the handle and to the faucet. This little assembly is what we’re after. I just use an allen to hook it and pull it out.

The spring pushes that gasket up to seal off the water against the cover on the bottom of the spindle assembly. The problem here is that enough sediment had accumulated on the gasket and spring so as to prevent it from sealing properly against the spindle. Just clean off both of these pieces, thoroughly. Hey! It would be nice to have some water right now! You’ll just have to go to another faucet for it is all. I don’t recommend using tissue or toilet paper since it might leave behind little pieces- which is essentially the problem to begin with.

So, here’s all your handiwork. Once the spring is cleaned, all of that has to go back into the faucet. Simply reverse the above process, starting with replacing the spring and gasket. When putting the spindle assembly in place, make sure to line up the keys properly and then test fit the handle to make sure the motion on the handle will be correct for turning it on and off. Nothing worse than cinching things up only to find out you have to take it apart again. When tightening the cap nut, remember that it’s squeezing plastic and that it will likely need to come off again. In other words- not too tight.
Now that everything is back in place, you’ll notice that the faucet isn’t dripping! Don’t get ahead of yourself though, because you haven’t turned the water back on. Also, the drain can be opened up again.
Alright, now the faucet isn’t dripping. Job well done.
One reply on “How to Fix a Leaky Faucet”
Good job. On to the next leak!