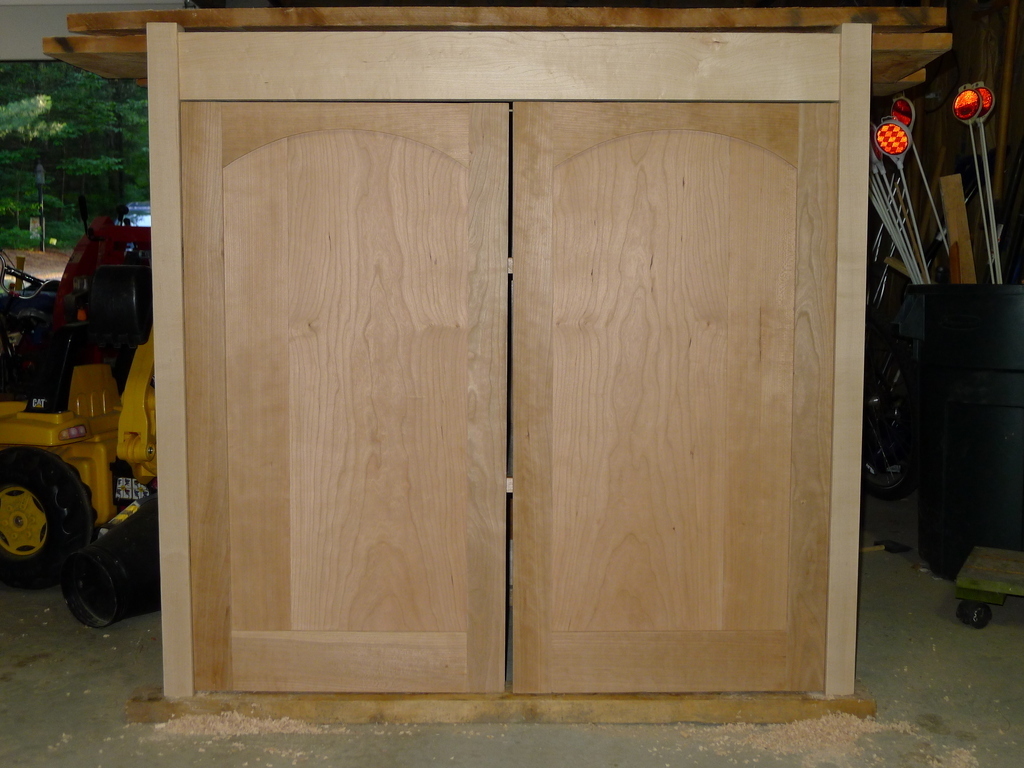
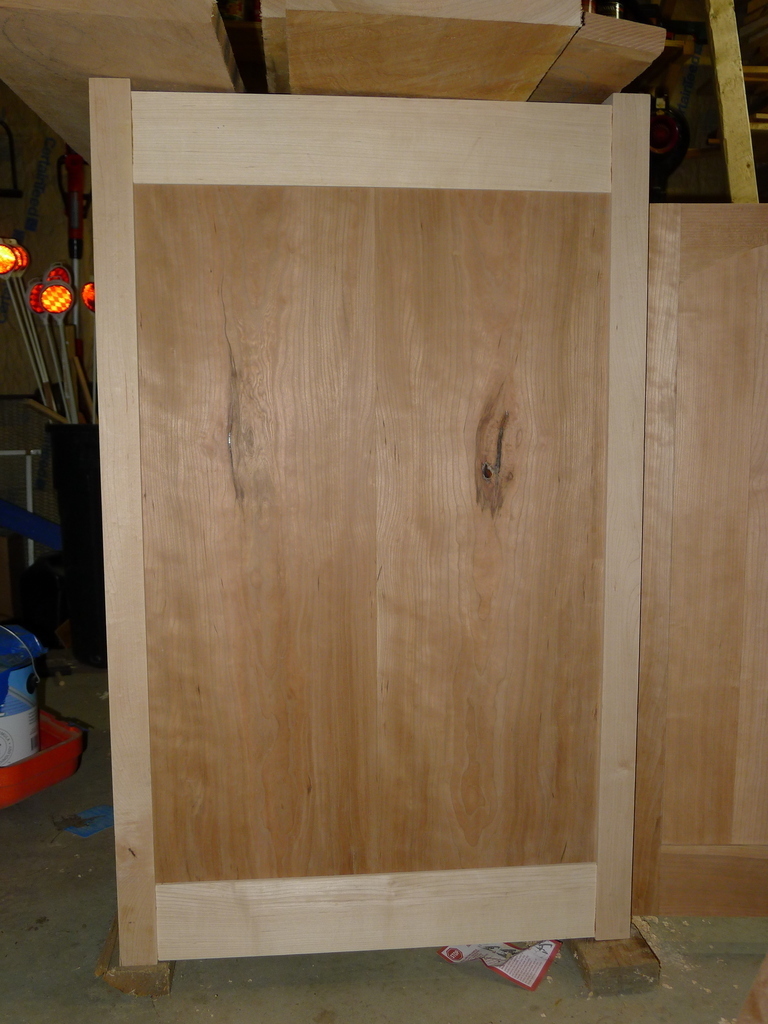
So, here we go. Seems like as good a place to start as any. The doors are actually mounted on their hinges here. More on that in a bit. Not much else to comment on the doors, the panels are book matched and the eyebrow is pretty clear here. I wasn’t able to get a single piece of wood wide enough to serve as the panel, so I had to do a glue up.
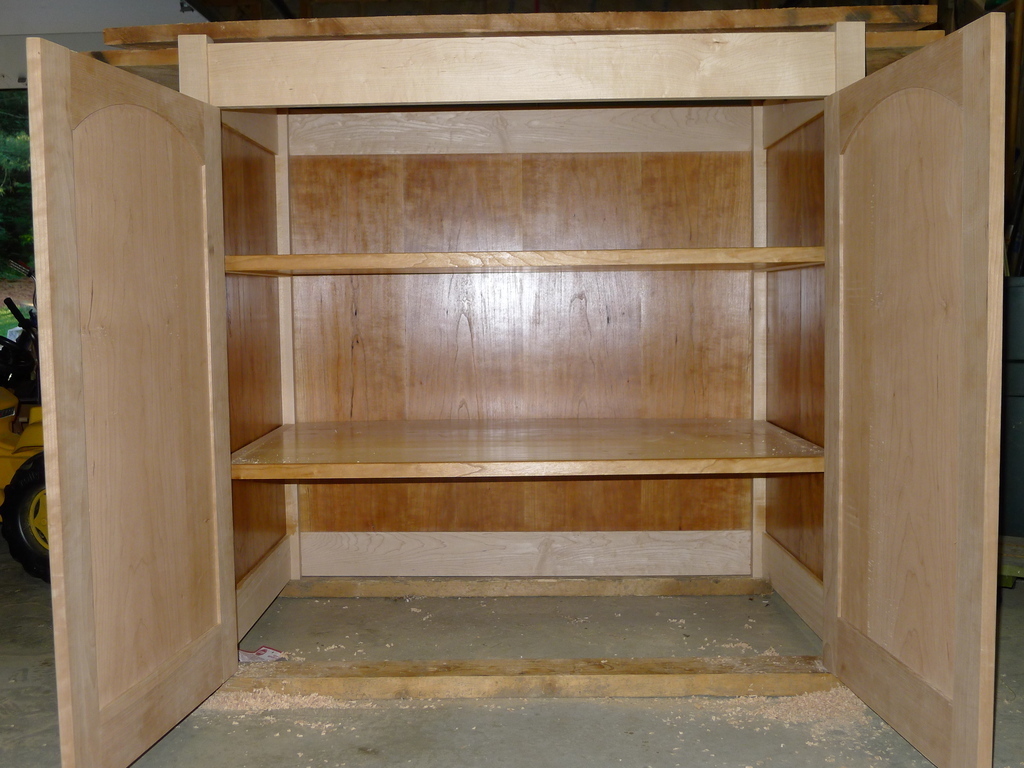
And here are the shelves I spoke about before. Obviously, they flattened out plenty for the purposes of acting as a shelf. If you’re wondering how they’re supported, check out the next picture.
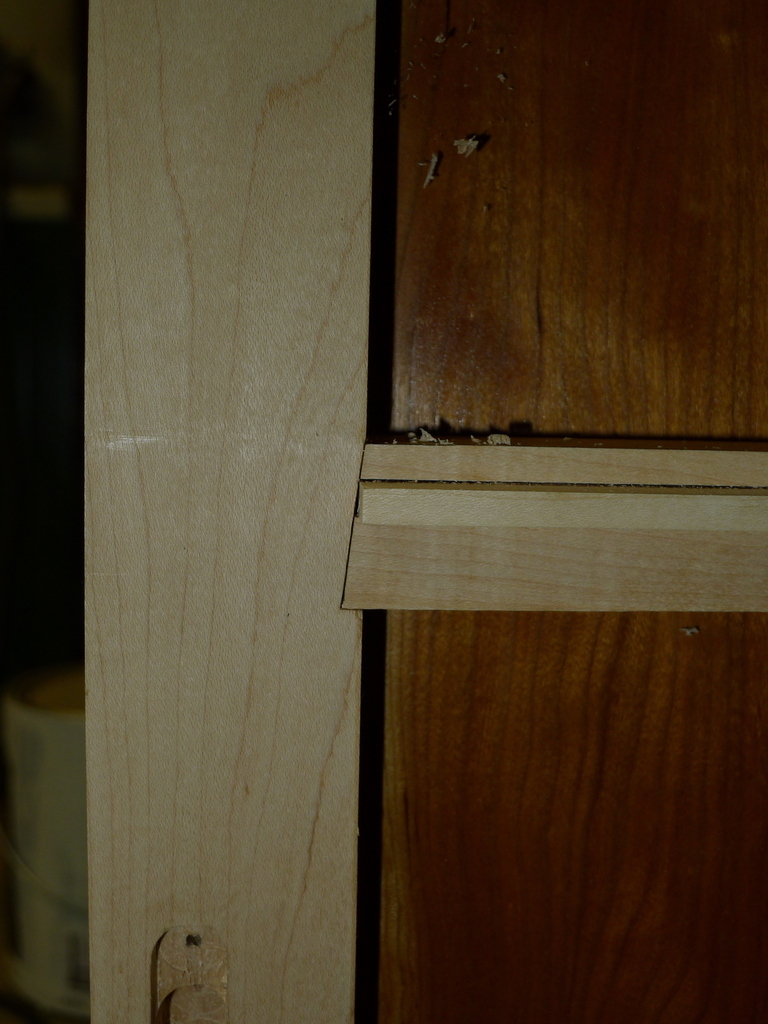
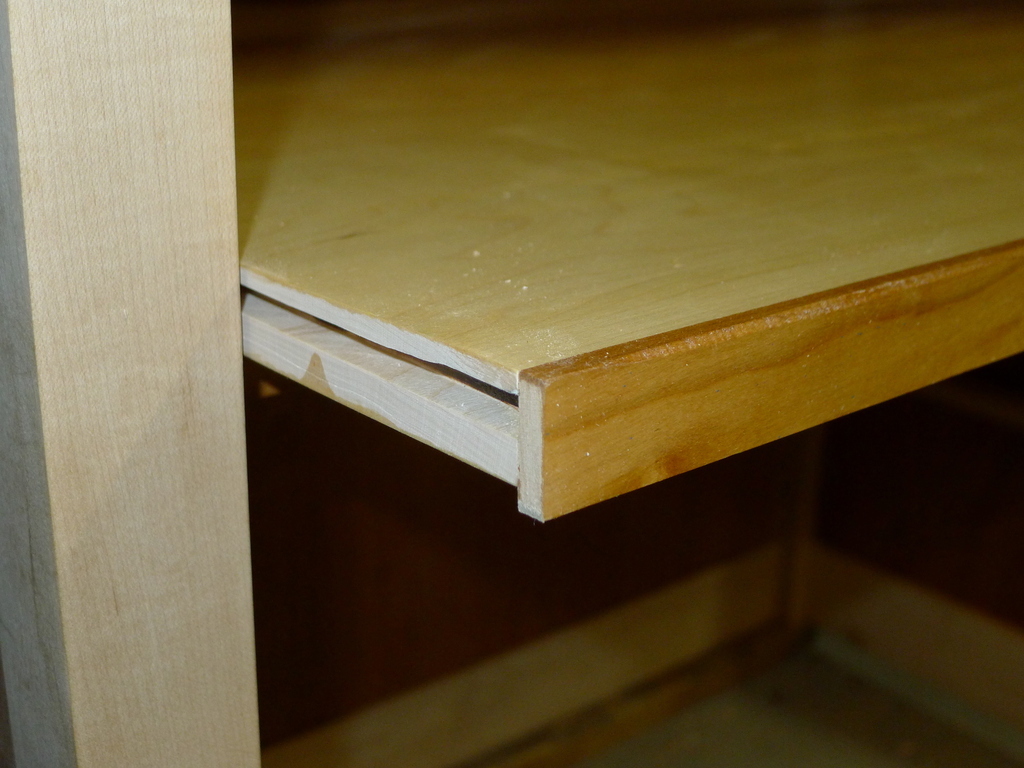
I’ve removed the shelf here to expose how I designed the shelf supports. Basically, a dovetail style piece of joinery. All 4 supports are fitted like that into the posts. The support has a groove cut into it that I’ve fit a spline into. The spline, in turn, fits into a groove cut into the side of the shelf as pictured below. The arrangement worked out nicely because the shelves are removable, something I took advantage of for these pictures.
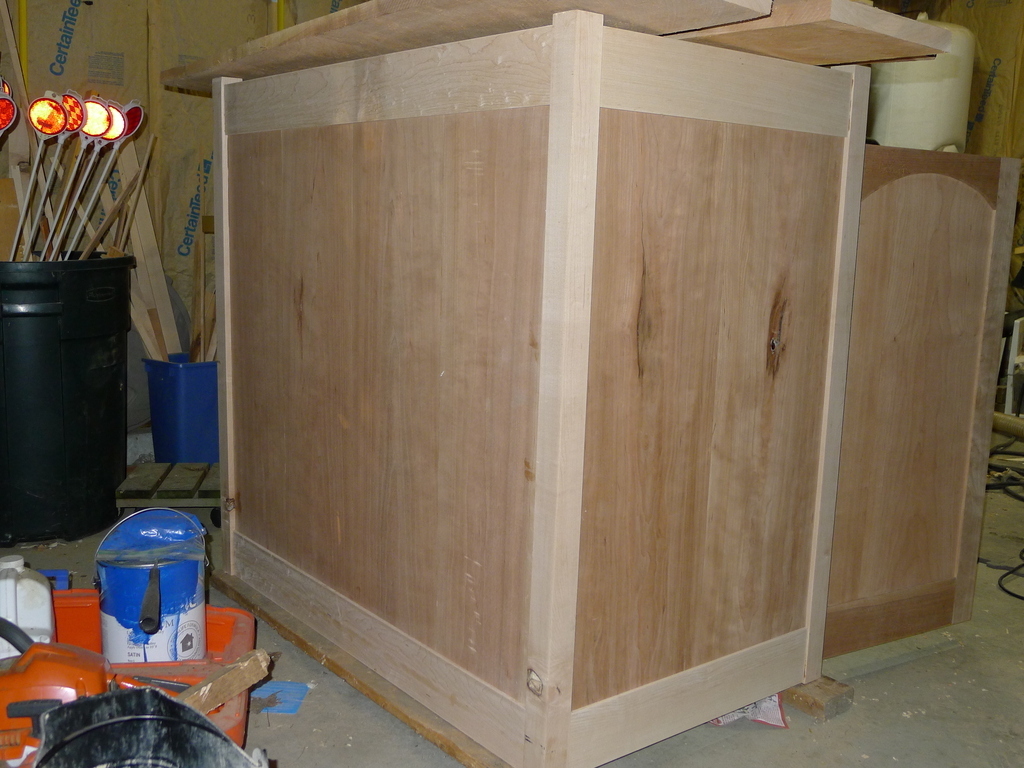
A couple of pictures of the rear and side of the cabinet, just to give an idea for proportion and size. If memory serves, the cabinet is 42 inches tall, by 44 inches wide, by 26 inches deep. All the panels are 1/4 stock that have been bookmatched. The posts are 1 7/8 square and the stretchers are all 4 inches wide.
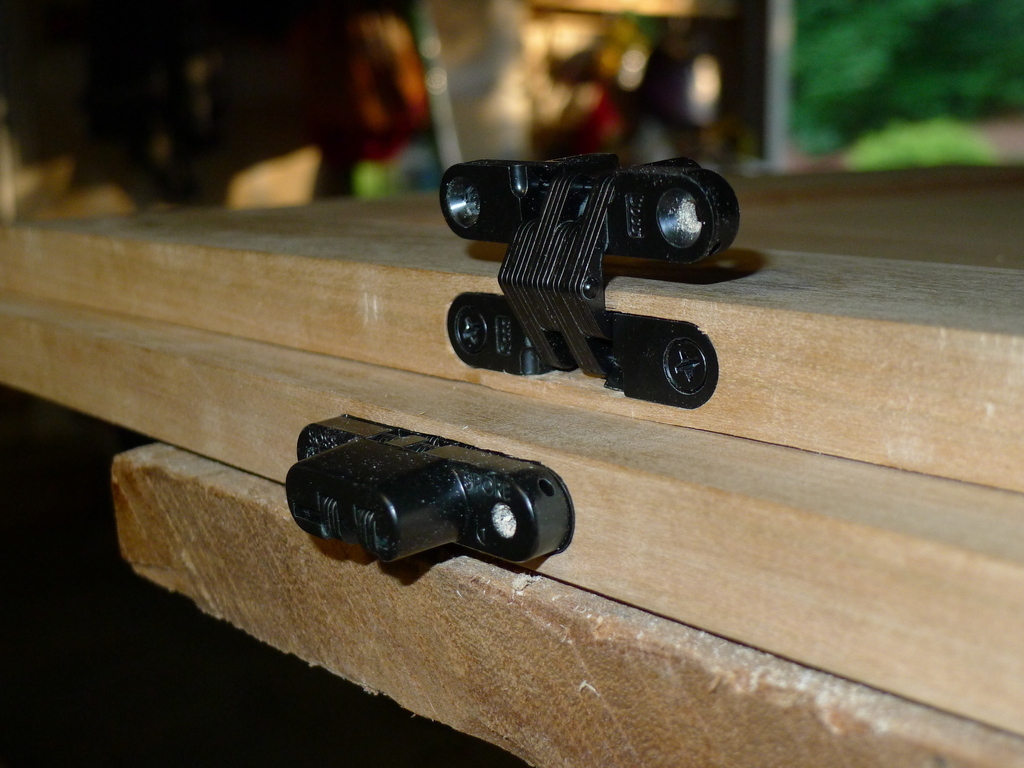
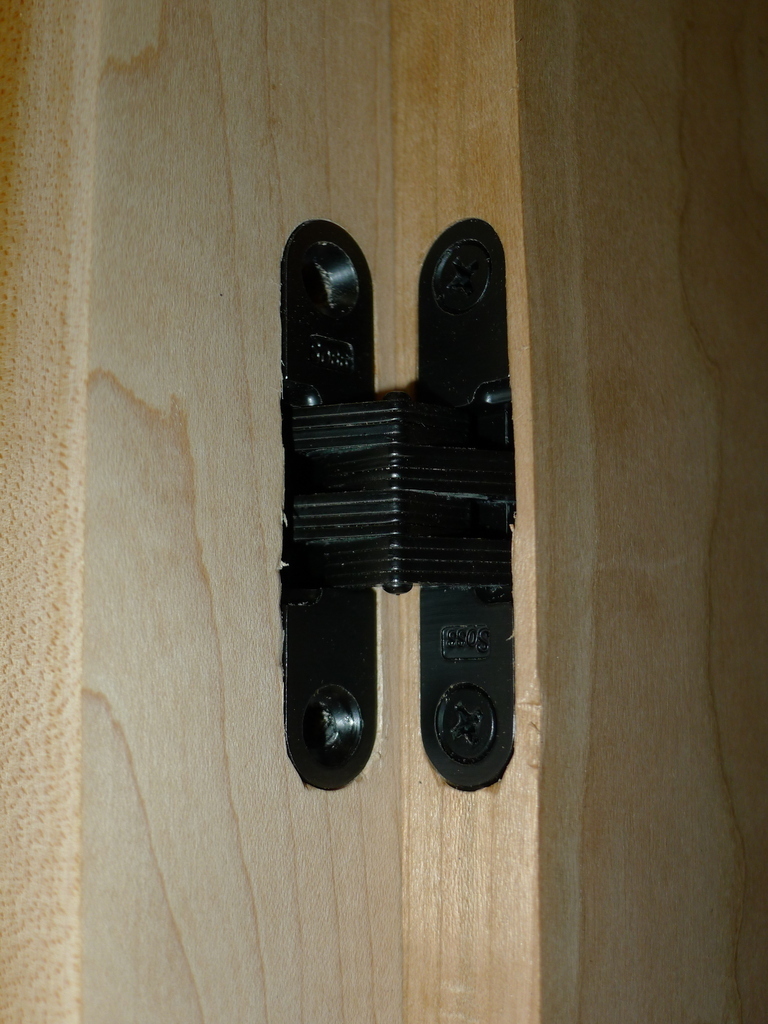
Here, at last, are the hinges I used to mount the door. The top picture gives an idea for the range of motion of the hinges. The second picture shows what they look like when mounted in place. The flanges fit into a mortise and are flush with the post and door side, respectively.
One problem that came to light once I had the doors assembled and ready for mounting was that a traditional hinge wouldn’t work. That’s because the doors are recessed from the front of the posts by 5/16 of an inch. That follows because the upper stretcher is recessed from the front of the posts. So, because the doors aren’t flush with the front, regular hinges with a finial wouldn’t cut it. Further, I really don’t like the Euro style hinges. They’re big and bulky and hideous looking when the door is opened. That left me with this style of hinge- an invisible hinge from SOSS.
Even so, it wasn’t a perfect match because these hinges are designed for a normal inset type of door that is flush with the cabinet front. In such circumstances, the hinges would allow the door to swing open a full 180 degrees. In my application, they only open a little better than 90 degrees, which is plenty for my purposes.
So that’s where it stands. The last bit of construction is for the top, which I’ve got a good idea what that will look like or, at least, what I want it to look like. With a little luck I can get started on it tomorrow.
One last thing. We’ll call it a personal growth moment. I’d cut out one of the hinge mortises a little tight. So, with a little persuasion, the hinge fit but was really tight. Too tight, in fact, to remove it once I’d fully seated it. This posed a problem at the time because I’d removed the shelf and the hinge was in the way for being able to put the shelf back in place.
There was a time when I’d have stormed off in a rage at those circumstances. Always some kind of hiccup. That likely would have resulted in my damaging something.
But that was then.
Here, in the now, I left it at a mild swear word and then set about figuring out how I could remove the hinge. Ultimately, attaching it to the door with the screws and using the added leverage the door gave me allowed me to remove it. No damage to anything. Let’s hear it for personal growth.
2 replies on “Armoire Progress and Pictures”
🙂
Good Job Big Guy !
Real nice job. Nice heirloom!