Categories
BBQ Notweet

Rubbed the Right Way

I was looking for a little different wrinkle on the usual rub I use when cooking ribs. I’ll be smoking some spare ribs on the ol’ WSM tomorrow. A few minutes of googling revealed this rub recipe. It looked promising, so I’m going with it, although I’ve made a few modifications based. Here’s what I whipped up:

  1. 1 cup brown sugar
  2. 2 tablespoons chili powder
  3. 2 tablespoons paprika
  4. 1 tablespoon garlic powder
  5. 1 tablespoon onion powder
  6. 2 teaspoons black pepper
  7. 1 teaspoon cumin
  8. 3/4 teaspoon cayenne pepper

A whole tablespoon of cayenne, which the original recipe calls for, would have had everyone screaming. So I reduced it significantly. I didn’t see the point of all the paprika, so I replaced some of it with chili powder. I never include salt in my rubs- I prefer to salt the meat directly and then apply the rub. In this case, I used a pink salt we recently purchased- it has a funky twang in addition to the normal salt taste. Wow, can’t believe I just wrote that. Finally, I like cumin too much to not include it.

The rub tasted good, we’ll see what the overnight does for it. Most importantly, we’ll see what a little heat and smoke does to it tomorrow.

Categories
BBQ

Who Loves Ya’ Baby!?!

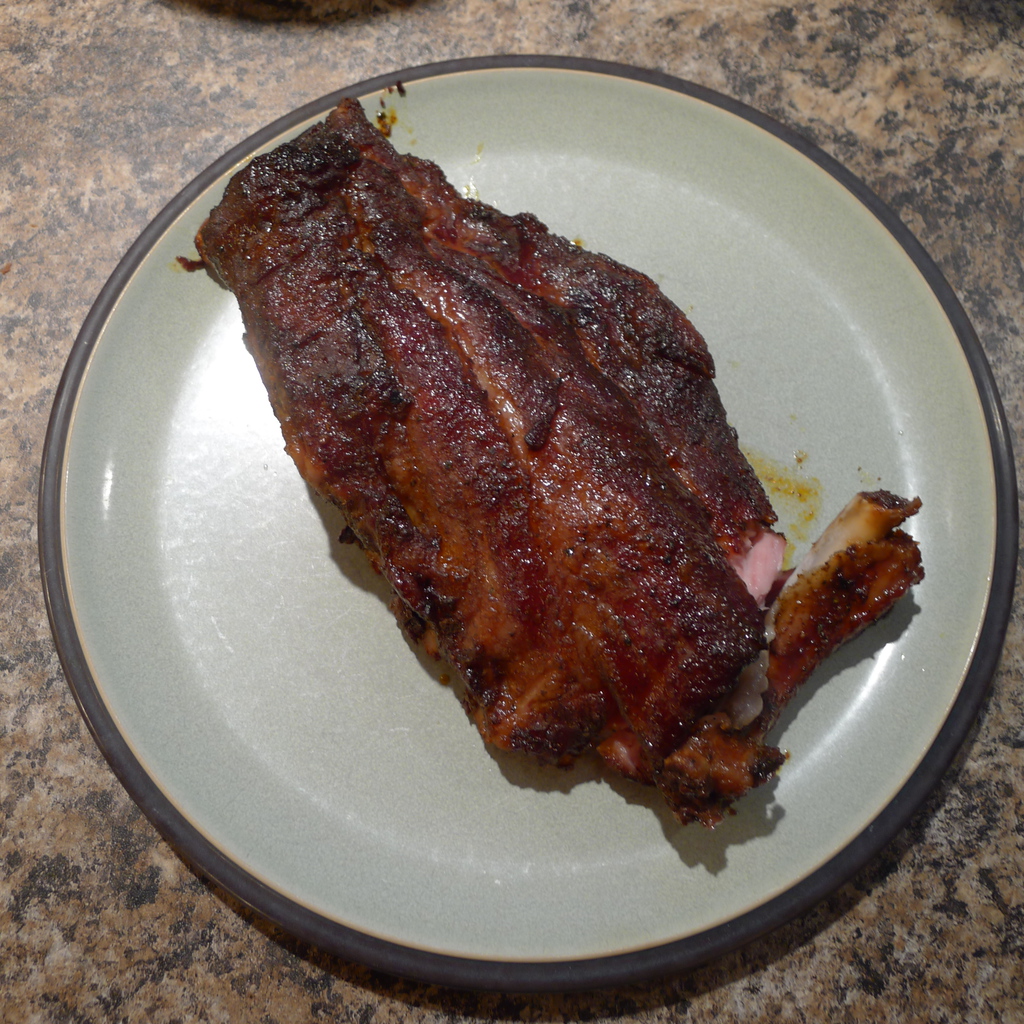
The contents of that picture did not last long, I can assure you.

Nor did 4 of the other 5 half-racks I cooked up today. They were so good, neither child complained about them. The boy even said “This is the only thing I like barbecue sauce on,” which was amusing because they don’t have any sauce on them, just a rub.

Speaking of which:

  • 1 cup dark brown sugar
  • 3/8 cup chili powder
  • 2 teaspoons onion powder
  • 2 teaspoons garlic powder
  • 1 teaspoon cumin
  • 1 teaspoon orange peel(dried and crushed)
  • 1/4 teaspoon paprika
  • 1/4 teaspoon cayenne
  • 1/4 teaspoon chipotle chili

Combine all of the above to create the rub. I know, complicated stuff.

I had 3 racks of ribs, which I rinsed last night and then salted with kosher salt. I can’t give you an amount there, lets just say it was enough to salt both sides of all 3 racks. In this case, I cut all 3 racks in half to make it easier to place them in the WSM.

Then, I placed a rack on a sheet of aluminum foil and liberally spread the rub over the meaty side of the ribs. I actually, uh, rub it in; but I didn’t give them the deep muscle massage treatment. I also coated the underside of the ribs with a lighter layer rub. Once coated, I wrapped the foil around the rack and set it on a cookie sheet.

Once all 3 racks were treated, I placed them in the fridge so they could get happy over night.

This morning, I fired up the WSM. I got some coals going in the middle and then packed around that with fresh charcoal, filling the bottom with charcoal. I just used Kingsford. I also filled the bowl up with water right off the bat (being able to use the garden hose made this so much easier). Then, I let it come up to temp, slowly choking it down as it approached 200F.

The ribs went on at about 180F- I figured they could heat up along with the WSM. When it finally came up to temp, I cut two pieces of hard maple and tossed them on top of the coals.

That was it, except for that brief interval about 4 hours in where I topped off the water bowl. Otherwise, I just monitored the temp.

6 hours later, they were done.

10 minutes after that, they were mostly bone.

Categories
BBQ

Pulled Pork

One thing I forgot to mention in my prep post for the pulled pork is that I left the pork butt in the brine for about 24 hours.

Today, I cooked it.

I fired up the WSM around 7:30 or so this morning. Since we burn wood to heat the house, I cheat. Or you could say I’m resourceful. After loading the bottom with Kingsford charcoal, I simply placed a big chunk of hot coals from our fireplace in the middle of the charcoal. I filled up the bowl with hot water and then assembled the unit. About half an hour later, it had come up to temp.

So around 8:00AM, the pork started cooking. I stuck a digital temperature probe into the butt and strung it up through the top vent in the WSM lid.

Today was hardly an ideal day for barbeque. It never got above 30 today, and even then it didn’t get that warm until the late afternoon. Thus, I had a little trouble maintaining a good temp. I was concerned it might affect the outcome.

After about 6 hours, I opened things up to take my first look at the meat. I didn’t take any pictures, but I can say it looked delicious. I felt better about the temperature issues- apparently there were none. The bark had developed beautifully. I’d come prepared with a couple of lengths of aluminum foil to wrap it up the pork with for the final cooking stage. I did so and then took a moment to top off the water in the WSM bowl. I place the meat back on the grill and closed everything up, taking time to put the temperature probe in the meat again. I took my first temp reading and it was at 140- so I had about 40 degrees to go. I wouldn’t need to open things up again until it was done cooking.

I continued to monitor the grill temp and the meat temp through the remainder of the afternoon. Finally, about 6 o’clock, the meat had come up to temp at 181. I could smell it as soon as I took it off the grill and put it onto the platter.

When I took the foil off, there was a nice layer of juices sitting on the bottom and the bone in the center of the meat pulled out without any effort. It took me about 5 minutes to pulled it apart with a couple of forks- during which time the Wife and I sampled the results liberally. The interior meat was super tender and the outer layer had a nice pink color where the smoke had penetrated. There was no need for sauce, as it had plenty of flavor between the smoke and the pieces of the bark distributed throughout.

Easily the best results I’ve attained for pulled pork.

Categories
BBQ

Pulled Pork in Our Future

In anticipation of the game tomorrow, the Wife suggested cooking up some pulled pork. I haven’t cooked anything on our WSM since the ribs from back around Christmas, so I was more than happy to oblige.

Fortunately, cooking pulled pork is nothing new to me. I’ve tried several different techniques and my favorite involves prepping it in a brine followed by applying a rub. The brine is nothing more than salt and some brown sugar, about a half-cup of each. I use enough warm water to completely submerge a 9-lb butt. I do start with hot water to help dissolve the salt and sugar, then ,because the butt was frozen, I add the butt and then top everything off with cold water.

As for the rub, here’s what I’m trying this time:

  • 2 tbsp brown sugar
  • 1 tbsp onion powder
  • 1 tbsp garlic powder
  • 1 tbsp chili powder
  • 1 tsp orange peel
  • 1 tsp cumin
  • 1 tsp ground thyme (I used a mortar a pestle for grind up thyme leaves)
  • 1/4 tsp paprika
  • 1/4 tsp cayenne
  • 1/4 tsp chipotle chili powder

I’ve applied the rub and have wrapped it well using plastic wrap. For the now, I’ve got it sitting outside on the deck, since it’s about 20 degrees out. I’ll move it inside tonight (I don’t want it to refreeze) and then get things started nice and early tomorrow morning with the WSM. Probably around 7, if not earlier. I’m planning a nice, long, slow cook.

Tune in tomorrow to find out how it turns out.

Categories
BBQ

Further Notes on Smoker

Alright, cooked my first batch of baby back ribs using the smoker today. They came out OK, but I think I can do better. More importantly, I learned a few more things about using the smoker.

  1. Cooking when it’s cold and windy is difficult. Trying to dial in a specific temperature is very difficult to almost impossible because of all the variables: fuel, wind, outside temp.

  2. I used the water bowl today for the first time and I’m not sure what it gained me other than a lot of steam. I’d read it helped to keep the temperature down, but that wasn’t entirely obvious to me. That might have more to do with the less than ideal barbecuing conditions though. It’s just too hard to tell at the moment.

  3. I’ve read that the fuel door on the side of the unit has been made bigger. Well, I’d like it to be bigger yet. Also, adding water to the bowl seemed almost impossible from the door. I had to lift the lid and poor the water down through the grills- this seemed less than ideal.

  4. The thermometer in the dome is nice, but would be a lot nicer if it was measuring the temps down at the grill level. Ideally, both grill levels. I don’t have any feel for how well the air is actually mixed in the grill- my assumption is the temps are higher at the grill level since they are so much closer to the heat source.

  5. Even though conditions weren’t optimal today, dialing in a specific temperature is not easy. Do I close the bottom vents to slow the burn, or do I close the top vent? Does opening the top one just allow heat to leave or does it mainly provide for the draft? How long do I wait to see how the temp is affected by a change in the vents?

  6. I got about 5 hours of heat on my initial load, and then an additional 3 hours after adding more briquettes. But, I wasn’t able to recover the heat level I wanted after refueling. Not sure what to do there.

  7. BE CAREFUL MIXING THE COALS. It kicks up the ash and will likely end up on the food. Bleck.

The ribs were still good. They cooked for about 7 1/2 hours or so. Getting things started was easy and I only lifted the lid to add water, so the overall operation was much nicer. I still was monitoring the temperature pretty frequently, but that pails by comparison to what I had to do with the Weber kettle style grill.

As for the ribs, I applied a rub to them last night and left them in the fridge overnight. The rub consisted of brown sugar(1 cup), onion powder(1 tsp), garlic powder(1 tsp), paprika(1/2 tsp), cumin(1/2 tsp), chipotle pepper(1/4 tsp), cayenne pepper(1/8 tsp), orange peel(1/2 tsp). I also salted the ribs prior to applying the rub. I cut each rack in half and then placed the ribs in a vertical stacker on the top rack. When done cooking, they were pretty tender and the meat came off the bone with little effort.

That said, I’ve done better. The meat can be more tender, but that will require me to get a better gauge of the temps inside the smoker and also to get better control of the smoker temps as well. Overall, not a bad first attempt- both kids ate them without complaint if that’s any measure. I’ve got more racks in the freezer to learn with.

Categories
BBQ

Smoked Chicken and Lamb

So, I received a Christmas gift a bit early this year. My parents got us a Weber Smokey Mountain Cooker. We received it on Thursday and I set it up Friday. Unlike some comments I’d read, I had no issues with assembly due to incorrect parts or missing parts. My only regret is that I didn’t wait for the boy to help me assemble it.

I was advised to cure the smoker prior to using it, so yesterday I purchased some Kingsford charcoal and let it rip. Basically, I filled the bottom with a half-bag and planned on letting it burn out and leave it at that. I didn’t bother putting any water in the bowl.

The Wife had pulled out some chicken thighs for dinner and as the afternoon wore on and the grill cooked, I started thinking it would be a waste of all that heat if I didn’t cook something with it. The curing advise I’d read and heard involved cooking some fatty meats to get the inside of the smoker good and greased up. Chicken thighs are pretty fatty, so I figured what the heck.

I let the WSM run wide open, so the temp on the dome thermometer read around 300F. I suspect the temp at the grill level was something hotter than that, but in a sense it’s irrelevant. The main thing is I ran it wide open and as hot as I could get it. The chicken took about 50 minutes to cook. When we served it, both kids had second helpings of the thighs, and everyone commented it was the best they’d had. The Wife, particularly, was impressed because I typically kill them on the gas grill, but here they were very tender and tasty.

So score that one a victory.

Cooking attempt 2 took place tonight or, more correctly, this afternoon. The Wife had prepared leg of lamb and she’d intended for me to grill it. Emboldened by yesterday’s success, I opted to use the WSM to cook it. Rather than running it hot, I opted to run it at about 250F as read on the dome thermometer. I put the lamb on the top grill and fiddled with the lower vents to get a consistent temperature. Once there, I put three chunks of maple wood on the coals. As with the chicken, I didn’t fill the bowl with water.

I also made sure to stick a probe in the lamb so I could monitor the internal temp. One thing I learned from the chicken is that when cooking, don’t remove the cover. Especially when using the upper most grill. All the heat disappears and it takes time to get things back up to temp. I didn’t want to have any problems wit the lamb, thus the temperature probe.

It took about two-and-a-half-hours before the probe read 155F. I pulled the lamb off and let it rest for about 10 minutes prior to serving. It was tender and cooked to about medium, with quite a bit of red meat. Tonight, the reviews were more mixed. The Wife didn’t like the smokey flavor and neither did the lass. The boy had a couple of helpings, as did I. Actually, for that matter, so did the Wife. For my part, I didn’t think the smoke flavor was that powerful, but I’m probably not the best judge.

So I think we’ll have to score that one a draw.

But even with only two uses under my belt, I’m excited about the possibilities. Prior to this, I’d used our Weber Kettle grill for this type of cooking and, frankly, did so rarely because it’s pretty time intensive. I’d constantly be monitoring the temperature and fiddling, plus I was constantly removing the lid to add charcoal to keep things going for longer cooks.

With the WSM, the entire operation is much easier. The side door will make it straight forward to add fuel for longer cooks, and not having to remove the lid will maintain the temperature while doing so. The grates on the bottom and the dome combine to make getting a consistent temperature much easier. Temperature monitoring is easy with the dome thermometer as accuracy isn’t as important as knowing that it’s consistent. For more sensitive cooks, like the today with the lamb, I can just use a probe.

So, I expect I’ll be doing much more experimenting with BBQ this year. In fact, I’ve created a new category here on the blog to help me keep track of my experiments. Right now, there’s a bunch of baby backs sitting in the freezer, waiting…