Categories
DIY Notweet Patio

Wall 2 Completed

I can’t get a good picture of the whole thing, but these 2 should give the general sense of it. Having completed this one so soon after the first, I think it’s safe to say no two walls go up the same. Obviously, the shape changes. It’s more than that though- the material changes, the accessibility to the material changes (in other words, rocks on the top of the pile tend to get used first, rocks at the bottom last), plus the previous wall influences decisions about what’s acceptable and what isn’t. In this one, I used vertical rocks in a number of spots, versus the first I only did that in a couple of spots against the foundation wall.

That would be stage 2 completed. On to stage 3, which is the one I’ve been most anxious for.

Categories
DIY Notweet Patio

The Weekly Patio Update

I’ve actually managed quite a bit of progress in the past week or so. I completed the excavation, over the course of the 3 hottest days no less. Additionally, all of the base stone has been filled and I’ve laid the first course of the wall. I’ve even started filling in behind the wall as well.

Worthy of note, I’ve added a catch basin to handle the our curtain drain. The original pipe posed a problem- the height of the pipe was going to interfere with the finished height of our patio. After speaking about it with a landscape guy, I basically had 3 choices: one, to cut and cap the pipe; two, to re-route the pipe; and three, change the height of the pipe using a catch basin.

The easiest was just to cut and cap the pipe. I also ruled it out almost immediately. Even though I’ve never seen water coming out of this pipe, I didn’t want to tempt fate. No, I wanted water to have some place to go. So, of the remaining two options, the catch basin was the simplest. The way it’s designed, I can even use a smaller pipe to make sure I don’t run into any problems with clearances.

If you’re wondering if I’m worried about the post on the far right, the answer is “a little”. I didn’t originally dig that close it it, but the dirt kept falling off. Luckily, with the wall going in now I’m less worried than I was since the back filling will shore things up.

As for wall features, it’s obvious this one is much longer but much shorter. Hmmm, that last sentence reads funny. What I mean is it won’t need to be as tall as the other wall, but it is much longer with the ‘S’-curve design. The height will gradually fade from about three-and-a-half feet at the house to about 18 inches at the other end. I’ll be following the same basic build process- build up the wall, then back fill with large stone and the three-quarter inch stone, cover with the landscape cloth and complete the back filling with sand and top soil.

One quick observation about this wall versus the other is I’ve been able to use larger stone more consistently on this first course. Looking at how the other wall came out, I’m not sure if that’s good or bad. On the one hand, the larger stone on the bottom theoretically makes the wall stronger. On the other, I think the randomness of rock size makes for a better overall look. That said, it’s early days for this wall. I seem to remember not knowing what to think of the first one and it ended up better than I’d hoped for. Perhaps the medium is the key and as long as I build it solidly, the appearance will take care of itself.

Categories
DIY Notweet Patio

More of the Same- But Different

Completion of the other wall is only part of the project. Now, I get to do the same basic stuff on the other side. This wall will be easier in some ways, and more difficult in others.

As should be obvious from the excavation, it will have more curves to it. This will help to increase the patio area quite dramatically. Really, under the deck looks bigger already, excluding for the two massive pile of dirt I have in the center. But where it has the “S” curve feature, it won’t be nearly as tall- standing only about three-and-one-half feet at it’s tallest.

Aside from that, it’s more of the same. The next step is to dig down about a foot, line it with rip-rap and then fill with stone. Then I get to start building and backfilling.

Oh, almost forgot. I’ve also got to do something with that drain pipe. Don’t worry, I’ve got plans for it.

Categories
DIY Notweet Patio

Stage 1 Complete

I tried to find a suitable quote from A Song of Ice and Fire but was unable to do so. So, suffice it to say, this wall is complete.

By the end, even the kids wanted to help. Mostly, I think, because they were able to climb up onto the top of it and “play.” I had them grading the backfilled area. If nothing else, it was an initial active load test to make sure the wall is solid. It seems to have passed with flying colors.

Next up, the other side of the house, where the next wall awaits. That one won’t be as high as this, but it will have more curves and, I think, be a little longer. I’ll enjoy this one for a day or so before starting the next one.

Categories
DIY Notweet

Wall Updates

The latest status on the wall. It’s taken shape nicely. I’ve got about another foot to go at the house side and I’ll taper it into the lower side as it comes around. Stone wall building is definitely a discipline where focusing on the details can get you in trouble.

The probably deserves a bit more exposition. Details are important in every project. In fact, the details make the difference between a successful project and an unsuccessful project. The trick is knowing which details are important.

In the case of stone wall building, I think a natural detail to pay attention to are the joints between rocks. This details lends to hunting for only stones of a certain size, shape and flatness. The problem is, those particular sorts of stones, at least in my project, are rare.

It turns out the more important detail to pay attention to is how it sets on the wall. The shape is almost completely irrelevant because other rocks can be used to build around the odd shape. Take a look at the picture closely and there are quite a few odd shape rocks. They end up being an accent, even though the rocks around them don’t necessarily fit exactly. In fact, the overall effect of the varying rock sizes and shapes, along with the gaps (assuming they aren’t completely egregious) makes for and overall nicer look.

The back filling has been moving along as well. I don’t think I have to worry about collapses so much anymore. I’m using landscape cloth over the stone filler to keep the dirt and sand from filtering down into the stone. That should help with drainage over the life of the wall. Which better be very long.

Just for the stone, I’ve moved about 12 tons of material I figure. I’ve gone through better than half wall stone and 5 tons of the 3/4 inch stuff. Still got a few tons to go as well. Then it’s on to the stage 2.

Categories
DIY Patio

Meanwhile, Back on the Wall…

Alright, that post title is deliberately trolling George RR Martin fans. And if you don’t get that reference, well, it wasn’t meant for you.

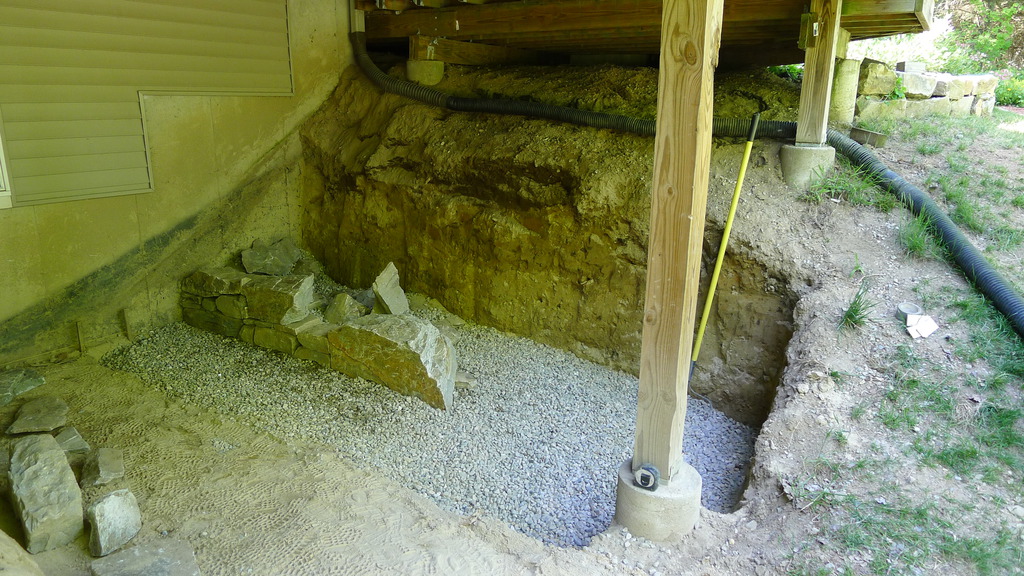
I should have known that moving all that earth and stone was going to cost me. My whole body has been hurting for the past couple of days. Shoveling out several yards of earth by hand and by wheelbarrow is not for the faint of heart. Literally- don’t do this stuff if you have a heart condition. Now that I’ve started moving rocks around for the wall, my forearms ache. Plus the blisters.

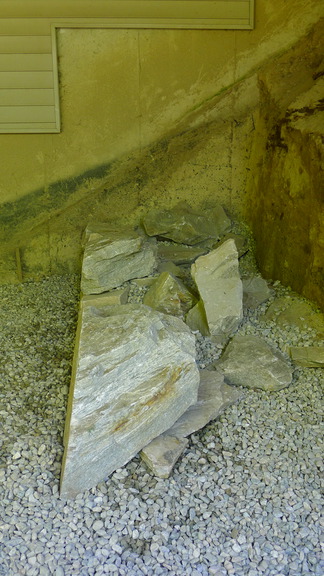
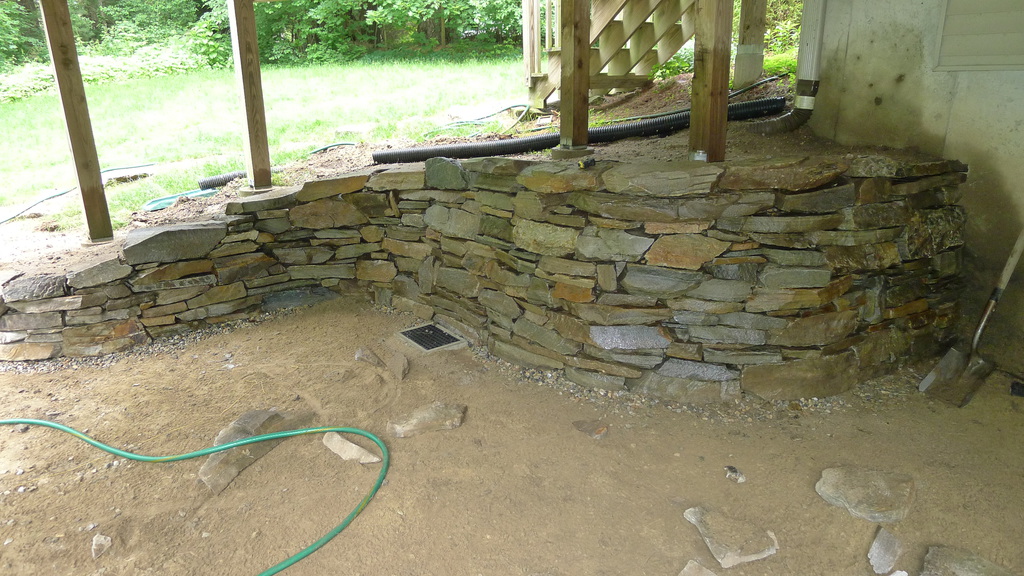
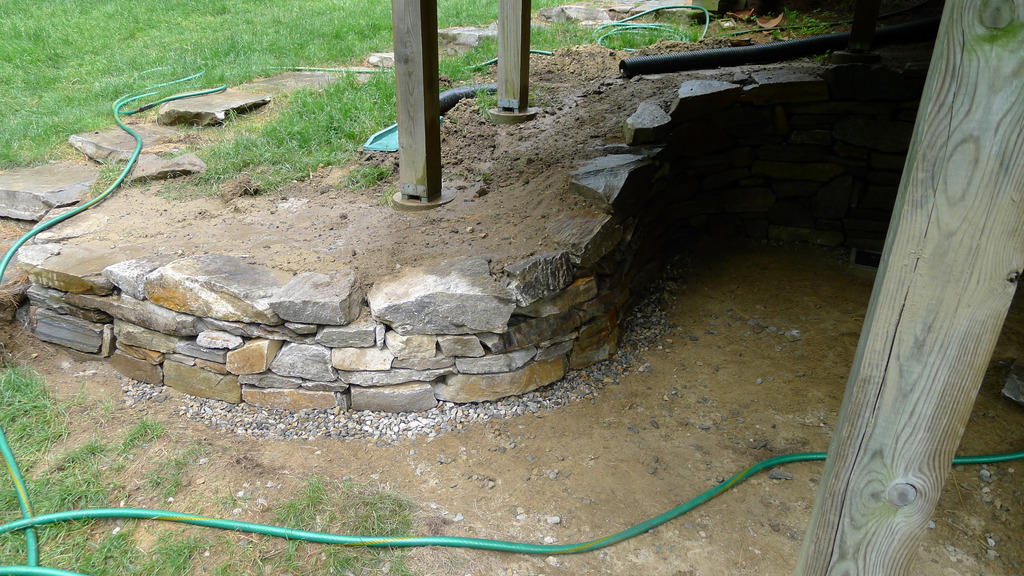
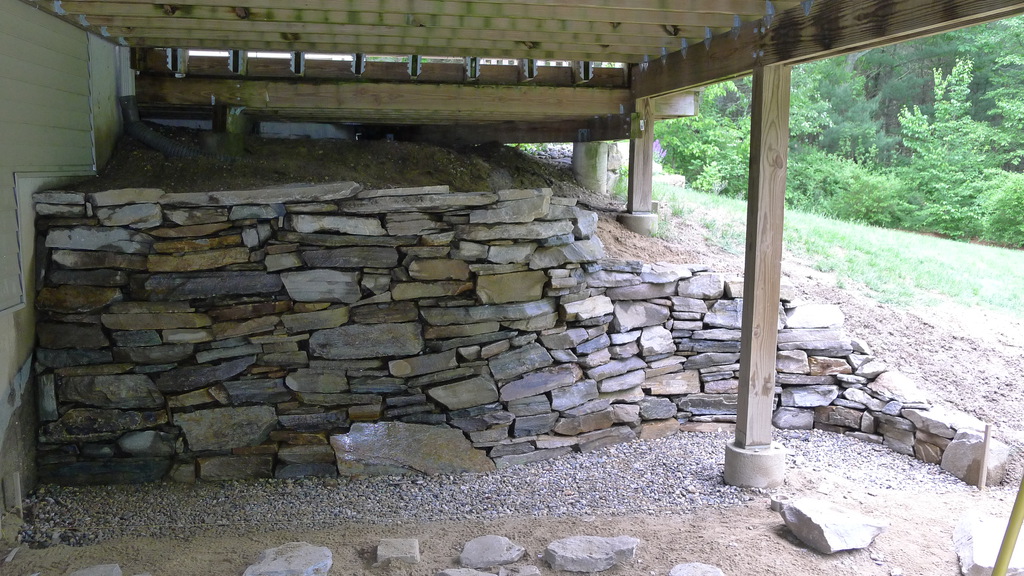
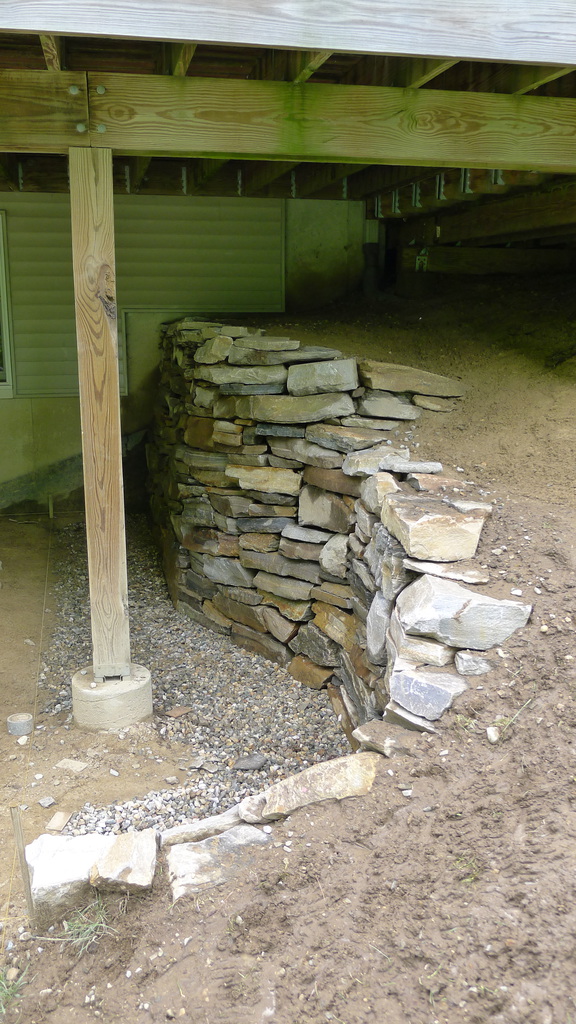
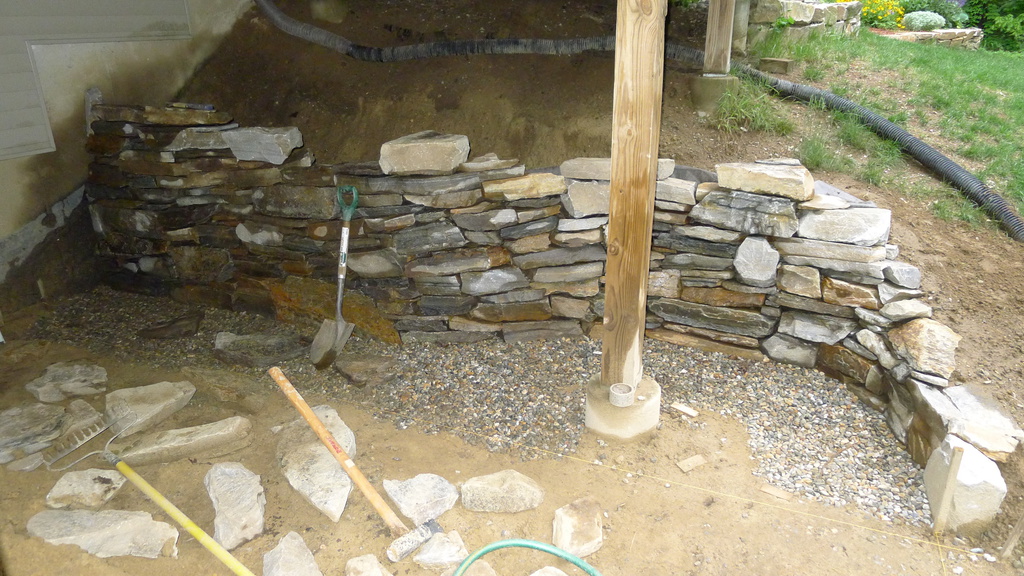
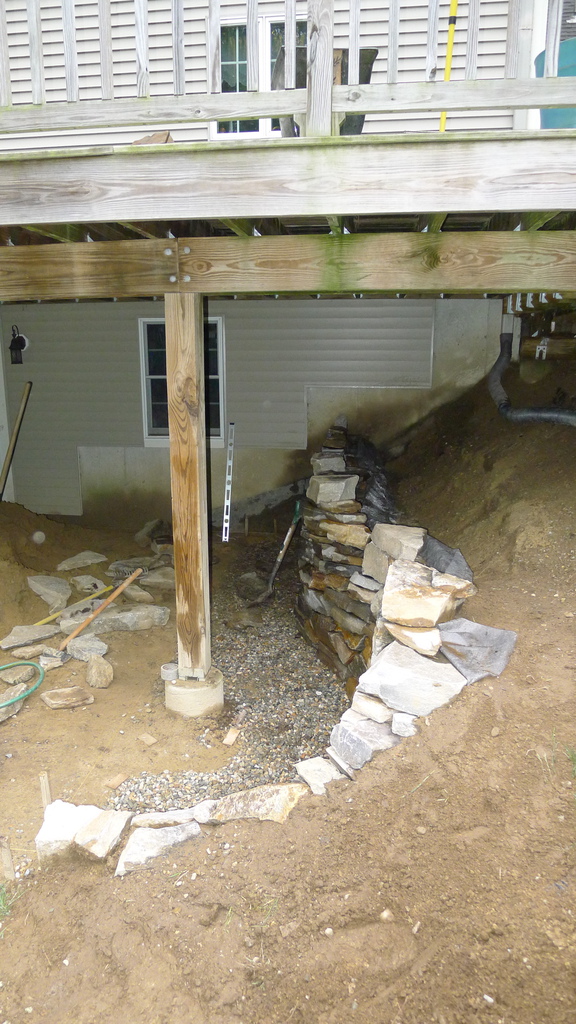
So this is the progress so far. I’m not sure if I should be pleased or not. On the one hand, that represents 3 days worth of work. On the other hand, the first day I only got to work on stacking rocks for a couple of hours, and yesterday for about 45 minutes. Today, I got another couple of hours worth of work into it. So from that standpoint, it’s not too bad. Still, days are ticking away.

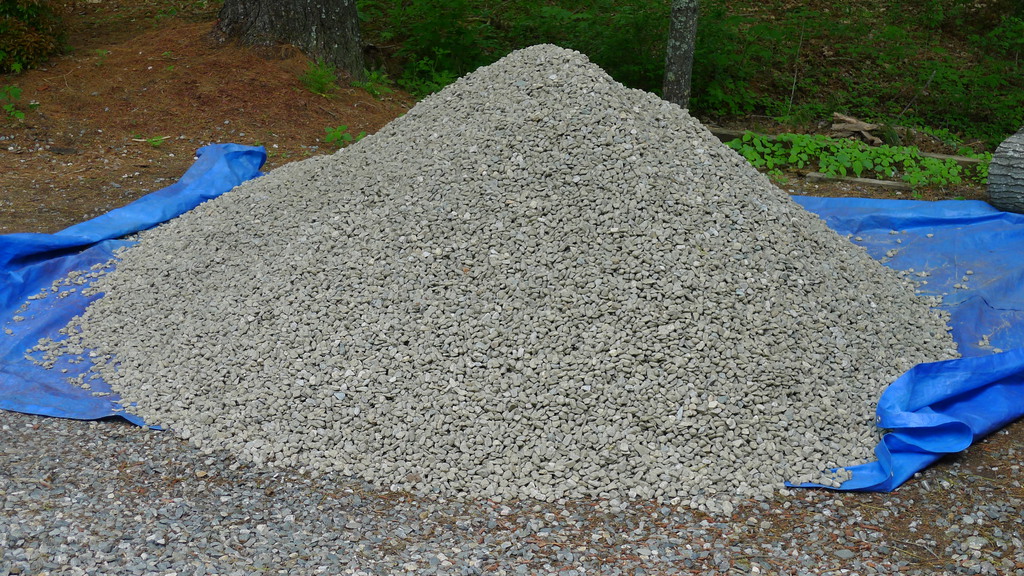
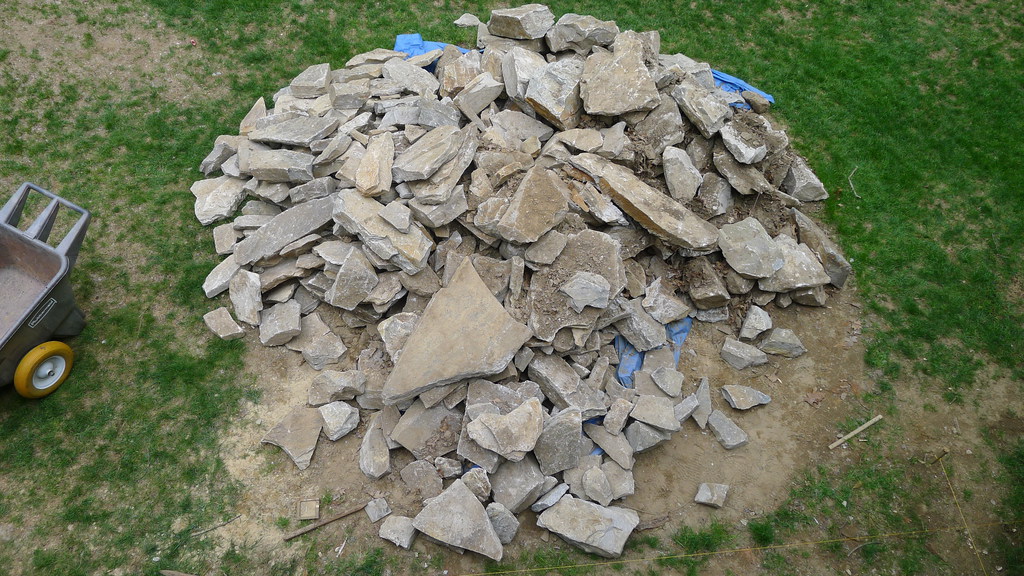
The second picture shows my general tact for buttressing the wall against collapse. I’m back filling with large stone right now for weight purposes, and filling the gaps with the smaller three-quarter inch stuff. As I get a bit higher, it’ll start to narrow up since there will be less weight pushing against it up there. The big rocks should provide stability, the little rocks drainage as well as locking everything together.

That’s the idea anyway.

I’d intended to spend the day working on the wall. Life conspired against me to a degree though. First, there was the trip to the grocery store, 90 minutes gone. Then, I had made arrangements to get new tires for our car, so I went to take care of that. Another 90 minutes, gone. Next up, the sidelights for our front door needed to be painted. It’s a small paint job, so I figured I could bang it out in a few minutes. After 10 minutes, I realized I’d underestimated the time because it’s all cut-in work. Chalk up an hour there. Throw in whatever other random odds and ends needed attending like dogs, laundry, lunch, phone calls, email and it’s almost 1 o’clock. In 2 hours, I have to pick up the kids from school and then my evening starts. So I got my couple of hours worth done on the wall, which was actually more like 90 minutes since I stopped so I could squeak a shower in.

Then the shuttling began. Pickup the kids from school, bring them home. Listen to them fight. Remind them they have to get ready. NOW. Listen to more fighting. Remind them again. WE’RE GOING TO BE LATE. The lass can’t find her dance stuff. THERE it is, at the bottom of a load of laundry. WTF!?! How do they have that much laundry? Go start a load while they finish getting ready. Finally get them in the car and off we go. Get the obligatory “What are we having for dinner?” question. I threaten them with chicken.

Drop off the boy at martial arts, continue on with the lass to dance class. Stop at dance class long enough to see her class start, then off to wait on the boy. Stop and gas up the car along the way. Wait at martial arts class for 30 minutes, then back to the dance school. Wait 40 minutes for her to finish up. It’s 6 o’clock. The boy has homework to complete and I never got anything going for dinner. Probably my biggest shortcoming on the at-home-parenting qualification list. So we stop at Wendy’s.

Now we arrive home. We eat our gourmet meals. Feed the dogs, feed the birds. The boy has to finish his homework. The lass has to practice her “easy” spelling words. I go do the laundry shuffle (washing machine to dryer), then I have to put a second coat on the sidelights (remember those?)

CRAP! The boy’s birthday is this weekend and he wants to bring brownies into his class tomorrow. Start the brownies. Time for bed- for the kids. Get them to bed, then it’s back down to fold laundry.

Finally, sit down. Eat a quart of ice cream. Sit down, type a blog post. With lots of typos. Proofread.

What did you do today?

Categories
DIY Patio

I Rock

The beginning of phase one of the patio project has, uh, begun.

The idea is pretty simple. We’ve got a lot of space under our deck that would make for a nice sitting area. Until now, it’s just been a pit. That is going to change rather drastically over the next several weeks. We’re putting in a paver patio down there.

But before I can lay any pavers, I need a couple of retaining walls. For one, they’ll increase the usable area down there because otherwise the slopes of the ground eats up a sizable portion of the available space. The other benefit of the retaining wall is it will provide a nice border to build the pavers out to.

I’ve dug the hill out here by hand. Yes, I did that with a shovel, an adz and a wheelbarrow. I’ve pull some finished level lines that aren’t visible in the picture, but I’ve dug down about 12 inches and then put a layer of rip-rap down. The edge of the wall won’t actually be lined up with the edge of my digging here, rather it’ll be back about a foot, thus why there’s a void between the edge of the digging and the rip-rap.

That’s the pile of 3/4″ stone I’ll be using to create drainage for the wall. Tomorrow’s job will be filling the hole with this stone. I’ll also be back filling the wall using some of this stone as well. Whatever it takes to keep the amount of water behind the wall to a minimum.

And here’s what the wall will be built with. That’s about 10-ton of stone. It all looks gray, but there’s actually quite a bit of color in it- orange and red to be exact. Some of those rocks go about 150, maybe 200 pounds. Those are the ones I’ll want to get things started with. Best eat my Wheaties tomorrow for breakfast.

Oh, and the digging isn’t done yet. It’s just done enough that I can start laying some wall now. The wall is going to continue out from under the deck and create a semi-circle going up the little hill there. The Wife can do some more planting or something there when it’s done.

Categories
DIY Notweet

How to Fix a Window Regulator

I didn’t want to fix our cars window. I’d even called a “professional” to come do it. I’d done all the hard work for them, figured out the problem and procured the part. I explained what needed to be done and they were supposed to come out Thursday.

They no showed.

Actually, I ended up calling them late in Thursday afternoon and telling them not to come because we needed the cars at that point in the afternoon, so it would be a waste for them to show up. They assured me they would come by yesterday, in the morning.

Again, they no showed. To make matters worse, they have yet to call.

Not that it will matter at this point. I’ve already done the job.

After the jump is a description of the process I went through to change out the window regulator for a Toyota Matrix. No pictures though. I don’t think they’d be very helpful.

Prior to the instructions, for the curious, the window regulator is the mechanical portion of the window lift. It is basically a scissor with one of the arms fixed to the door so that the other, which is connected to the bottom of the window glass in some way, can raise and lower the window. A motor is attached to the “handle” side of the lifting arm. I believe the scissor arrangement also gives some mechanical advantage to the motor for lifting purposes.

Categories
DIY

If Your Lawnmower Won’t Start…

I have a few caveats before I proceed:

  • The lawn mower should be relatively new, no more than 10 years old.
  • The engine in this particular case is a Briggs & Stratton.
  • If you don’t know what “Briggs & Stratton” is, you should just bring your mower to a repair guy.
  • The mower should be in relatively good condition.

OK, throat clearing complete.

On the lawn mower is a fuel tank. Connected to the underside of the fuel tank is a little black piece of rubber hose. That little black piece of rubber hose leads to a little metal bowl. On the bottom of the bowl is the head of a bolt.

It is a very special bolt. Not in the “on a very special episode of the Big Ban Theory…” sense but in the “not a normal bolt” sense.

Unscrew that bolt from the bowl. Then look at the threaded side of the bolt. There will be a hole through the tip that comes out the side. It is a tiny hole, but it must be absolutely clear of debris. Blow through it to clear it out. Not just a puff either- so you can almost hear it whistling.

Reassemble the bolt and bowl onto the lawn mower and try starting it again.

You’re welcome.

Bonus wisdom: If you don’t like gas all over the place, drain the tank first. Don’t tip the mower because the lid is not liquid tight and the gas will flow through the lid and drip. Also, don’t do this on the grass.

Categories
DIY Notweet

The Next Project

The site of our next big DIY project. I’ve begun breaking ground today. First I had to clean some of that mess up though.

Details to follow at some point later when I deem it appropriate to start doling them out. Suffice it to say for now, this area won’t look like this for much longer.