Categories
Armoire Notweet Woodworking

The Armoire- A Mistake

I thought I was done with the armoire, but as it turned out I made a mistake in my design. The mistake turns out to be obvious enough in hind sight, and it was easily remedied. This is more a matter of jotting it down so I remember for the next time this situation arrives.

The problem had everything to do with the drawers. They are large, solid wood doors made of maple, cherry and cedar on the bottoms. The shear size of them (nearly 3 1/2 feet wide and 2 feet deep) necessitated larger dimensions on all of the pieces, including the bottom which I made 3/8″ thick. The larger pieces means more weight, even before they get loaded up with whatever.

The drawers are mounted on Blum invisible drawer slides. These slides mount to the sides of the cabinet, but then hook under the drawer so when the drawer is pulled out the slides themselves are not seen.

To support the runners attached to the cabinet, I fashioned rails for attaching the slides. Those rails were mortised into the posts at the front and rear of the lower cabinet space. And that’s where the problem occurred. The glue holding those rails in place in their mortises let go under the combination of the weight of the drawers and the active, day-to-day usage of them. Because they let go, the drawers sagged and would hit the rails on the front that defined the drawer openings. The problem got so bad that one of the clips that attaches to the drawer itself, and then to the drawer slide, was knocked off of the drawer and made using the drawer basically impossible.

So, the fix was simple. First, I used a single screw in each end of the rails to reattach them to the post. Now, there’s not way for the rail to fail short of it actually breaking. Next, to make sure there is enough clearance, I reattached the drawers slide a little higher. The combination of fixes took care of the problem and the drawers work like new again.

The mistake I made was in not using the proper mechanical joint for attaching the rails. I should have used a sliding dovetail design instead of a straight up mortise. My assumption was I just need joint strength in the vertical direction. As it turned out, there was also a moment that I had to account for due to the drawer activity. A sliding dovetail would have handled the problem splendidly, pinning the rail into the post with no chance of it breaking out. Something for me to keep in mind for the next project I work on.

Categories
Armoire Woodworking

The Armoire Ends

Here’s my first, ever, entry on the armoire, appropriately titled to boot. The most interesting thing is the date: September 27th, 2009. That means it took me 3 year to finish this project.

On the one hand, I’m glad because where projects are concerned, a former colleague of mine had a simple theory: The longer a project takes to complete, the more unlikely it is to be completed. He may have been speaking about engineering projects at a company, but I think he also meant it in a general sense. I’m glad this ended up being an exception.

So why did it take so long?

Looking back, I seem to have finished the dresser portion of the project by April 2010, including finish and hardware. So, roughly, 7 months of on and off work which entailed the carcass complete with mortise and tenon joinery and floating panel construction, 3 large dovetail drawers and the top with trim.

The next post is in June of 2011! Then, not again until August of 2011. That was just prior to my elbow injury and I then have a post for March of this year when I finally got back to it. (Amusingly, I see I was thinking of my colleague’s theory even then!) From there, I worked slowly and steadily until yesterday.

Leaving out the 6 months lost due to my injury and recovery, the biggest mistake was in underestimating what it would take to complete construction of the cabinet. I remember thinking it was simply a matter of building up the sides and doors, with a couple of shelves thrown in and some kind of molding to trim out the top. There were, in fact, a lot of details that I completely glossed over. My miscalculation was apparent in my own plans as well. I’d drawn up plans for the dresser portion in great detail, thinking out all of the little gotcha’s and pitfalls. For the cabinet, I barely drew up any plans at all.

So therein, I’d say, lies learning point 1 for a project- design the whole thing, even if it can be neatly divided into 2 separate stages. Also, I think it was a mistake to divide it into 2 stages. Had I possessed a completed design, I could have been finishing 8 legs, and 4 sides at one time and avoided unnecessary retooling for the same basic mortise and tenon construction and floating panel construction. Of course, room would have become an issue in the garage, but my time management would have been more efficient. But all that hinges on my having a completed design from which to work.

Another mistake, which ties into the previous one, is to not underestimate the scope of the project. I had a good idea with the dresser portion, reflected in my detailed planning and steady progress. But thinking of the cabinet as “just a box” put me in the mindset that it would be trivial to whip up, and as I realized such was not the case, I became discouraged and kept putting off design decisions.

A few other things I liked, and didn’t, about the finished result:

  1. The finish is Waterlox which I rubbed, rather than brushed on. I thought it came out just shy of spectacular. In between coats, I took the time to sand (600 grit wet/dry) and wipe down everything. It made a huge difference in the finished product. I also took the time to make sure all surfaces were properly prepped prior to finishing, because the finish stage is just that, a finish. It’s not a chance to hide mistakes or blemishes.

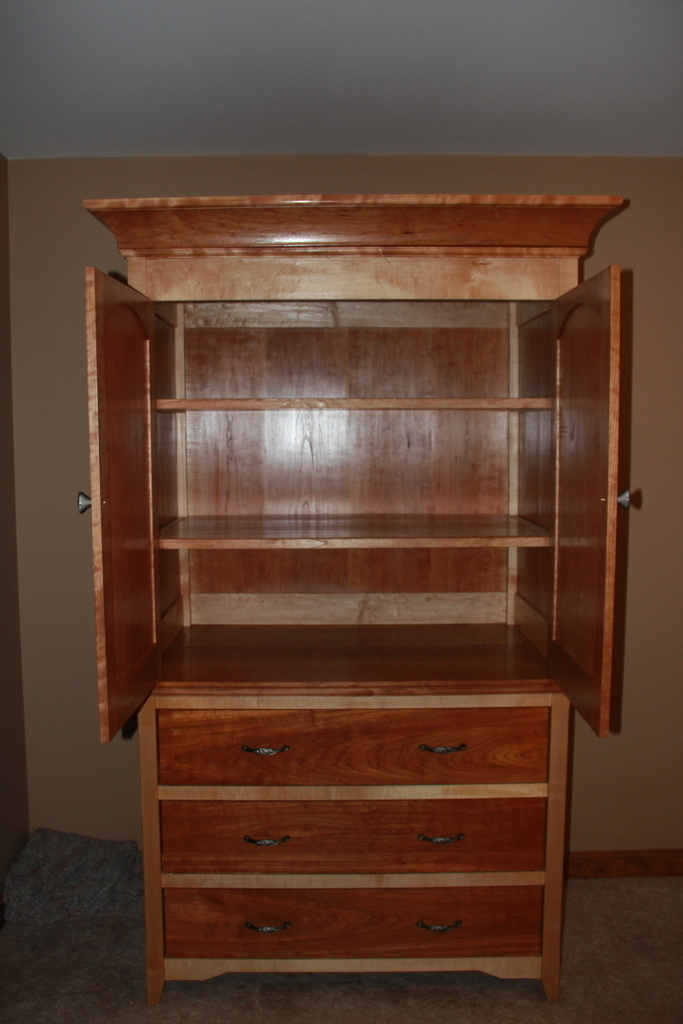
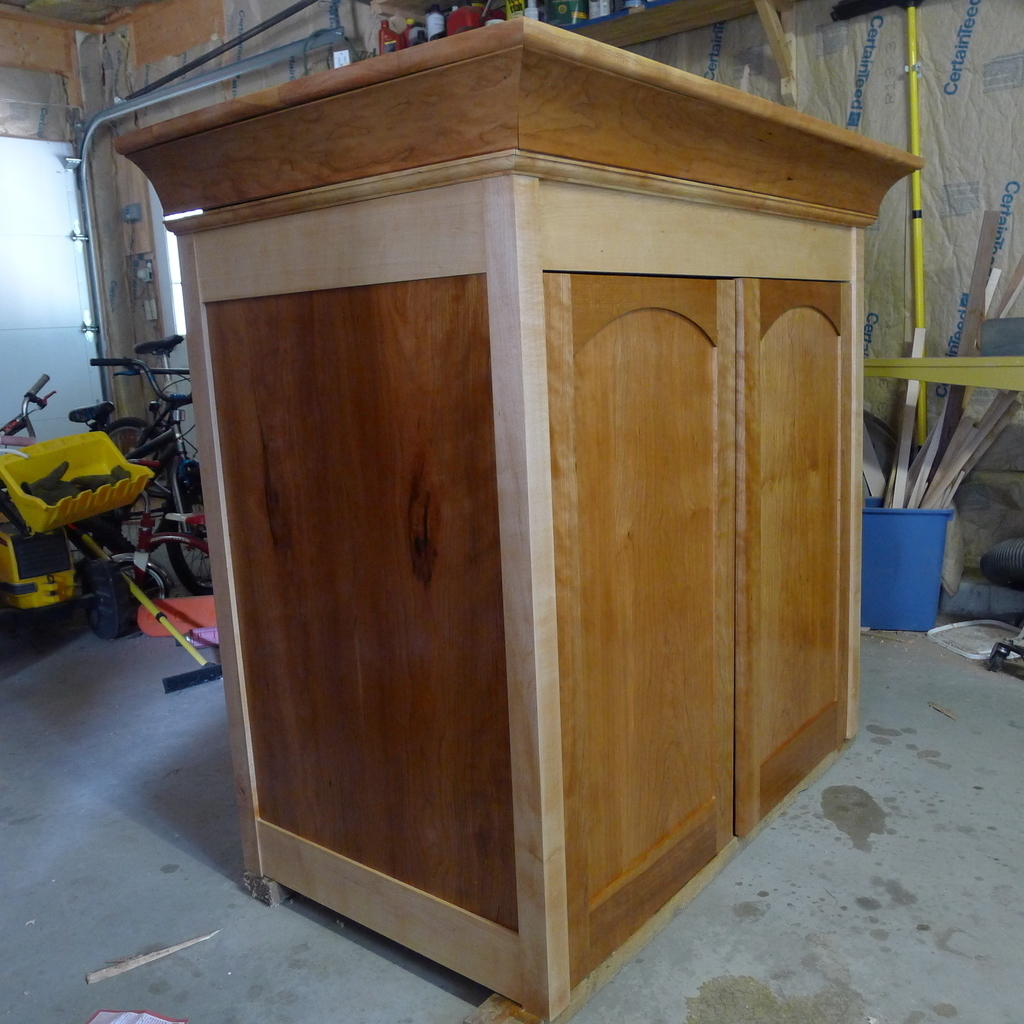
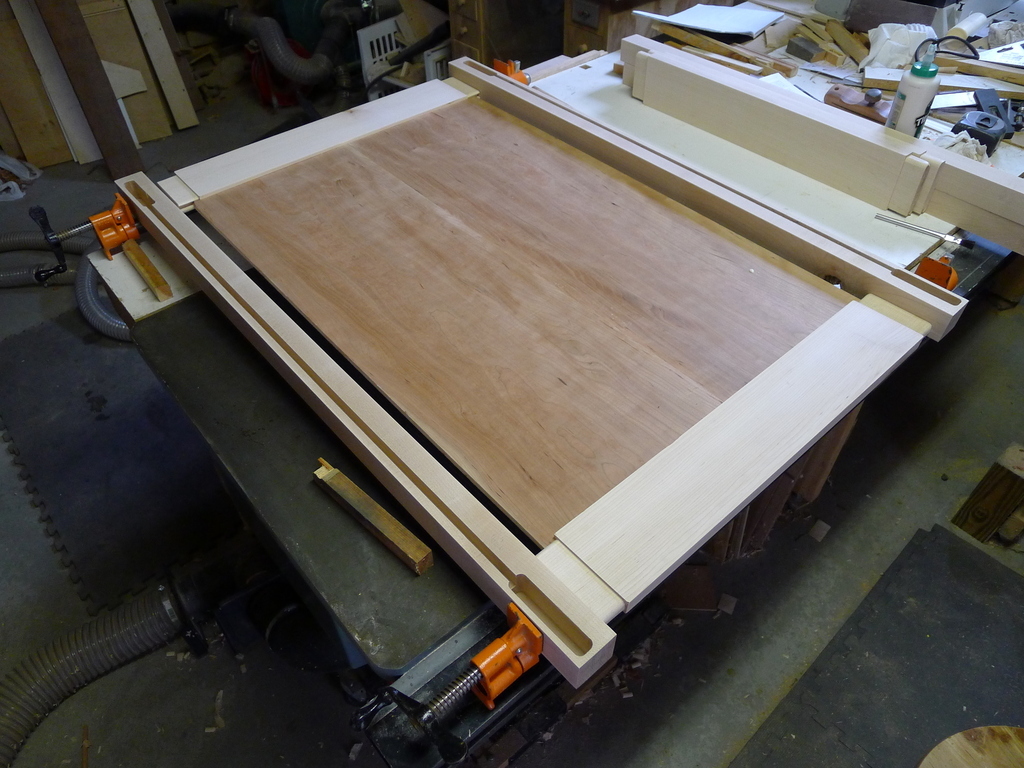
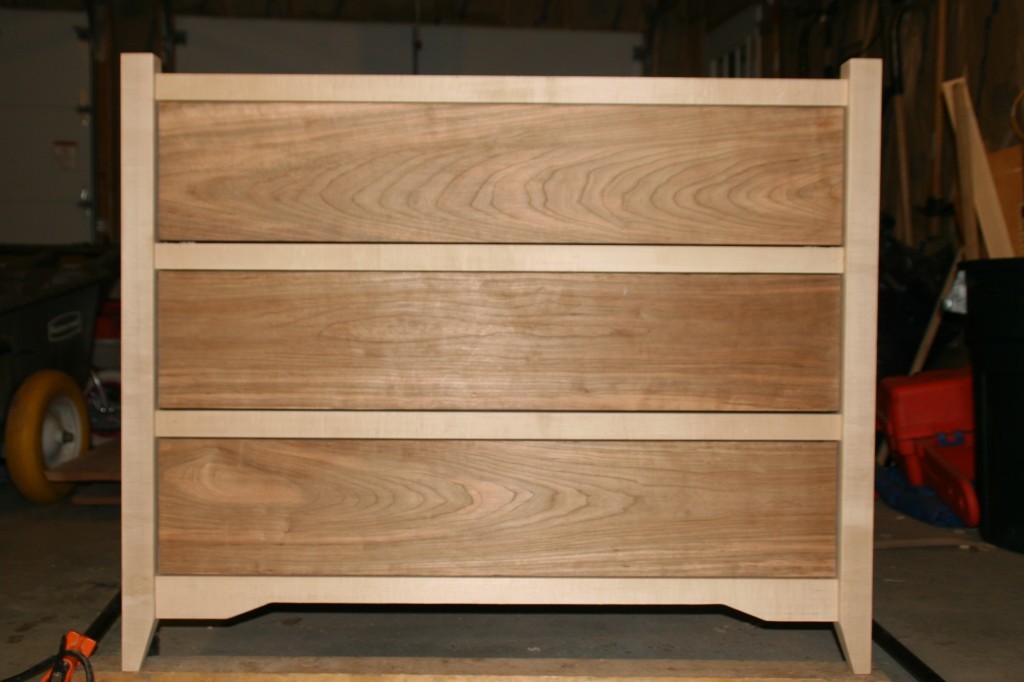
  2. In general, I was happy with the joinery results. The dovetailing I already documented thoroughly, but the mortise and tenon joinery was everywhere: the doors, the cabinets- sides (4) and back (2). That joinery is key to the whole thing because if it isn’t executed well, then the whole thing starts to fall apart. I can say that after nearly 3 years, the dresser is still solid as ever and when I placed the cabinet on top, there were no problems with rocking or wobbliness. Also, I was alway checking for square by measuring diagonals; my biggest out of square measurement was by 1/8″ over a 4 foot span.

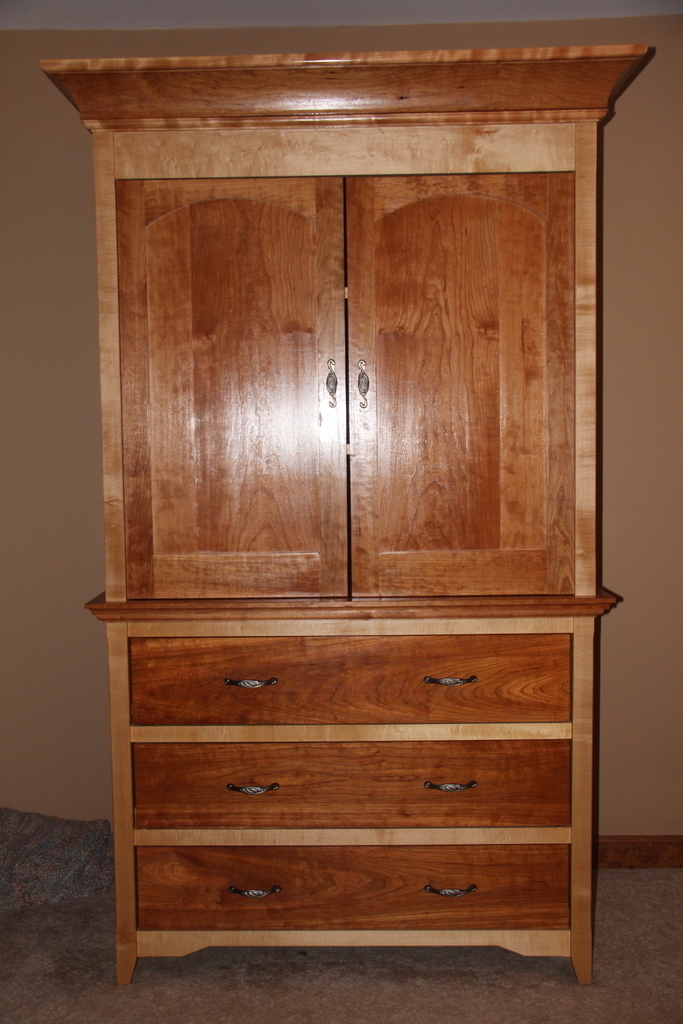
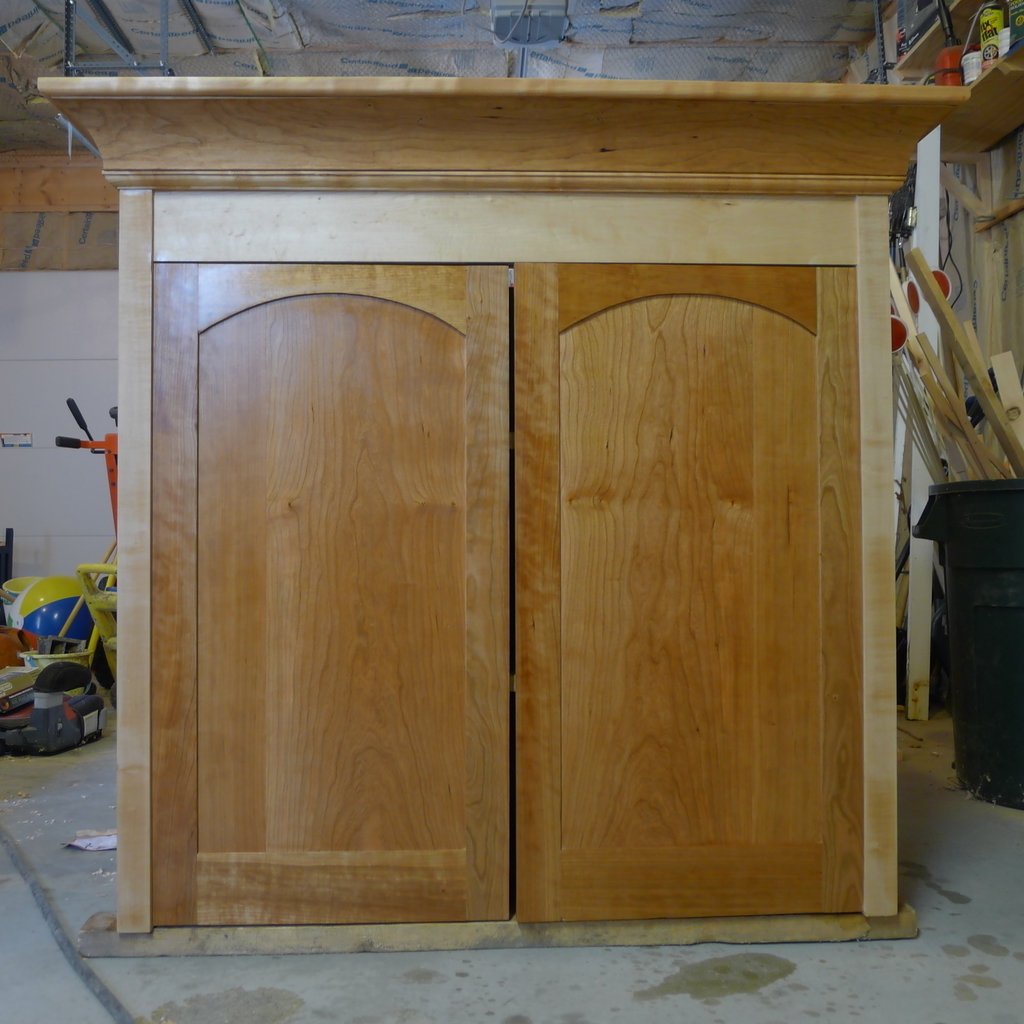
  3. The eyebrow on the doors was a nice touch, so too the large cove molding. The design is almost all straight lines. The couple of curves gave it just enough variation to make it visually interesting.

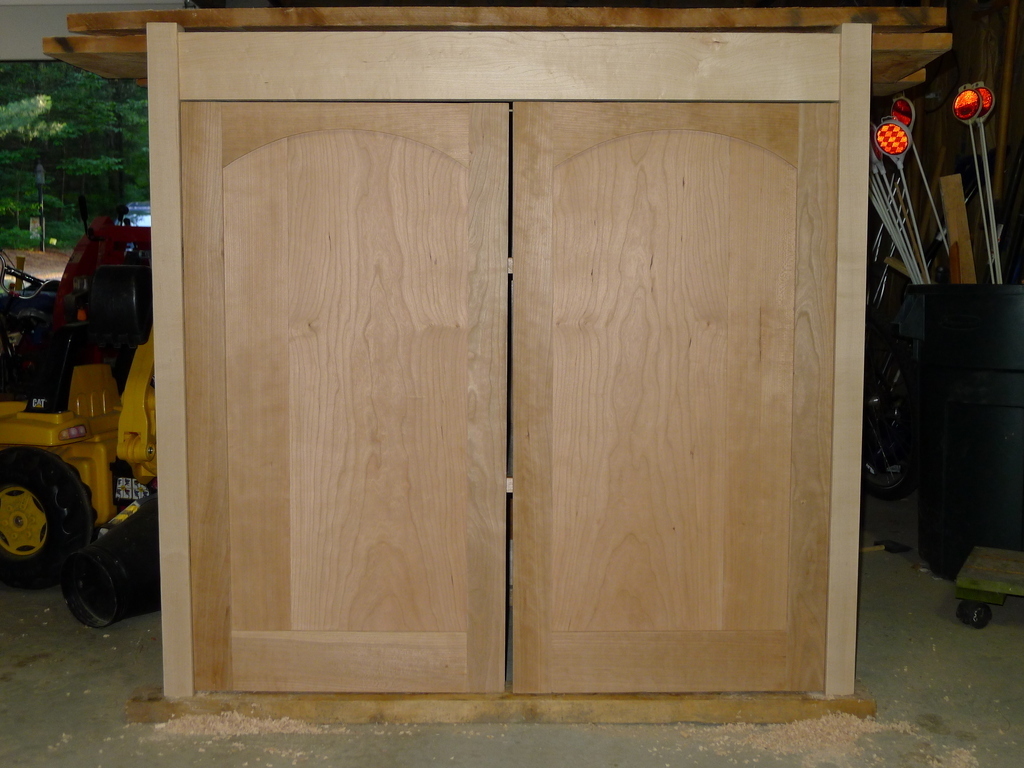
  4. I though the use of the cherry was well executed. In general, I used lots of cathedral grain for all the panels. The only one I strayed from that was the rear panel on the cabinet- which won’t be seen much anyway. For the doors, the rails and stiles are straight grained pieces, suited to there construction needs. Along these lines, the quiet maple serves nobly as the weight-bearing wood, nicely contrasted with the flamboyant cherry.

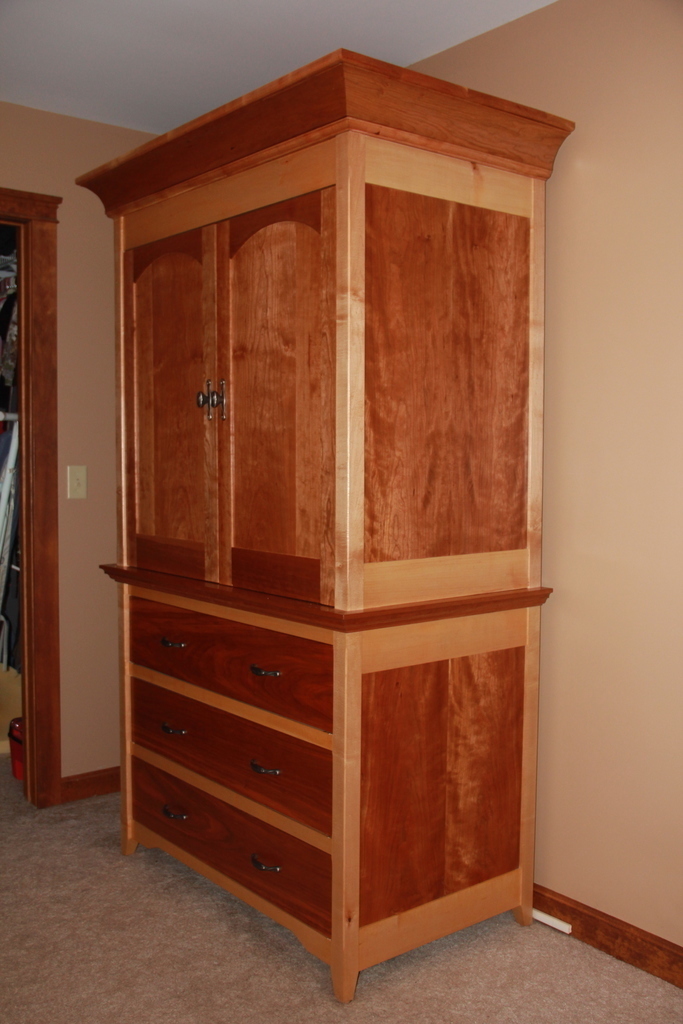
  5. I don’t like how the top of the cabinet came out, entirely. Mostly, this is due to construction decisions that made it difficult to figure out how to mount the top. Also, the cove molding could have been made a little different to make it easier to mount up there. This one goes back to the “design the whole thing” mistake.

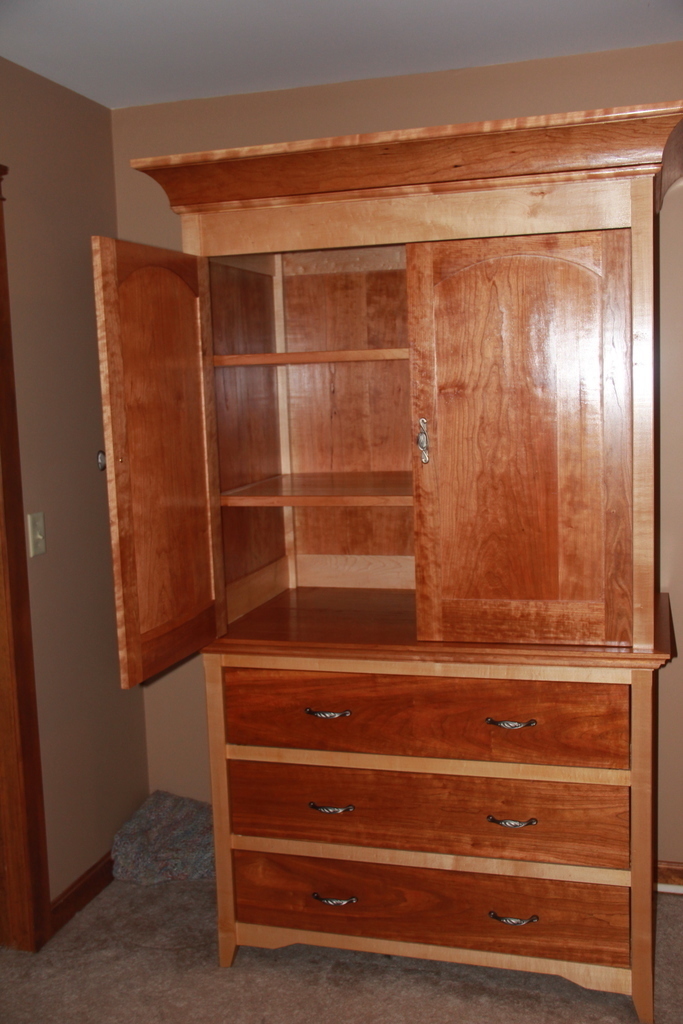
  6. The Blum drawer slides and the SOSS hidden hinges were kludges to make up for the fact that I hadn’t properly accounted for all my design decisions. I’ve talked about the Blum slides (bottom line: if using Blum slides, design with the selected slides from the start and follow their guidelines) in previous posts, but the hinges were a problem because the doors are inset and recessed. Having the recessed doors and using those hinges also means the door don’t swing 180 degrees, only the 90 or so from the close position.

  7. Going back to the cabinet top, I ended up using screws to anchor it into place. I don’t like that one bit, but it was a necessity at that point.

And with that, so ends the armoire project.

Categories
Armoire Woodworking

The Finished Armoire Project

Here it is, finished and assembled in it resting place.

I actually have quite a few thoughts I wanted to put down, but not now. Too tired. I’ll revisit it again tomorrow after enjoying the fact that I completed the project at long last.

Categories
Armoire Woodworking

TA-DA!

I still have to put the final coats of finish on it. And get it upstairs. And put the handles on the doors. And shim the doors so they hang properly. And attach the top securely to the cabinet (right now it’s just resting there). And mount the cabinet to the dresser that’s been waiting for it for over 2 years now.

But other than that, yeah. It’s done.

Categories
Armoire Woodworking

Finishing the Armoire

I’m finally finishing the armoire. Literally.

When last I’d reported, I’d finished making some cove molding to be used to trim out the top of the cabinet. Since then, I’ve also fashioned some extra pieces of trim as well as glued up the wood to make the top.

So today, I finally started applying finish to the cabinet. So far, I’ve only done the panels and the doors. I’m holding off on the maple posts and other pieces until I finish fitting everything together. It’s been a bit tricky securing the cove molding to the top as well as the cabinet. All those angles make things a bit difficult.

I also ran into trouble with the top. The boards I used to glue it up weren’t perfect, so the finished surface was less than perfect as well. Keeping mind that it’s about 4 feet long and 2 feet wide, it has a small twist in it so the molding doesn’t sit flush on it. I could have forced the trim to conform to the top, but I opted for a different approach. I’m trying to use the varnish to reduce the cupping in the board before attaching the cove molding to it. I’ll be curious to see if it works.

I’ll post pics when I’ve finished assembling the top.

Categories
Armoire Woodworking

Cove Molding The Hard Way

To finish the armoire, I need cove molding. Unfortunately, I can’t just run down to the local Lowe’s or Home Depot because they don’t carry cove molding in cherry. But that’s what I need. So I had to fabricate some molding myself today.

The molding I made is made use 3/4″ stock. I ripped the boards to a 4 inch width, then set about hogging out the material using my table saw. I’ve seen it done where the wood can be push at an angle across the blade, thus hogging out the desired arc in one fell swoop. I didn’t use that technique. Instead, I kept adjusting the depth and position of each cut until I’d removed all the material I could. The result is a series of steps that rough out the arc. For each cut, I’d set the blade and fence, then pass the wood over it, turn the board end-for-end and do it again, so the arc ended up symmetrical.

My initial cuts were in the 2 deepest cuts in the center. I then switched to working from outside to in. Initially, I tried eyeballing each cut, but that didn’t work so I traced an arc from the middle to one edge so I had a line to work to for each cut.

When that was all done, I tried to sand the results to smooth it out. After going through 3 pieces of sandpaper on my first piece of wood, I decided to give my curved card scraper a try. That worked out much better and I finished the job that way. After the jump are pictures of the stock at varying points in the process.

Categories
Armoire Woodworking

Armoire Progress and Pictures

So, here we go. Seems like as good a place to start as any. The doors are actually mounted on their hinges here. More on that in a bit. Not much else to comment on the doors, the panels are book matched and the eyebrow is pretty clear here. I wasn’t able to get a single piece of wood wide enough to serve as the panel, so I had to do a glue up.

Categories
Armoire Woodworking

Recent Armoire Progress

I’ve just completed assembly of the doors for the armoire, which means I’m getting real close to finishing it. My main task now is to create the molding and the top, apply the finish, mount the doors, and I’m done. Real light-at-the-end-of-the-tunnel territory here.

The doors went together almost better than I’d hoped. In fact, in addition to the dovetailing, door assembly is another area where I’ve improved tremendously on this project. Actually, mortise and tenon joinery in general is what I’ve improved on. I’ve learned how to effectively wield a shoulder plane to trim the tenons to nicely fit a mortise. Now more racked doors or floating-panel assemblies. It’s kind of nice to have achieved a level proficiency and skill with this stuff. All it takes is time and lots of crooked doors.

One nice I did different with these doors was to put an “eyebrow” on the panel. When I initially decided to go this route, I thought of a couple of possibilities for how to go about making the rails and panels. In the end, I went with the simplest, I think method: cutting a large radius across the top of the panel and a matching arc from the top rail. I still had to be careful when cutting the panel to length, and width because the arc made thing a little tricky (where do I measure the length? the middle? the ends? Plus, it has to fit into a groove in the rails and stiles.)

Doing this made the assembly of the door a bit different than normal panel door assembly. Instead of gluing and assembling a stile and both rails, then sliding the panel home and finally adding the second stile, the assembly started with a stile and the top rail with the eyebrow cut in it. After those pieces were mated, the panel was inserted followed by adding the bottom rail to the assembly. Then, I completed assembly by adding the other stile. I had to do this because with the arc from the eyebrow, there was no way I could assemble both rails and then slide the panel into place.

I’ll try to get some picture of up in the next day or so to show off the work that’s been accomplished. But in all, I’m pleased with the product and I’m looking forward to seeing the finished piece come together.

Categories
Armoire Woodworking

Some Gluing!

Amazingly, I finally got a chance to do some gluing today. I’m happy to report it went pretty well, although the rear panel gave me some fits. Mainly, it was a clumsy operation for 1 guy to work through because of the size of the parts involved. But, once I got everything started, the clamps did the rest of the work pulling everything together.

Now that what I have is together, I’m wondering how the hell I’m going to get it up to the second floor. It must be close on 100 pounds, plus it’s 4 feet wide, 2 feet deep and 3-and-a-half feet tall. Plus, I still have to add 2 doors and a top with some molding. I may need to rent a crane.

Another modest logistical problem is that I couldn’t glue it up on my workbench because of the size, so I did it on the floor in the garage. Technically, on a mat on the floor in the garage. Unfortunately, that spot is right in front of my workbench, so I’m going to have to find a different location for it before I can do any more work on it. How I’ll move it without dinging it should be a fun little exercise.

I’ll try to post some pics later this week after I move it.

Categories
Armoire Woodworking

Meanwhile- Back in the Woodshop

I remember and engineering colleague of mine had a simple observation about projects: The longer it takes to complete, the more unlikely it will be completed.

I fighting like hell against that observation right now where this armoire project is concerned.

No big posts with pictures about what I managed this weekend. Rather, taking pictures and documented the actual work and design decisions will serve as incentive for me to actually get something meaningful done on the project.

But as a quick recap, when last I’d touched the wood out there I’d managed to complete and glue-up the sides of the cabinet, as well as gluing up the rear-panel, cutting the front and rear stretchers and gluing up the shelves for inside the cabinet. Then I injured my arm and that was that.

Until this weekend, where I managed to cut and install the shelf supports as well as finish sanding the shelves themselves. I also cut the shelves to their final size for when I actually assemble the cabinet. If I’d pushed things, I could have done some glue-up tonight, but I chose not to because I didn’t want to make a mistake I’d regret at this point. Perhaps this week I’ll get the cabinet assembled and glued up, complete with the shelving.

That leaves the doors as well as some molding (or cornice) as well as a top and the project is complete. Except for the finishing.

Categories
Armoire Woodworking

Armoire Update

Progress has been slow, but steady on the armoire. The sides glued up without incident. Completing that portion allowed me to move on to the back. And working on the back brought the realization I’d made a mistake in my wood quantity calculation.

I’d originally thought I’d use tempered masonite for the rear panels. I, in fact, did exactly that for the lower portion. But in working on the back for the upper portion, it occurred to me there’s a major difference between the back of the lower half and the back of the upper half of the armoire: the rear panel of the upper half is visible. (The lower half consists of 3 drawers, so the only way to see the rear panel is to remove the drawers or get behind the whole thing, niether of which is easy.) Tempered masonite is fine to use as a panel, but not when it will be visible in a natural wood piece of furniture.

Fortunately, when I’d purchased the wood, I got more than I would need on the grounds that I’d just use it for another project down the line. Guess that project down the line has arrived.

After the jump are some pictures.

Categories
Armoire Woodworking

Both Sides Coming Together

In the end, the sides of the upper cabinet of the armoire were straight-forward to assemble.

My glue of choice is there in the background: Titebond III. It’s supposed to be stronger and more water resistant, but the main reason I chose it is because it has a longer open time. Since I was the only one doing the assembly (sadly, the boy wasn’t interested) and I had to coat all 4 mortises and tenons before putting things together, open time was going to be key. The only thing I don’t like about it is it’s runny, certainly more so than version II. I accounted for that by applying and spreading it in small doses.

One deviation from “normal” panel assembly, I suppose, was putting the panel into the rails before I’d glued the rails into the post. I chose to do that because the panels are warped enough that I didn’t think they’d slide into the groove on the rails very easily. Pre-installing them in the rails avoided that problem and turned out to be a non-issue for the overall assembly.

Categories
Armoire Woodworking

Back in the Woodshop

I finally went back to work on the armoire today. I’d cut the posts out a couple of months ago and at the time, I had the intention of starting it up. But I couldn’t summon the discipline to work through it because, while the top half will be much simpler to construct than the bottom half, there are details that need to be worked through, those details are important and with the busy schedule I just couldn’t focus on them long enough to sort them out in my mind.

Details like, the width of the stretchers, how to mate the top-half with the bottom half, the profile for the cornice for the top, whether to make the doors all cherry construction, or cherry and maple construction. None of that includes the proportions so that that the top looks right sitting on the bottom. I’ve been mulling all of that stuff in my mind for several weeks now. Finally, with the break in the kid’s schedule today, I opted to start making it into a reality.

Even so, meaningful progress was minimal.

Categories
Armoire Woodworking

Hardware In

The handles we chose for the armoire are in earlier than expected. That will mean the end of construction of the lower half. The Wife wants to paint the bedroom before putting it in the room. It’ll be nice to put it in its final resting place.

I already have the upper half figured out in my mind, just a matter of dimensioning everything. Perhaps tonight.

Categories
Armoire Woodworking

Another armoire update

No pictures yet- I actually started the finishing last night. First coat is done. I’m using Waterlox and applying by rubbing it on with a cloth. The results are quite nice. I’ll post pix after application of the second coat.

Categories
Armoire Woodworking

Stage 1 Complete

Well- mostly. I finished construction of the bottom half of the armoire today. I also cleaned up all the surfaces in prepartion for applying the finish. The dovetails came out very well after cleaning them up. I added some chamfers to the legs as well as all the corners and egdes that could have given someone a nice zinger. That’s one of the things about maple and cherry- they hold corners to well. Those suckers can be sharp when all is said and done.

Looking forward, it’s arguable I’m over halfway done. I have some details to figure out for the top- but still, I don’t have anymore drawers to make. Just 2 large doors to make. There’ll be some shelving too… maybe a hidden drawer… hmmm…. Maybe not so halfway after all.

I’ll post some pix tomorrow.

Categories
Armoire Woodworking

Top Results

The top for the armoire ended up with slightly mixed results. Pictures are after the jump, but the quick and dirty version is the mitres came out very well, but the edge joinery ended up being off a little. In the end, I think my assembly procedure was in error.

Categories
Armoire Woodworking

Armoire Blogging

drawer-fronts.JPG

That’s the current state of the armoire. All the drawers completed. Well, except for the cleanup portion of that program. I’ll have to trim all the corners flush as well as scrape the fronts. But for now, I’ve moved on to other elements of construction. The top to be specific. Not the top-top, the bottom-top. You know, the part that goes over the top drawer?

Categories
Armoire Woodworking

Armoire Dovetailing

Here are some pictures of the dovetailing on the second drawer:

Categories
Armoire Woodworking

Armoire Drawers

I finished the second drawer this weekend and I’ve got a good start on the third one. The second drawer is far superior to the first one. I’m aiming to make the 3rd drawer the best of the three.

I’ve got some pics and a more elaborate writeup coming, just not tonight. It’s getting late and I need some time to put the post together.